One of the best things about no-till gardening is not having to till. The soil of my vegetable garden hasn’t been disturbed for over 2 decades. Besides avoiding the hassle of tilling, not having to till makes for quicker and easier planting.
Today, for instance, I planned to clear a bed of harvested edamame plants to make way for lettuce. Easy! I just pulled up each plant, coaxing it along, if necessary with a Hori Hori knife so that I had the tops and only the main roots in hand. Once plants were up and out, light use of a lawn rake gathered up dropped leaves, pods, and other debris, and brought what few weeds were still present into focus for removal. In 20 minutes, I had the double row of plants in a 20 foot by 3 foot wide bed cleared, and the bed cleaned up.
“Quicker and easier” are not the only benefits of no-till. Not tilling makes for less weeds because weed
seeds, buried within every soil, don’t get exposed to light, which they need to sprout. Untilled soils also make better use of water and maintain higher levels of organic matter.
I could have sown right into the clean surface but chose, instead to further enrich the ground for the months and year ahead. A garden line and sprinklings of ground limestone re-defined the edges of the beds, along which I laid two-by-fours. The two-by-fours, only temporary, were to contain the compost which I piled into the bed to a leveled depth of about an inch.
That one inch of compost provides all the fertility the bed needs for a year of vegetable production, even with multiple crops of vegetables in the bed. In addition to fertility, the compost helps the ground hold water and air, snuffs out small weed seedlings, and sustains beneficial soil organisms for healthier plants. Because the compost is made from “garbage,” fertility derived solely from compost is truly sustainable.
———————————————
Compost, as I wrote, makes for healthier plants. Thorough bed cleanup after each crop also makes for healthier plants by reducing sources of disease inoculum. (See my new compost video, www.youtube.com/leereichfarmden, for more about my compost making.)
That’s not to say that my garden has no pest problems. A pest problem arises when you have that perfect confluence of a susceptible plant, the presence of the pest, and a suitable environment. Susceptibility of a plant depends on the type of plant as well as how well it’s been nourished.
———————————————
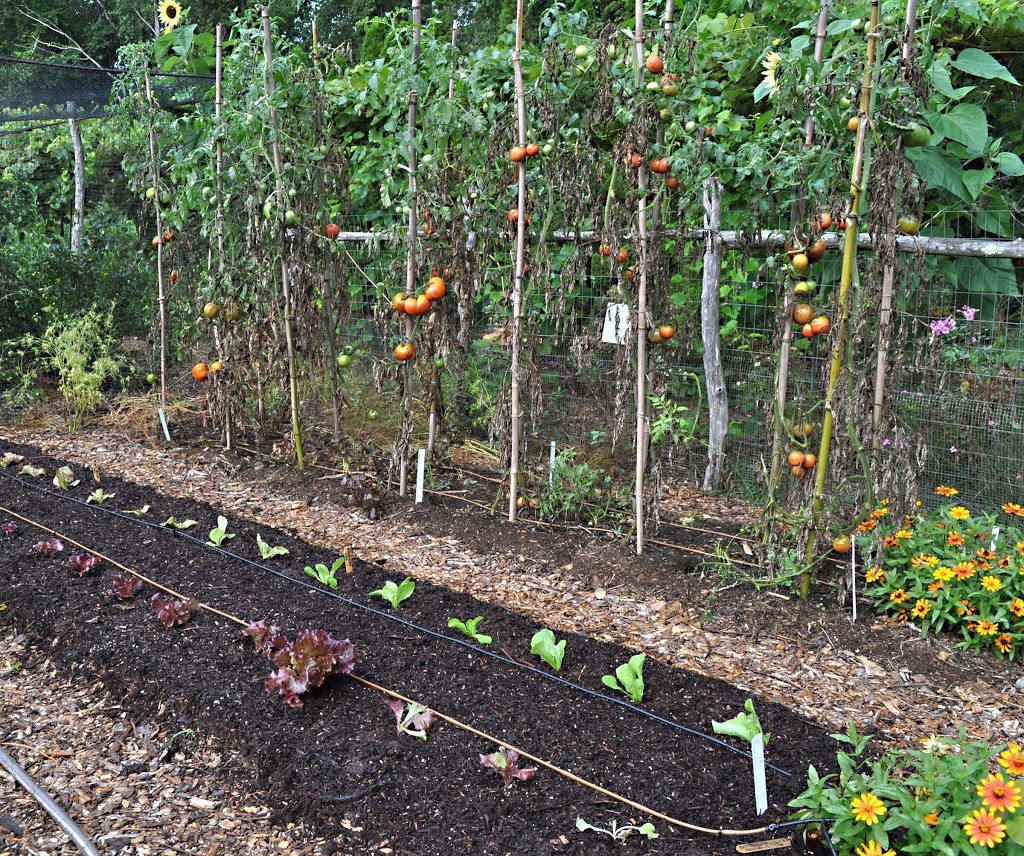
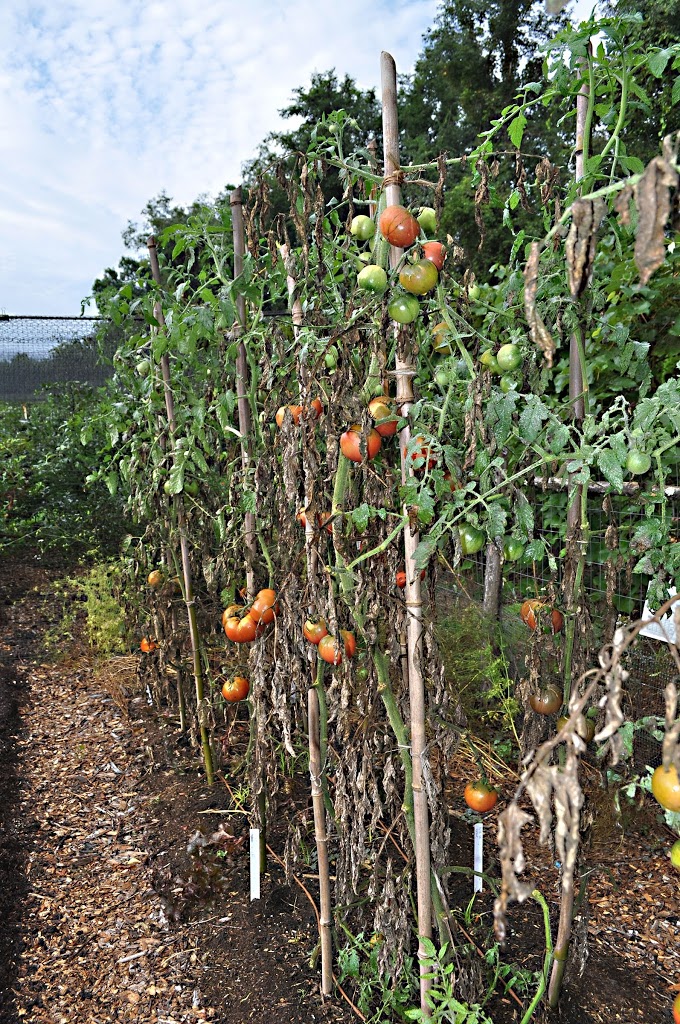
All of which leads up to the admission, despite compost, pruning, and careful siting, that my tomato plants are not the picture of health. The plants, each pruned to a single stem that climbs, with the help of string ties, to a bamboo pole, have lost many of their lowermost leaves.
“Blight” is the mantra I keep hearing from other gardeners. Not so fast. Not every tomato affliction is
“blight,” a buzzword that originated, no doubt, with the “late blight” epidemic of a few years ago that sensitized gardeners and farmers to this disease. Late blight is but one of tomato’s enemies, but it’s not the only one.
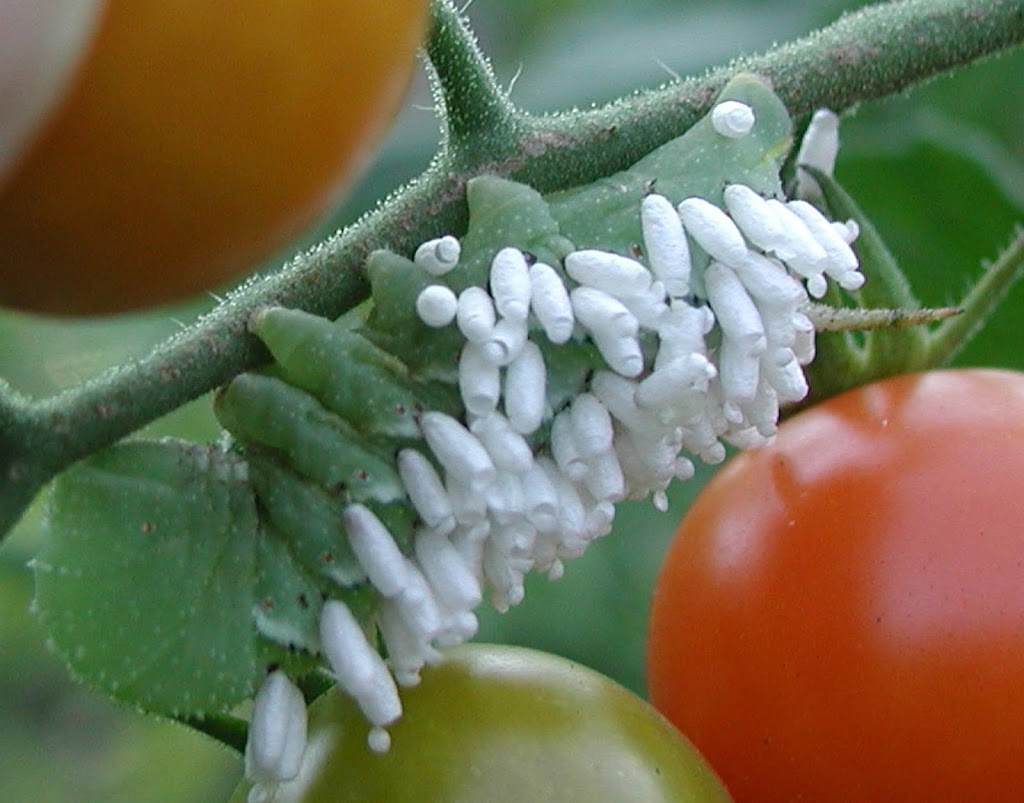
Tomato plants bereft of leaves could be due to the diseases septoria leaf spot, early blight, or, of course, late blight, or the insect tomato hornworm. The hornworm is easily identified because it’s a big, fat, hungry caterpillar that chomps off big portions of healthy, green leaves. The caterpillar itself is quite a sight, as big as your thumb and with white stripes and eye-like markings along its length. Control is easy: crush them (unless they have parasites, which look like rice grains, attached to their backs) or spray using some commercial form of the biological insecticide Bacillus thuringiensis (Bt).
The three diseases are easily distinguished. Early blight marks leaves with spots of tan and black,concentric rings and yellowing leaf tissue. Septoria spots are small, round and gray, each surrounded by a single, dark margin. Late blight marks leaves with greenish-black splotches, each surrounded by a pale, greenish-yellow band. In humid weather, a downy growth develops on the undersides of leaves. On fruits, symptoms are firm, dark, greasy looking lesions.
My thorough cleanup and compost mulch greatly reduces presence of early blight and septoria leaf spot spores in the beginning of the season, as does planting tomatoes in a different location each year in a 3 year
 |
| Tomato hornworm with parasite |
rotation. Late blight needs living tissue to survive winter here, so returns by wintering over in infected potato tubers, by hopscotching up from the south on favorable winds with cool, moist weather, or, as happened a few years ago, by arriving on infected transplants sold by big box stores. I grow my own tomato seedlings and hope for the best as far as cooperative weather for my plants.
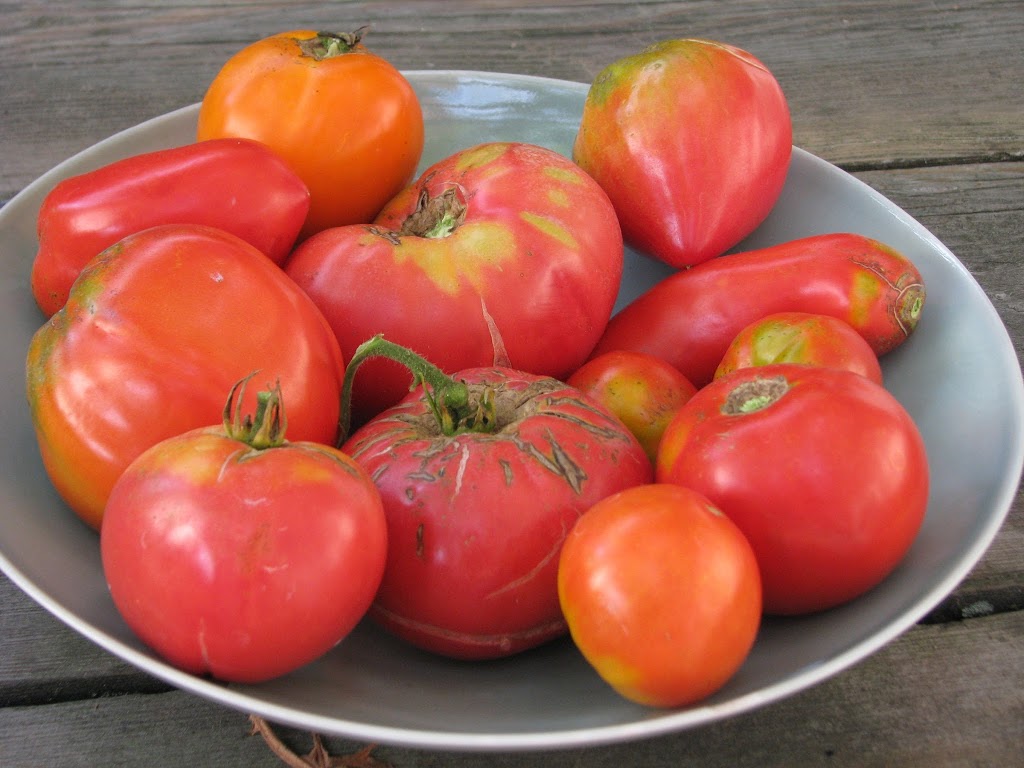
Taking a closer look at my tomato leaves, I see that the main causes for their defoliation are septoria leaf spot and — uh-oh — late blight. Weather in the next few weeks will determine how fast plants decline. I could spray (some formulation containing copper) but choose to avoid even mild pesticide, in this case. Upper portions of the plants still ook fine and, most importantly, I have been eating, canning, and drying plenty of tomatoes.


Regalia Maxx is a biofungicide made from an extract from Japanese Knotweed – http://www.marronebioinnovations.com/lightray/site/wp-content/uploads/2012/09/TomatoPepper-Regalia.pdf
I’ve never used it (but will this coming year in our orchard) but I did talk with a no chemical fruit grower in Niagara who raves about it. We were standing under his apricot trees at the time. He waved at his trees which were magnificent and said there’s the proof.
Regards,
Mike
Thanks for the information. I had read about this extract from Japanese knotweed. I may give it a try next year.
How does no-till work with cover cropping? I realize that some fall cover crops winter kill and then essentially compost in place, but many cover crops have deep roots and have to be turned under which doesn’t exactly mesh with the no-till practice.
I have a new garden that originated from a heavy clay soil yard. I have amended the soil with leaf mold and continue to add compost, but after a crop has finished the surface seems as if it has reverted back to heavy clay. It would be virtually impossible to direct sow small seeds into this heavy soil without first breaking it up and aerating. Any suggestions, other than continue to improve the soil and eventually (hopefully) the soil will become more and more friable?
I have successfully no-tilled Daikon radishes as a cover crop into an existing sod lawn. I also included spring oats in the mix, but these did not fare as well due to birds and poor germination. However, both of these crops winter kill so there is no need to turn them under in the spring. Daikon radishes provide a certain amount of “tillage” themselves making them an ideal cover crop.
I use fall cover crops that winter kill. Timely mowing in spring can also kill overwintering cover crops. Deep roots do not mandate tillage; overwintering does. You might try daikon radishes as a winter cover crop to break up the soil. There’s some research into this.
In heavy clay soil, I recommend a one-time, thorough digging in of an abundance of organic matter that does not break down too quickly. Sawdust is ideal. A source of nitrogen and lime need to be added so as not interfere with plant growth. I detail all this in my book WEEDLESS GARDENING. After that one time digging, it’s no longer needed.
I had Anonymous’ problem, and with years of tilling in lots of organic matter it still got worse each year. No-till and cover crops slowly improved things until now I have good, if not great soil (actually great, in spots). I lightly scratch the soil for small seeds, or just broadcast on the surface and lightly cover with straw, grass clippings or row cover until I get germination. Don’t give up, Anonymous, and stop digging.
BTW, I’ve had VERY bad results with tilling in sawdust. Would sawdust from different trees, or maybe composted sawdust have worked better?
As I wrote above, if you’re going to plant within a few months of digging in sawdust, you need to add nitrogen and lime to offset it’s temporary nitrogen tie-up and acidification. Here’s the quote from WEEDLESS GARDENING that describes the process:
“When the soil is moist—that is neither very wet or very dry—spread a six-inch layer of sawdust or peat on top of the area slated for planting. A six-inch layer works out to about two cubic yards per hundred square feet. Because peat moss or sawdust makes the soil temporarily more acidic, add limestone at the rate of 60 pounds per hundred square feet– unless you’re trying to make the soil more acidic. For sawdust, add some extra nitrogen fertilizer because soil microorganisms temporarily borrow nitrogen from the soil at the expense of plants to decompose that sawdust. Spread a hundred pounds of some fertilizer containing 10 percent nitrogen on top of the sawdust (adjust the fertilizer rate accordingly if you use one having more or less than 10 percent nitrogen).
Go ahead and mix the peat moss or sawdust into the top foot or so of soil. Do it thoroughly, spurred by the realization that you’ll never have to dig or till the ground again. (And of course you’ll never again set foot on it either.)”
Red Dragon is the specific brand I have tried and it works on many tough to control weeds. There are small lightweight models for the homeowner and large commercial selections as well. They run off propane gas. Of course, be careful using any fire producing device.
Lee,
This may not be the proper place to post this but . . .We have a small micro farm and one of the things we raise are organic meat rabbits. They are housed in pens over vermicompost bins (well. . they are usually vermicompost bins- except when they are mismanaged and the “vermi” are not there anymore LOL). Anyhow, the rabbits eat organic fodder and the left over fodder mat goes into the vermicompost. . .so does dropped hay that the rabbits aren’t “careful” with. Then some of the rabbit manure goes directly into the garden as a “layer” and some into the outdoor compost bin to act as a green layer. My question is I have some weed seeds that sprout in my garden. . .so much for weedless gardening. I can’t figure out a way to prevent this as even if I don’t toss the left over fodder mats into the vermicompost, the rabbits also get some dry grain (wheat and barley) and they manage to scatter some below. Some day I can revise the cages to catch all of this but not now. Is there anything I can do to prevent this? For example, if all of it goes into the outdoor compost bin, will the “kill” the wheat/barley seeds or no? Does this make sense?
A few weeds here and there are always going to be the case, even in a weed-less garden, farmden, microfarm, small farm, etc.
one more thing. . .did I mention that the garden has never been healthier since employing your methods and the garden is virtually weed free, except for these weed seeds and they are plentiful. I don’t want to waste the rabbit manure as it is too valuable