PEST PLANS

My Sweet, Corn

Spring is here this week, weatherwise, at least. Not to bring back bad memories, but with real spring just around the corner, now is a good time to revisit two or three of last year’s worst pest problems, and plan some sort of counteraction. Not that those memories are really that bad; the interaction of pests, plants, the environment, and my hopefully green thumb is always interesting.

Golden Bantam sweet corn, non-hybrid
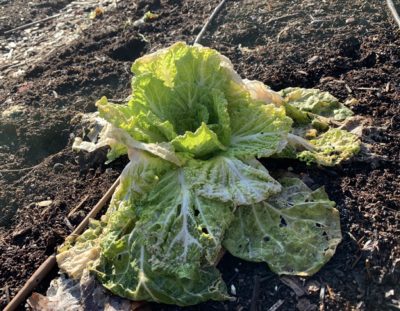
The most serious pest problem last year, most serious because it affected one of my favorite vegetables, was a disease that devastated my later plantings of corn. Looking at the symptoms —  yellow streaks on leaves that turned to tan, dead areas — my diagnosis was the bacterial disease, Stewart’s wilt. Some plant pathologists pointed out that Stewart’s wilt is very rare around here, and that the problem was probably the fungal disease, northern corn leaf blight.

Disease development

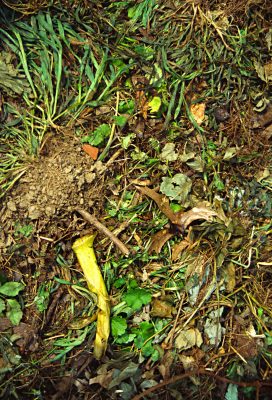
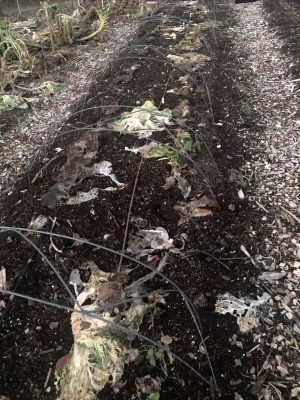
Disease development on leaves

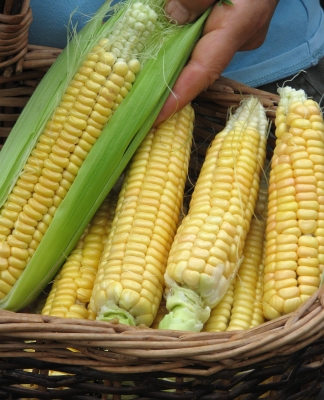
I’m not 100% convinced it’s the blight but, more important is what to do in either case. I like my sweet corn. (Popcorn and polenta corn were unaffected.) Stewart’s wilt can be avoided by growing resistant varieties. But not only do I like my sweet corn; I like specifically Golden Bantam sweet corn.

A hundred years ago, Golden Bantam corn was bred into a number of hybrid varieties, some of which are resistant to Stewart’s wilt. Golden Cross Bantam, for example. As I said, though, I like my Golden Bantam. I’ve grown Golden Cross Bantam and its flavor fell short of Golden Bantam.

Northern Corn Leaf Blight

Northern Corn Leaf Blight

As a nonhybrid variety, Golden Bantam turns up in a number of strains. My seed came from a few sources, and it’s possible that some strains are more resistant than others. My two earlier ripening beds had no disease. Last year I didn’t keep records of which beds got seed from which sources. This year I’ll record it.


Northern corn leaf blight can also be controlled with resistant varieties. As I wrote, though, Golden Bantam is the variety for me, so other varieties are not an option, for now at least.

Plus, there are other options for dealing with northern corn leaf blight. Thorough cleanup at season’s end removes spores that would overwinter. Done. Not planting corn in the same bed for one to two years to starve out the disease. Done. Good air circulation and humidity control by keeping weeds in check. Not so done each year. Colder, damper air descends readily into the Wallkilll River Valley here and, while weeds are under control, I do a lot of interplanting, which has the same effect, humidity-wise, as weeds.

Who knows? Another season, different conditions. The problem, whichever it is, never showed up before; perhaps it won’t ever again.

An Unwelcome Newcomer

The other significant pest problems last year were with my onions and leeks. As usual, I started onions from seed indoors in February and planted them out in early May. Another batch got direct seeded right out in the garden in April. Both plantings — I’m ashamed to admit — yielded stunted bulbs, many no bigger than a nickel. Leeks likewise were stunted, or deformed.

Also embarrassing is that I didn’t take the trouble to examine the plants closely for clues. This would have been relatively easy since the probable culprits were leek moth or thrips, both now common, around here, at least.  Plus, I’ve previously had a problem with leek moth.

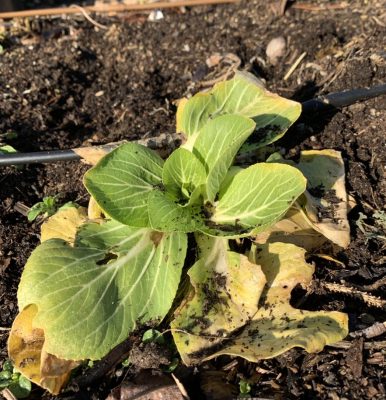
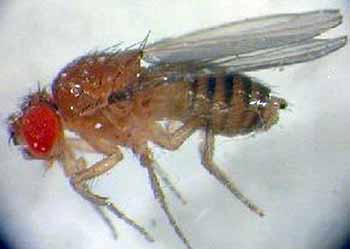
Leek moth, a European native, is a relative newcomer on this side of the Atlantic, first showing up in northern New York state in 2009. Temperatures above 50°F in late winter awaken papae or adults overwintering in debris, and Ms. Leek Moth soon starts laying eggs, lots of them. In less than a month, new adults start feeding on leaves. Subsequent generations follow suit, feeding on leaves, weakening the plant, and also the parts — stalks and bulbs — that we want to eat.
Leek moth damage
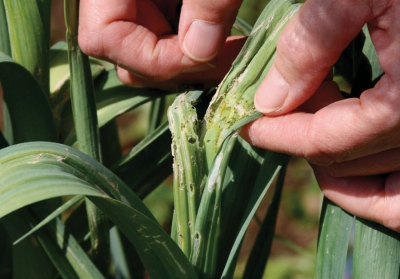
Early signs of impending damage are the eggs, tiny and transluscent and laid on the undersides of the leaves. Or, later, the caterpillars, slender, yellow and also small, less than one-half inch long. The important thing is to take action at the first signs of damage — holes in leaves and caterpillars. To see the caterpillars, leaves of garlic and leeks need to be unfolded; hollow leaves of onions need to be opened for an inside look.

Leek moth damage, later

Leek moth damage, later

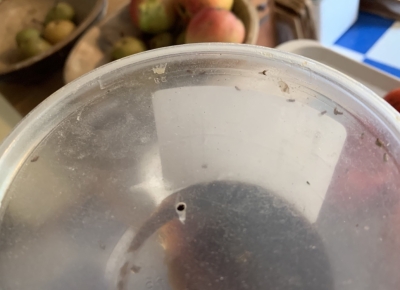
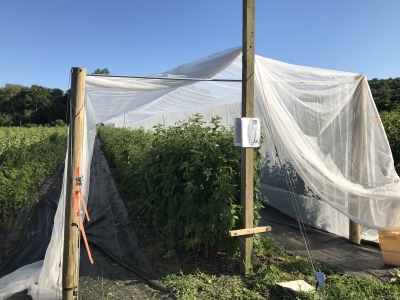
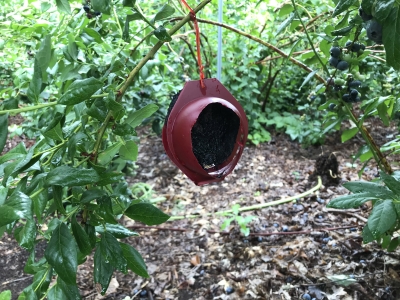
Preemptive action would be to use a lightweight floating row cover beginning early in the season to keep Ms. Leek Moth from laying eggs on plants. 

Once damage or caterpillars is found, spraying, my least favorite garden activity, is needed. Organic sprays include Pyganic, which is effective for a couple of days, or, more lasting, Entrust, a natural substance made by a soil bacterium. In either case sprays need to be applied strictly according to label directions, both for effectiveness and for legality

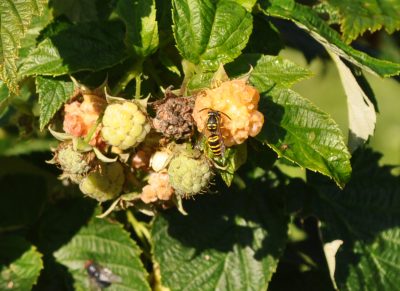
Thrip, Thrip, Thrip – No, Not a Frog

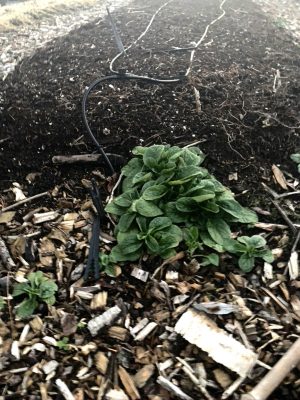
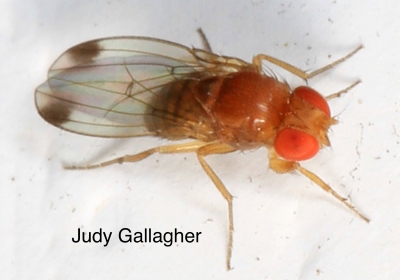
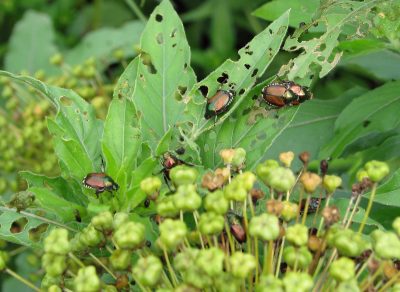
Thrips, the other possible, or additional, culprits are very small, but their damage is telling: silver lines and/or small white patches on leaves and tip dieback. To see the culprits themselves, you’ve got to look closely between the leaf folds, zeroing in on the youngest leaves, for light yellow nymphs and darker adults. Hot, dry weather suits them best, which were the conditions here last summer.
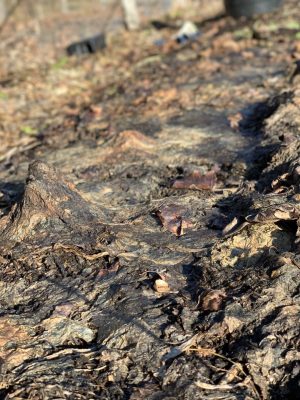
Thrip damage

Thrip damage

Because thrips overwinter in debris, thorough cleanup helps. Straw mulch has potential, although one study showed that while it reduced the number of thrips, it didn’t affect yield. It did increase the number of jumbo onions, though. Go figure. 

Certain kinds of onions are more resistant to thrips than others. In general, red onions (which I anyway don’t grow) are very susceptible, yellow ones (which I do grow) less so, and Sweet Spanish onions (which I have grown in the past) are relatively resistant.  I’ll no longer grow the variety Candy, which is listed as susceptible.

Certain plants, on which thrips do little damage, can draw thrips away from the onions. Carrots, tomatoes, cabbage and its kin, carnations, and chrysanthemums, as examples.

And, of course, there are organic sprays, a last resort for me. Beauvaria, a naturally-occuring insect killer, for one. Also the relatively benign insecticidal soap paired with Neem. And again, Entrust.

As I said, I’m not bemoaning these insect and disease pests. It’s reassuring for me to stop and think how few or no pest problems vegetables typically affect my kale, tomatoes, peppers, okra, and most other vegetables grow. They all grow well with little more than yearly additions of compost to the beds, and timely planting and watering.
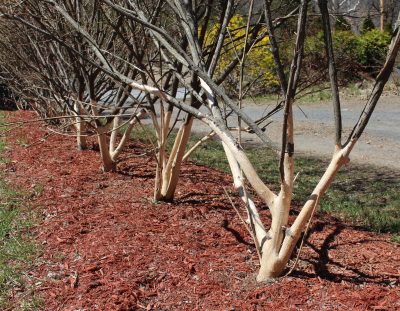
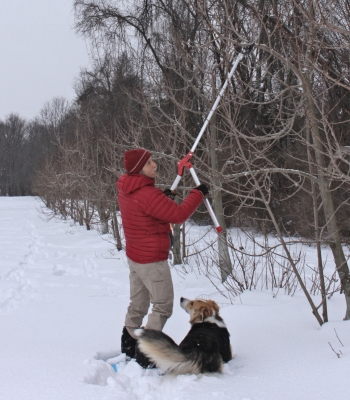
Prune Fearlessly

A reminder that I’ll be holding a FEARLESS PRUNING webinar on March 29, 2021 from 7-8:30pm EST. This webinar will take the mystery out of pruning, so that you can prune your lilac and rose bushes, apple trees,  blueberry shrubs — all trees and shrubs, in fact — to look their best and be in vibrant health. Fearlessly. For more information and to register, go to www.leereich.com/workshops.

TELLING SNOW

I Grow Taller

“Make hay while the sun shines” is fine advice in its season. For winter, how about? “Prune while the snow is high and firm.” 

My apple and pear trees are semi-dwarf, presently ranging from seven to eleven feet tall. Even though I have a pole pruner and various long-reach pruning tools, I still carry my three-legged orchard ladder out to the trees with me to work on their upper branches. Sometimes you have to get your eyes and arms and hands right up near where you’re actually cutting.
Pruning on snow
A few years ago, as I was looking out the window and admiring the foot or of snow on the ground, I realized that all that snow could give me a literal leg up on pruning. If I stayed on top of the snow, that is. While the snow was still soft, I was able to do this by strapping on a pair of snowshoes, which I bought, used, just for this purpose. (For travel through snow, I prefer to glide, on skis.) When the snow melted a little and then froze, the icy crust that formed was able to support my weight sans snowshoes.

In any case, when there’s a good depth on the ground, such as today, I gather my tools – minus the stepladder – and walk tall out to the trees.

 Top Down Pruning

Plants, like other creatures, have hormones, and a hormone (called auxin) in every plant generally coaxes uppermost portions to grow most vigorously. Which is why old apple trees become topheavy, with most shoot growth high up. The upshot of this habit is that most fruit is borne high in the branches, out of reach, and lower branches are shaded to become unproductive and prone to disease. 

  Ideally, then, the best place to start pruning is with the most vigorous branches, highest in the tree. That’s also the last place you want to start if you’re standing at ground level. Perched atop a good depth of snow next to my smaller trees, starting near the top was much easier.

  If I get high enough (in the tree), I can imagine that I’m hovering above the branches, looking at them from the perspective of ol’ Sol, which is a good perspective for a grower of fruit trees. This allows a more objective perspective on which branches are going to be blocking light or otherwise cramping others for space.
Pruning in snow
Letting more light and air in among the branches and, at the same time removing potential fruits with pruned branches, channels more of each tree’s energy into perfecting those fruits that remain. Remaining fruits are then healthier, larger, and more flavorful, especially for naturally larger fruits such as apples, pears, and peaches

Snow Tales

The snow is a blank canvas that records some winter activities. My dogs’ footprints are obvious and telling. They are provincial in their travels, having beaten paths from their doghouses, where they sleep, to the driveway, where they greet humanity, and to the deck, where they lie in the sun.

 Daisy and Sammy at work

Daisy and Sammy at work

Less frequent are their forays out into the hay field to do their business and to see if anything interesting is creeping around out there.

The small, padded footprints of my cat hasn’t beaten out paths. The cat more randomly explores out-of-the-way nooks and crannies. She also likes to steer clear of the dogs, who consider her just another small animal worth chasing.

Cat, Gracie at work

Gracie at work

The distinctive footprints that I’m keeping the closest eye out for are those of rabbits and deer. Now, about when I typically delude myself that all danger has past, periods of warmer weather start coaxing rabbits to wander about and eye my trees and shrubs as food. Now is also when cottontail rabbits start reproducing, the first of up to five litters for this year, with a half dozen or so bunnies per litter! Very cute, but deadly to my plants.

  This winter, a couple of deep snows either brought deer here or displayed their abundance with tracks in the snow. For the rabbits, who feed on young trees and low branches, I sometimes make up a spray of white latex paint, water, eggs, cinnamon, and hot pepper. That needs to be re-applied about now. Traps I set out for them are thoroughly and safely (for the rabbits) buried in snow. Perhaps I’ll dig them out and re-set them.

The uncluttered expanse of snow makes it easy to see where I put my pruning tools as I prune the apples and pears. The snow also makes it easy to see where I drop the prunings.

Deer tracks in the snow

Deer tracks in the snow

And why do I care where I drop my prunings? Because I can then quickly look at them to see if any bark has been gnawed off those freshly cut branches. And what would gnaw bark off those freshly cut branches. Rabbits!

No sign of rabbits – yet, at least – on those prunings as well as on tracks in the snow. Thank you Gracie (my cat).

The dogs’ are supposed to be keeping deer at bay, but do so only if they are out and about when deer are around. This year I’ve been relying on Bobbex repellent, which I spray monthly on branches that would be within reach of the deer. So far, the sprays have been 100% effective even on trees with deer tracks right beside them in the snow.

Get Ready for Spring

I will be hosting a WEEDLESS GARDENING webinar on Monday, February 22nd for $35.  It will run from 7-8:30 pm EST and there will be plenty of opportunity to ask questions. For details, go to www.leereich.com/workshops. Or trust me, and go right to registration (required) at https://us02web.zoom.us/webinar/register/WN_WqSCBtOGTqqjGgbOHOuxfg 

WINTER READINESS

For anyone who missed my recent 90 minute webinar on GOURMET COMPOST, the webinar has been recorded and is available for $35 on-demand from Oct. 1st, 2020 until Oct. 8th for $35. The webinar covers options for compost bins, feeding your compost “pets, monitoring progress, what can go wrong and how to right it, when is compost “finished,” and making the best use of your compost. Click below to pay almost by any of a number of ways. Thank you.

Putting Summer in Jars

I’m hunkering down for winter, which includes capturing what I can of summer’s bounty in jars and dried and frozen garden produce. With this year’s hot, sunny weather, tomato plants yielded plenty of fruit — until cut short with a few nights of freezing temperatures about a week ago. Still, I have over two dozen shiny quart jars lined up on a shelf in the basement.

This year, San Marzano, which I (and most of Italy, where San Marzano canned tomatoes are labeled as such) consider to be the best-tasting canned tomato, got segregated into a number of jars all by itself. Other pluses for San Marzano is that it’s an heirloom variety, so I can save my own seed from ripe fruits, and it bears heavily over a long season on healthy, stocky vines.

A past neighbor of mine used to begin his process of canning tomatoes by alternating layers of tomatoes with salt in tall, half-bushel baskets. Other gardeners begin by peeling, perhaps seeding, their tomatoes.

Me? I opt for the quickest method possible, which is: Cut off any bad spots and drop the tomatoes into a large pot with just a half inch of water in the bottom. After being brought to a boil, the tomatoes get simmered until the volume is reduced by one-half, with less reduction for San Marzano’s because of their low water content. Then, a thorough blending with an immersion blender.

New guidelines call for keeping the acidity of canned tomatoes below pH 4.6 to prevent growth of Clostridium botulinum, aka botulis bacteria, by adding 2 tablespoons of lemon juice or 1/2 teaspoon of citric acid per quart. This is because of lower acidity of some modern tomatoes. I do so just to make sure even though my tomatoes’ acidity measured below 4.6. Finally, the canning jars go into the pressure canner for processing for 10 minutes at 15 pounds pressure.

I figure that I can chop up and sprinkle in any flavorings for sauces or soups later, in winter, when I have more time and I know the jar’s end use.

(House) Plants on the Move

I’m a little late this year in readying my houseplants for winter. I know from seasons past that when they come indoors, so do occasional pests. The pests that are most troublesome, the only ones about which I need to do something, are scale insects.

Scale insects aren’t always in evidence now but I know they are there on my citrus, bay laurel, orchid, and staghorn fern plants. By early winter, the pest becomes more obvious as occasional, small brown nodules on stems and leaves. That’s the protective “scale,” beneath which the scale insect is happily sucking away plant sap. 

Scale insects have never killed my plants but do weaken them and – perhaps worse – exude a sugary “honeydew” as they suck sap. This sticky honeydew gets all over floors, furniture, or whatever is beneath the plant. And then a fungus arrives to feed on that honeydew, giving leaves a dark, smoky, haze.

Hard-shell scale on staghorn fern

Hard-shell scale on staghorn fern

My tack for scale insects is to line susceptible plants up in my driveway, then spray them with some relatively benign insecticide such as Ced-o-flora, horticultural oil, neem oil, or pyganic. I’ve been doing that for the past few weeks in an effort to get the young scales before they find shelter beneath their protective shells.

With the last spray finished, in come all my houseplants. Windows are still open at least some days so indoor air is not too different from outdoor air, easing the environmental transition for the plants.

Squirreling Away

Black walnuts are one of my favorite nuts and they’re conveniently abundant and free for the picking, at least around here. Perhaps too abundant. Once there are a couple trees, they beget more and more as squirrels start “planting” them everywhere. My vegetable garden, with it’s soft, rich soil is a favorite spot.

Admittedly, the nuts aren’s so convenient to eat. Their messy husks need to be removed. Then the nuts have to be cured in a dry, cool or cold, squirrel-proof space until around New Year’s Day, And finally, the very tough nuts need cracking. I recommend the ‘Master Nut Cracker’, in my opinion the best nut cracker for those tough shells.

Last year black walnuts were raining down all over the place here and in town. This year, probably because of last year’s overabundance, the crop is light everywhere. How are the walnuts doing where you are?

I’m lucky. One tree here on the farmden that provided most of our nuts in years past, is bearing heavily. Up to a few years ago it was useless, bearing nuts whose innards were almost always spoiled or shriveled. That  might have been because of hurricane Irene back in 2011, when the nearby Wallkill River flooded its banks to wash over here and rise about four feet up that tree’s trunk.
black walnuts in jar
I cracked a few of the nuts this year to see how the nutmeats look. They’re well-filled and a nice, white color inside. But not edible, as I wrote, until they’re cured. Until January, we can enjoy what’s left of last year’s nuts.

CREATURES LARGE AND SMALL

Identity Crisis?

For the past couple of months, I’m not so sure that my duck knows that she’s a duck. She and another female duck once shared a drake, and they all lived together in their own “duckingham palace.”

  Sometime after the other female and the drake were taken by a predator, probably a fox or coyote, I thought our remaining female might enjoy some company at night. So I coaxed her to take up nightly residence with our three chickens — a rooster and two hens — who have their own house (“chickingham palace?,” actually more palatial than duckingham palace).
Chicken & duck, off to work
Not only has Ms. Duck moved in with the chickens at night but she also wanders around with the flock by day. Her special companion is the rooster, especially since the two chicken hens decided to spend much of their days sitting on imaginary eggs. Neither hen has laid a real egg for over a month. So the female duck and the rooster stroll together each day, gobbling up insects, weed seeds, and some vegetation, except, of course, within the fenced confines of the vegetable gardens. I’ve even caught them in flagrante delicto.

  The duck, being a duck, enjoys water. Her idea of a pond is the 3-foot-diameter children’s sandbox repurposed with water that we’ve provided for her bathing pleasure. During the bath, the rooster stands nearby, watching and seemingly trying to figure out what’s going on with his water-loving belle.

Beetles and Vespids

This season has seen both an abundance and a lack of some other, smaller creatures here on the farmden. In July, I saw a few Japanese beetles and braced for an onslaught, ready to repel them with a spray of neem extract or kaolin clay if things got ugly. Although I heard about the beetles descending in hordes on some other gardens near and far, I’ve hardly seen any all summer since then.
Japanese beetles
This beetle-less trend has been going on here for a few years. I’m not sure exactly why. Japanese beetles do have some natural predators and diseases, including beneficial nematodes. Whatever’s helping out, I’m thankful that they’re doing their job.

  Making up for a lack of Japanese beetles has been an abundance of yellowjackets, reflecting, perhaps, good weather conditions, for them, in spring. In contrast to honeybees, yellowjacket colonies do not overwinter; only the queens do. But the bigger the colony this summer, the more young queens develop to fly off and find winter quarters to build up colonies next summer. These insects start out the season feasting on high protein foods but have now shifted to sweets.

European hornets are also in abundance, with their large size looking more frightening than the yellowjackets but, in fact, not nearly so aggressive. They do have a bigger appetite for fruits, though, often hollowing out whole apples to leave nothing but most of the skin, intact.
Apple being damaged by European hornet
Yellowjackets and European hornets have made me more cautious when berry-picking. The insects are capable of breaking through thin skins so are actually robbing a significant part of the late summer raspberries. A close eye is needed to avoid harvesting an angry yellowjacket along with a berry. Early in the morning, they are especially grumpy when wakened from their resident berry. 
Yellow jacket on raspberry
Yellowjackets and European hornets are also a problem on compost piles in progress. Fresh additions to the pile, especially sweet ones such as melon rinds, quickly need covering with a layer of hay or manure. This hides the food and gets it composting.

  Although yellow jackets are beneficial in the garden for eating plant pests, their present habits mostly outweigh the good, for me, at least. (I’m allergic to their stings.) I destroy any nests I happen upon with torch or insecticide. Insecticides with mint as their active ingredients are very effective.

A Bag for Protection

  Grapes have tougher skins than raspberries, skins that can resist yellowjackets. That is, until a bird takes a peck or a couple of diseased berries split open.

  In anticipation of problems with yellowjackets, European hornets, honeybees, birds, insects, and diseases, earlier this summer we enclosed 100 bunches of grapes in white delicatessen bags. Not that all unbagged grapes get attacked. But the bagged bunches can be left hanging the longest to develop fullest flavor. Most of the time, we tear open the bags to reveal perfect bunches of grapes.
Bagged vs unbagged grapes
For the first time, this year, I enclosed some grape bunches in organza bags. (Organza is a fine mesh fabric often used to enclose such items as wedding favors.) These bags were working really well until the European hornets got hungry enough to poke feeding holes in them. This ruined some of the berries and allowed access to fruit flies.
Organza bagged grapes
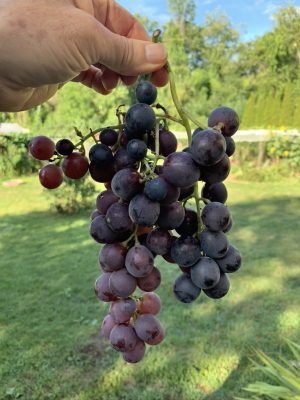
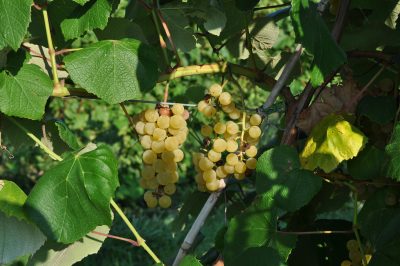
The first grapes of the season, Somerset Seedless and Glenora, started ripening towards the end of August. The first of these varieties is one of many bred by the late Wisconsin dairy farmer cum grape breeder Elmer Swenson. The fruits of his labors literally run the gamut from varieties, such as Edelweiss, having strong, foxy flavor (the characteristic flavor component of Concord grapes and many American-type grapes) to those with mild, fruity flavor reminiscent of European-type grapes. Somerset Seedless is more toward the latter end of the spectrum and, of course, it’s seedless. Swenson red and Briana, which are ripe as you read this, are more in the middle of the spectrum.

  As you might guess from Elmer’s location, all the varieties that he bred are very cold-hardy.

Thanks, Elmer.

DAILY GRAPES

As The World Turns…

Over the years, gardening has made me more and more aware of our planet’s annual track around the sun. How quaint. It gives me a certain kinship with the peasants at work in the 15th century painting for the month of September of Les Très Riches Heures de Duc de Berry.

Picking grapes, 15th and 21st century

Picking grapes, 15th and 21st century

As with those peasants, September is a month when I have abundant fruits for harvest. Like the peasants, I’m harvesting grapes; it’s been a bumper year. Unlike the peasants, my grapes are destined for fresh eating rather than being sullied by fermentation into wine. (Okay, okay, just kidding, although I am not a fan of drinking wine.)

First to ripen here were the varieties Somerset Seedless and Alden. With an abundance of varieties and fruits, I can afford to be picky, so this will be the last season here for Somerset Seedless. It’s too prone to pest problems and the fruit never loses enough of its tannin-y taste for my palate.

Alden grape

Alden grape

Alden is also threatened with my saw and shovel because it bears lightly and is also plagued with pest problems. But excellent taste and texture make it worth keeping.

Following on the heals of those earlier varieties are Swenson Red, Lorelei, Glenora, and Vanessa. The latter two are very good but would not be worth keeping if they weren’t seedless. In my experience, the most flavorful grapes are those with seeds. Swenson’s Red is a variety that pretty much everyone loves. They’d also love Lorelei if they got to taste this not very common variety.

Finally come Edelweiss, Wapanuka, Brianna, and, bearing for the first time, Cayuga White. The first three are not yet quite ripe. Even at this stage, they are delectable. Cayuga White is still proving itself, or not.

Edelweiss grape

Edelweiss

Looking to the future, newly planted Bluebell, Alpenglow, and Dr. Goode should yield a few berries next year. Also an unknown variety that I propagated from an old vine growing at a friend’s Orchard.

With their bold flavors, you’re not likely to find any of the varieties I mentioned at a supermarket, possibly even a farmer’s market. Plant them!

Variety Choices

A few caveats: The Wallkill River Valley, site of my farmden, is far from ideal for fruit growing. As a valley, it’s colder than surrounding land (zone 5) and is laden with damper air that encourages disease. An abundance of wild grapevines in the bordering 6000 acres of forest provides a place for insects and disease to get their start.

Nonetheless, I get good crops without resorting to sprays. This is possible by providing a sunny site with good air circulation and making the best of it with trellises, and — very important — annual pruning. Also by choosing varieties to plant based on pest, disease, and cold resistance. 

Many grape varieties are hybrids of European and American species, the Europeans chosen for their flavor (flavor, that is, from a Eurocentric perspective), the Americans for their toughness to pests and more rigorous growing conditions. American varieties have a unique flavor, called foxiness and typified by that of Concord, as well as a slip skin. European varieties are sweet with a crunchy texture.

As far as flavor and texture, varieties span the spectrum from those that are more like European grapes to those more like American grapes. My final, but very important, consideration in choosing a variety is flavor, and I mostly prefer the flavors of varieties toward the American end of the spectrum.

Of course, the choice widens for grape enthusiasts in more Mediterranean climates, where European varieties can also be grown, and in the Southeast, where the native muscadine grapes grow wild and are cultivated.

Bagging, for Pests

Many birds and insects, especially yellow jackets and European hornets, also enjoy my grapes. They leave plenty for me, but crucial to harvesting the best of the best tasting grapes here is bagging.

Years ago I figured that the longer a bunch of grapes hangs on the plant, the tastier it gets (to a point), but also the more chance of attack by insects and birds. So I bought 1000 bakery bags that happened to have “Wholesome Fresh Delicious Baked Goods” printed on them. Paper bagged grapes
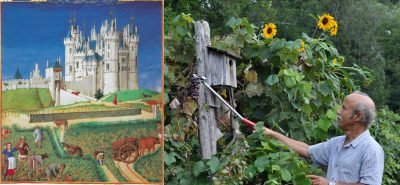
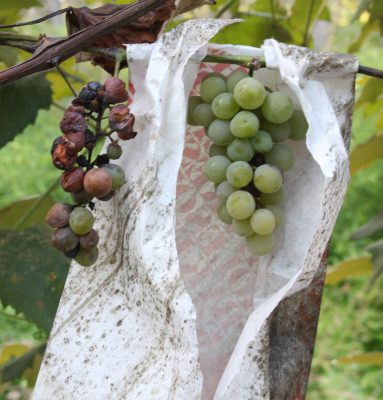
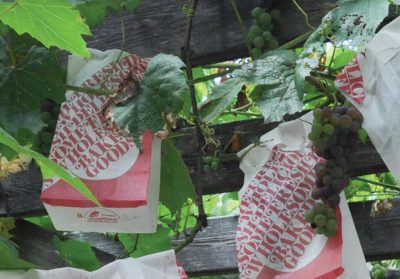
Perhaps the label made the bags even less attractive to grape-hungry birds and insects; at any rate, they worked very well, usually yielding almost 100 late harvest, delectably sweet and flavorful, perfect bunches of bagged grapes each year.

This year, I thought organza bags might work well. Bagged grapes, organza
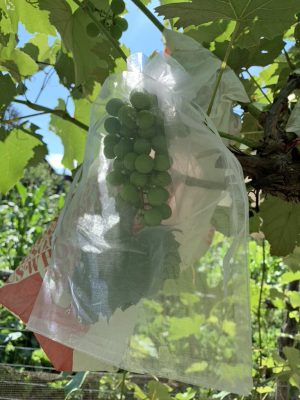
Organza is an open weave fabric often made from synthetic fiber. Small organza bags typically enclose wedding favors; the bags come in many sizes. Organza bags have the advantage over paper bags of letting in more light. A mere pull of the two drawstrings makes bagging the fruit very easy; paper bags involve cutting, folding, and stapling. Organza bags also re-usable. (The bags also work well with apples which, in contrast to grapes, require sunlight to color up.)

In the15th century painting, peasants just pile bunches of their grapes into large, wooden tubs. I gently set only enough bunches for immediate consumption into a woven basket. Different methods, but we’re all tuned to the progress of our planet around its sun.

More details about growing grapes — and lots of other fruits — in my book Grow Fruit Naturally.Apples, bagged with organza

LIBERATED, AT LAST

Exposée

My garden was liberated yesterday, the soil freed at last. That’s when I peeled back and folded up the black tarps that had been covering some of the vegetable beds since early April. My beautiful soil finally popped into view.
Folding up tart
Covering the ground was for the garden’s own good. “Tarping,” as this technique is called, gets the growing season off to a weed-less start. The black cover warms the ground to awaken weed seeds. They sprout, then die as they use up their energy reserves which, without light, can’t be replenished and built up. (I first learned of this technique in J. M. Fortier’s book The Market Gardener.)

Tarping is very different from the much more common way of growing plants in holes in black plastic film, even if one purpose of the soil covering, in both cases, is to snuff out weeds. Black plastic film is left in place all season long, and then disposed of, usually in a landfill, at season’s end.

Tarping tarps might be silage cover material or — as in my case — recycled, vinyl billboard signs (black on one side). They are left in place for relatively short duration, after which time the ground can be exposed to natural rainfall and air, and is open for blanketing with compost and cover crops. After each use, tarps can be folded up and stored for re-use for many seasons more.

Prescription for Weed-lessness

Tarping is but one part of my multi-pronged approach to weed control, the others of which I detail in my book Weedless Gardening. 

My garden is also weed-less because I never, and I do mean never, till the soil, whether with a rototiller, garden fork, or shovel. Preserving the natural horizonation of the soil keeps weed seeds, which are coaxed awake by exposure to light, buried within the ground and dormant. No-till also has side benefits: preserving soil organic matter, maintaining soil capillarity for more efficient water use, and not disrupting soil fungi and other creatures.

Tilling does loosen the soil structure, but I avoid soil compaction by planting everything in 3-foot-wide beds, saving the paths between the beds for foot traffic.
Garden beds
Weed-lessness is also the result of each year covering the ground with a thin layer of a more or less weed-free mulch, just half inch to an inch thick depth. This covering snuffs out small weed seeds that might be present. Other benefits are insulating to modulate wide swings in soil temperature and softening the impact of raindrops so that water percolates into the ground rather than running off. 

What I use for this thin layer of mulch depends on what’s available, what I’m mulching, and, sometimes, appearance. Vegetables are hungry plants so their beds get an inch depth of ripe compost, which, besides the other benefits of mulches, also provides all the nutrition the vegetable plants need for a whole season. Paths get wood chips; it’s free, it’s pretty, and it visually sets off paths from beds. Straw, autumn leaves, sawdust, and wood shavings are some other materials that would work as well.

At the end of the season, beds that have been harvested but aren’t needed for autumn cropping, get a cover crop, which is a plant grown specifically for soil improvement.
Autumn cover crop
Cover crops provide all the benefits of mulches, plus looking pretty, sucking up nutrients that might otherwise wash through the soil in winter, and growing miles and miles of roots to give the soil a nice, crumbly structure. I plant oats or barley, because the plants thrive in cool autumn weather and then, here in Zone 5, are killed by winter cold sometime in January. The leaves flop down, dead, to become mulch, which I rake or roll up easily before it’s time for spring planting.Raking up oat cover cropClearing oat cover crop by hand

Another ploy for weed-lessness is using drip irrigation. Sure, I could get by without any watering here in the “humid Northeast,” but timely watering gets the most out of the garden. Drip irrigation pinpoints watering to garden plants rather weeds, which would, with a sprinkler, be coaxed to grow, for instance, in paths.

Weed-less but Not Weed-free

With this multi-pronged approach to weed-lessness, isn’t tarping like “taking coals to Newcastle?” No. I found that even after not tilling, mulching, using drip irrigation, and, especially, cover cropping, some weeds do a figurative “end run”and find their way into some beds. Especially, the last few years, red dead-nettle (Lamium purpureum). Purple deadnettle
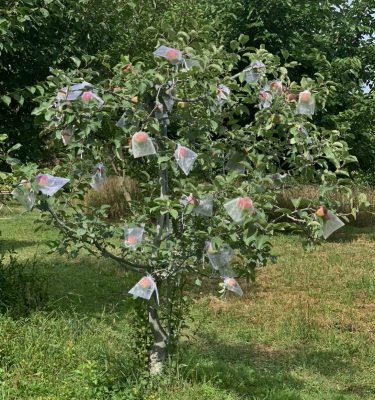
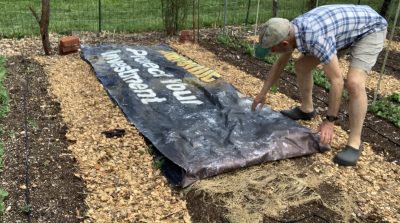
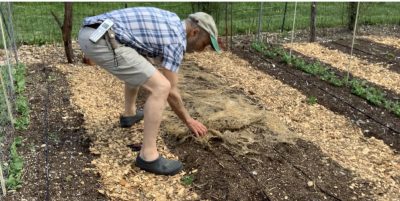
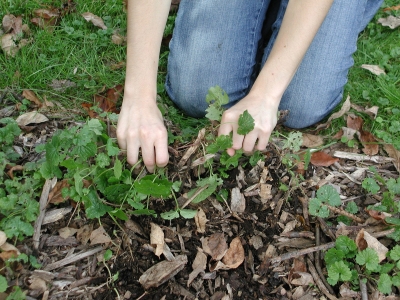
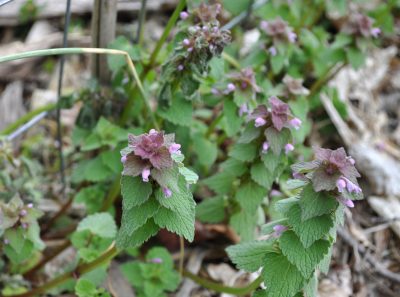
Yes, I know the plant is pretty, provides early nectar for pollinators, and is edible. But its out of place in my vegetable beds. The tarp does it in.

No garden can be weedless. But mine has been weed-less for many, many years.

Keep on Composting

One Problem in Cold Weather

I don’t let cold weather put the brakes on my composting, at least my role in it. For the bacteria, fungi, and other workers in my compost pile, it’s another story. Come cold temperatures, and their work come screeching to a halt or near halt (which depends on the degree of cold, the size of the pile, the mix of ingredients, and moisture).

But that’s no reason for me to abandon composting.

The main problem, as I see it, with composting in winter is not the workers not working. Pile up food scraps another organic materials winter, and composting will re-convene when warm weather arrives again in spring. The problem is that those food scraps offer a smorgasbord of tasty, easy calories for rodents. Which is not good.

(Lest you’re feeling fuzzy and warm to these furry creatures, a short list of what they could bring along to you would include hantavirus, leptospirosis, lymphocytic chorio-meningitis, rat-bite fever, salmonellosis, and tularemia, all of which are as bad as they sound. And that’s only a partial list.)

I take a multi-pronged approach, then, to keeping rodents at bay yet carrying on with my role in composting.

Population Control

My first line of defense is to keep rodent populations in check.

The top layer of the compost pile is not the only place where rodents might find a meal. In autumn, I clean up any rodent treats that might be lying around such as ears of corn, old squash and tomato fruits, and baskets of filberts or black walnuts. As appropriate, they go either onto the compost pile or into animal-proof storage.
Compost with fresh materials
Sammy, Daisy, and Gracie also help out. They are, respectively, a dog and a dog and a spayed cat, who spend most of their time outdoors. (I know, I know about the problem with cats and birds. But I’m trying to strike a balance. A few less birds weighed against soaring rodent populations seems reasonable. And anyway, Darwinian selection may be going on here for birds that are increasingly learning to avoid Gracie. At least, not to get too graphic, judging from the “gifts” Gracie brings back to show off.)

Dogs on porch

Dogs at “work”

I support the work of Sammy, Daisy, and Gracie by doing some trapping on my own, mostly of rabbits and squirrels because they can damage or kill plants, and pilfer my food. Black rat snakes, which sometimes go so far as to lay their eggs in my compost pile, also help out.

Mouse damage

Mouse damage

Rabbit damage to branches

Rabbit damage to branches

Exclusion

My second line of defense is to keep rodents out of my compost pile. A number of heavy-duty plastic or metal, animal-resistant compost bins are available for sale, and all work pretty well — as they should, since any pile of organic materials will eventually turn to compost. Their usual limitation is that they many lack sufficient volume for a critical mass if you want to make hot compost.

I made my own compost bin, actually bins. Having two or more allows compost to mellow in one bin while the other one or ones are still cooking. My bins are rodent-proofish. They are so, first of all, by my setting them up in flat ground upon which I first lay down a large enough piece of 1/4 inch or 1/2 inch mesh hardware cloth to keep the critters from tunneling up from below.
Commpost bin board
The bin itself is made of notched, fake wood (such as used for decking). As the notched pieces slide together, the tolerances were designed to be close enough to deny rodents access. Ah, but “there’s many a slip ‘twixt the cup and the lip;” my carpentry skills fell a little short of making all those notches small enough, which would be less than 1/2 inch, to allow entry by even a mouse. Still, the bins work pretty well.

I detail the material I used and the construction of the bins at https://leereich.com/2019/06/my-compost-for-a-bin.html.

Scavenger Friends

Rodents are wily creatures, and I expect that they could somehow jump and climb their way up the bins to the top of the pile where the freshest delicacies have been most recently placed. Originally, I planned to make rodent-proof covers to the compost bins, but they never got out of the early planning stage.
Dog and chickens on compost pile
Turns out that my dogs are very good jumpers, and also very fond of kitchen scraps. My ducks are adequate fliers/climbers, and likewise show interest in this department. So the plan here is to deposit compostables from the kitchen onto the compost-pile-in-progress each morning, when ducks and dogs are out and about. They clean up all of the most desirable and calorie-laden stuff, leaving little or nothing for any rodents who, excepting squirrels, are mostly nocturnal.
Dogs on compost pile
Note: As I re-read what I’ve written I realize that I could be accused of not being pc for a number of details stated. Sorry. But composting itself is very pc, and reality often involves striking balances to get the most desirable results.

What Midwinter, Spring-like Weather Will Do

My Garden’s A Mess!

After some really frigid weather a month ago followed by more or less seasonal cold, temperatures did a loop de loop and we’ve had a couple of days in the high ‘60s. Very unseasonal, to say the least, and perhaps another indication of global warming, but welcome nonetheless. Those temperatures, coupled with brightening sunshine, made me want to get my hands in some dirt.

A large, second-story bedroom window overlooks my main vegetable garden. The weather made me see it in a different perspective — it looked messy. 

I pride myself on putting everything in order each fall so that (quoting from Charles Dudley Warner’s 1886 My summer in the Garden) “The closing scenes are not necessarily funereal . . . A garden should be got ready for winter . . . neat and trim. . . in complete order so that its last days shall not present a scene of melancholy ruin and decay.”

Messy garden, January

Not a pretty picture

Endive, dead in January

Endive, dead in January

Although I had mostly cleaned up spent vegetables and dressed the beds with an inch-deep layer of compost, early wintry weather put an end to that. Now, what I saw outside was too much “melancholy ruin and decay” from a few beds of late cabbages and their kin and tunneled beds of endive. The wilted, dried, browned leaves of unharvested endive lay flat, covering those beds.

Spring-like temperatures offered me the opportunity to get my hands in the dirt. I grabbed my hori-hori knife and gathered up frozen or dessicated leaves and plants for carting over to the compost pile. What a shock to even find some signs of life still out there in the beds: some arugula, some kale plants, and a couple of plants of baby pak choy and michili Chinese cabbage.
Michili chinese cabbagePak choy in garden, January
Coldest temperatures (minus 20 degrees F. here) typically arrive in late January. Those temperatures will do in these plants. Except for mâche, of course, which was also still alive in the garden, spry and green as if temperatures had never already dropped near zero, and which always survives winter.

Mache, in garden in January

Mache, in garden in January

Garden after cleanup

Garden after cleanup

First Seeds

That spring-like weather also gave me the urge to sow some seeds. These would be the first of the year, a seed flat of lettuce and baby pak choy to mature in early spring in the greenhouse. For some irrational reason, I’m never that confident that those tiny specks are actually going to sprout, even though I’ve done this successfully for decades.

Perhaps my lack of faith comes from my first experiences sowing seeds. That was many years ago when, as a graduate student, I lived in a motel room that had been converted into an apartment and began my first garden as an adult. I sowed all sorts of vegetable and herb seeds in peat pots that I set in trays on a shelf on a wall near a window.

All those seedlings died — and that was my abrupt introduction to “damping off,” a disease that attacks seeds and newly emerged seedlings. Imagine the disappointment of a beginning gardener (me) watching seedling stems pinch in at he soil line and topple over — the telltale symptom of damping off disease.
Damping off, cabbage

First Disease

I soon learned that damping off was not uncommon, even among experienced gardeners. The disease is caused by any one of a few soil dwelling fungi that raise their ugly head (figuratively) given the right conditions (for them). One obvious way to try to avoid the problem is to sterilize the potting media.

Most commercial potting mixes are sterile, as were the peat pots I was using. The problem is that the culpable microbes are everywhere, waiting to attack when conditions are just right, conditions that I unknowingly provided in my motel room. The peat pots were excessively moist; the air stood still; and little light entered the room — perfect for damping off development.

Nowadays, my seedlings rarely experience damping off. The plants get off to a good start at temperatures they enjoy, bathe in light in my greenhouse or sunny windows (or, in the past, cozied up very close to fluorescent bulbs), and a fan keeps the air moving. I also add sufficient perlite to my potting mixes so that excess water drains feely down and out of the mix. A thin layer of well-draining material, such as sand or calcined montmorillonite clay (kitty litter) can also help.

Years ago, soothing brews of chamomile tea would also come to the rescue — for the seedlings, not for me. That tea hasn’t been needed for a long time. I also don’t pasteurize or sterilize my potting mixes. Beneficial microbes, from the compost in my mix, and good growing conditions have thankfully made damping off nothing more than a distant memory for me.

MORE AUTUMNAL NEATENING

An Upbeat Closing

I don’t know about you all, but I have a great urge to tidy up my garden this time of year. Partly it’s because doing so leaves one less thing to do in spring and partly because, as Charles Dudley Warner wrote in My Summer in the Garden in 1889, “the closing scenes need not be funereal.” All this tidying up is usually quite enjoyable.
Pulling creeping charlie
Moist soil – and not too, too many weeds – make weeding fun. Creeping Charlie (also know as gill-over-the-ground) has sneaked into some flower beds. Its creeping stems are not yet well-rooted so one tug with a gloved hand and a bunch of escaping stems slithers back from its travels forward from beneath and among flower plants and shrubs. What remains are occasional tufts of grassy plants, especially crabgrass, easily wrenched out of the ground or coaxed out with my Hori-Hori garden knife.

This tidying is intimate work: me, the soil, weeds, and garden plants at close range. While I’m down there on hands and knees, I’ll also cut back some old stalks of perennial flowers. When everything is cleaned up, I’m going to spread a blanket of chipped wood (free, a “waste” product from arborists) over all bare ground.

The one thing not to do this time of year, as far as tidying up, is pruning. Better to prune after the coldest part of winter is over and closer to when plants can heal wounds.

A Real Crocus, Now

A few weeks ago, I, along with anyone visiting my garden, was wowed by autumn crocuses then in bloom. As I pointed out, they weren’t not true crocuses (they were Colchicum species), they just acted like crocuses – on steroids. Then, a couple of weeks later, I noticed that my true autumn crocuses (that is, the ones that are true Crocus species) were in bloom.
autumn crocus
And I did really have to stop and notice them after that most flamboyant show of fake autumn crocuses. These true crocuses (crocii?) are dainty plants, just like spring crocuses, and their colors are subdued: some are pale violet and some are white. In contrast to the fake autumn crocuses, which multiplied like gangbusters, the real autumn crocuses look about dense as when I planted them. Both kinds of crocuses wait until spring to show their leaves.

It’s fortunate that the part of my garden that’s home to autumn crocuses, real and fake — the mulched area beneath the dwarf apple trees — is free of weeds. Otherwise, the real autumn crocuses, being so dainty and lacking a supporting role of leaves, would be swallowed up, visually or for real.

Weed? Perhaps.

Back to weeds . . . I’m trying to see the positive side of all that creeping Charlie I’ve been pulling. Bits of it that have insinuated themselves in amongst the bases of stems of woody shrubs, especially thorny ones like the Frau Dagmar Hastrup rose, are not that much fun to weed out. So what’s good about creeping Charlie?
creeping charlie
For one thing, with shiny, round leaves of a deep, forest green color, it’s not a bad looking weed. The flowers are an attractive, purple color although neither big nor prominent enough to make a statement. The otherwise excellent reference book Weeds of the Northeast (Cornell University Press) erroneously states that “the foliage emits a strong mint-like odor when bruised.” That would be nice except that I’ve never noticed that odor and didn’t even when I just ran outside to crush some leaves check up on this statement.

Creeping Charlie grows well in sun or shade, so well that when I worked in agricultural research for Cornell University, I considered the plant as a possible groundcover to replace the relatively sterile herbicide strips in apple orchards. It grows as such beneath my dwarf pear trees.

Creeping Charlie beneath trees

Creeping Charlie beneath my pear trees

The plant could even be a somewhat ornamental groundcover, making up for any lack of great beauty with its capability to rapid fill in an area and grow only a couple of inches high. You couldn’t ask much more from a plant – except to keep out of some of my flower beds.

A MONTH OF RECOGNITION

Good in the Lab

National Fruit Fly Month — October — has drawn to a close. (That designation is my own, not the federal government’s.) Sure, a few still flit about here and there. But no longer do clouds of them hover over bowls of fruit in my kitchen. In case you haven’t experienced them, fruit flies, Drosophila species, are cute little (about 1/8 inch long) flies that feast on overripe and damaged fruit as well as other plant material.
Fruit fly
I, and perhaps you, were first introduced to fruit flies in middle school biology, raising them on some mix of banana and agar-agar. In those days, I got more intimate with them as part of a science project: My project was to test whether x-rays cause mutations. My dentist agreed to help. After raising a batch of flies, I went to his office and laid a vial of them on the dental chair whereupon Dr. Golden zapped them with a beam of x-rays. After the buggers and a similar vial of non-irradiated buggers had reproduced, I examined the offspring, especially their eyes and their wings. My experiment “proved” x-rays benign (as least as far as could be detected morphologically by a 13-year-old).

Fruit flies’ fecundity is what has earned them prominent positions in science. An adult lives for only about a month but during that tenure she may lay as many as 500 eggs. The courtship ritual of those little guys and gals is intricate, involving a kind of dance along with some instrumentation, provided by sounds from leg tapping, and some singing. Each gal gets involved with a number of guys.

Fun fact: Despite the small size of fruit flies, they have the longest sperm cells of any known organism — over 2 inches long for D. bifurca. Most of that length is the sperm’s tail. During mating, those tails are wound up in tightly tangled coils.

Not So Good in the Kitchen

Fruit flies are very interesting and useful in the lab but not in the kitchen. The flies lay eggs on the surfaces of fruits and vegetables. The eggs hatch into larvae which feed, in time turning the fruits and vegetables into a slimy mush. After molting twice, they morph into adults, who flit away to generate more offspring.

Growing up, I only knew fruit flies from the lab, never my mother’s kitchen. Why do they invade my kitchen? One possibility could be the smorgasbord my garden provides, more than ever spread on counters of that kitchen of yore. Also, refrigeration drastically slows the flies’ development but also can suppress or ruin flavors (tomatoes, for example) or speed wilting (lettuce, for example); I only refrigerate for longer term storage, not usually for fresh eating.

And being home grown, my fruits and vegetables need not aspire to the same cosmetic standards as commercial fruits and vegetables. Small wounds that I ignore or cut away provide access to fruit fly activity.

Still, I can’t let the flies run amok. Fortunately, fruit flies are easy to trap. And one of their favored baits, vinegar, is readily available. (Fruit flies have also been called “vinegar flies.”) Just put out a glass of vinegar and you’ll soon see a crowd of fruit flies flocking to it. That, of course, doesn’t trap them.  Make that glass of vinegar into a trap by adding a little soap or detergent to the vinegar to decrease its surface tension so that, once in the drink, the fly can’t fly out.

Various kinds of vinegars are effective. Some people recommend apple cider vinegar. Or apple cider vinegar with a slice of banana thrown in. My preference is for balsamic vinegar. A mix of sugar, yeast, and water also works.
Fruit fly trap
Look on the web and you’ll see all sorts of more intricate — but none very intricate — traps for fruit flies. My method is to take a plastic carryout container with a lid, punch or drill a 1/8” wide hole in the lid, pour some balsamic vinegar into the container, then replace the lid.

A more Frightening Relative

Spotted wing drosophila

Spotted wing drosophila

October isn’t the only month of prominence for fruit flies. They are out there whenever the weather is congenial and food is available. One of them, spotted wing drosophila (SWD) is fairly unique in that this species need not wait for a fruit to be overripe, damaged, or nearly rotting to attack. It threatens intact, even underripe, fruit such as raspberries, blueberries, and other fruits of summer.

SWD is a relatively recent arrival on the garden scene (2008 in California, 2013 in my garden). At first it seemed that was going to be the end of blueberries, my favorite fruit. Over the years, I’ve been able to mitigate damage. Early on, I tried sprays of Entrust and Neem, as per recommendations. But even though organically approved, for me these sprays take some of the enjoyment out of growing and eating the berries. Fine mesh covering over a whole planting has also been tried (effective, but not tried by me).
Netting for SWD
This year, and for the past few years, my blueberry planting has yielded its usual, good harvests utilizing a multi-pronged approach. For starters, I grow a dozen or so varieties that extend the season from late June until early September. SWD, here, at least, is inconsequential until early August, by which time our bellies and the freezer are almost full of berries.

In the latter part of July, I hang out traps, one per bush, that I’m helping test for Cornell’s Peter Jentsch. They are baited with raspberry essence laced with boric acid, which needs to be renewed by weekly spraying (of the trap, not the plants). After 3 years of testing, the traps seem to be effective. 
SWD bait and kill trap
During summer, there’s always a bowl of freshly picked berries on the kitchen counter; by early August, fresh picked fruit goes into the refrigerator or, if the freezer’s quota still not yet filled, also into the freezer. Any larvae within fruit are killed after 3 days of refrigeration.
Bowl of blueberrires
Fruit flies and even SWD, despite their fecundity, aren’t about to take over the world. These pests have their pests, which include yellow jackets, ant, various other kinds of flies, and even smaller creatures, such as nematodes. Quoting Jonathan Swift, “. . . a flea, Hath smaller fleas that on him prey; And these have smaller fleas to bite ‘em, and so proceed ad infinitum.”