Posts

SEEDS OF ALL STRIPES

Finally, after many years, I made it to the library. No, not the book library. The seed library, the Hudson Valley Seed Library.
Hudson Valley Seed Library is neither an ordinary library nor an ordinary seed vendor. It all started in 2004 in a book library, the public library in Gardiner, NY, where Ken Greene was working as a librarian. Working where people borrow and return books got him thinking about — why not? — setting up a library where people “borrow” seeds and return them also. With seeds, the “returns” are even better than with books. One borrowed seed of an annual vegetable or flower gives, in return, hundreds of seeds by the end of the season, in addition to tasty vegetables or colorful flowers.
Ken eventually left the Gardiner Library to put his energy into growing — literally — what became the Hudson Valley Seed Library, which began business in 2008. What about the borrowing and returning? Seed-growing takes a certain amount of know-how. To maintain trueness (that is, a seed from a packet labeled Buttercrunch lettuce snuggled into the ground actually grows into a Buttercrunch lettuce plant), Ken started growing most of the seeds for sale himself.
But the “library” part continues. For a nominal membership fee, anyone can become a community grower. In addition to a discount on the cost of the Seed Library’s seeds, community growers get to grow out seeds to return to the library. Each year presents a different variety to grow for all the members. And — most

importantly — they get an education on how to best grow the plants, maintain trueness, and collect the seeds for the year’s variety. So a promiscuous vegetable, such as cucumber, whose female flowers mate easily and readily with any cucumber pollen, needs different treatment than, say, a tomato, whose flowers maintain greater fidelity because each one has both male and female parts, and just a little vibration — a breeze, perhaps — unites male with female parts. This year, community growers harvested Blue Pod Capucijners Soup Pea seeds. Dwarf Sunflowers are on the docket for next year.

———————————————————–
The weather was still warm and sunny when I visited the library in early October. Erin, an enthusiastic gardener/farmer who works there (and is working with some Otto File polenta corn seed I gave her), took me on a quick tour of the seed storage shed and the packing shed, and showed off their new seed-cleaner.
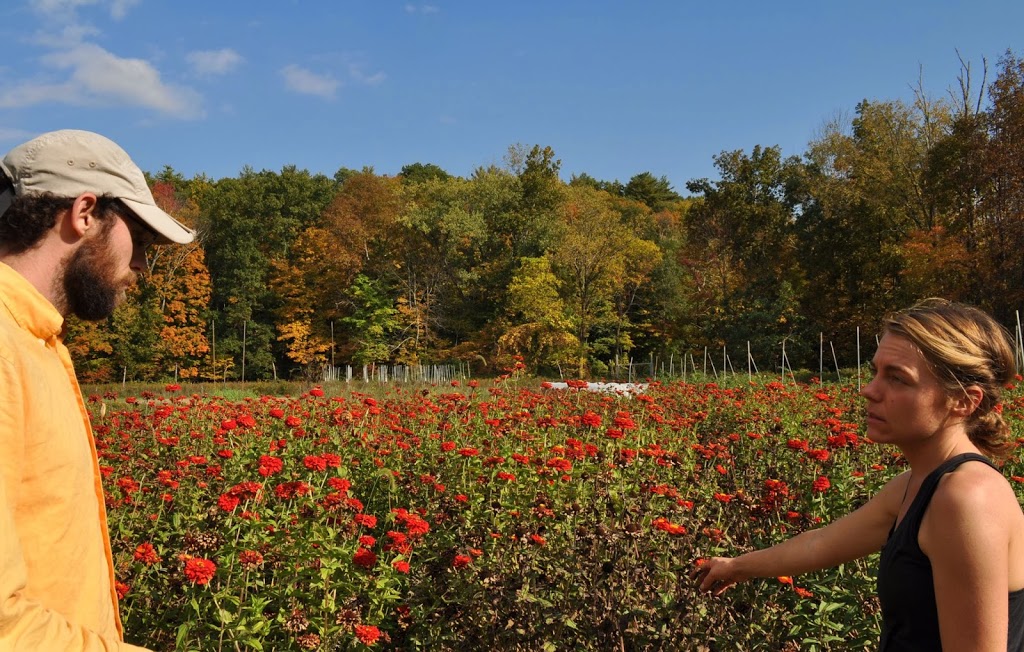
Rather than looking like a seed factory, a field for growing seeds can look like a very beautiful garden. Especially with flower seeds. Rather than just a flower bed of zinnias, spread before me was a small field electric with colorful, large heads of Dalhia Zinnias staring up at the sky.
Tasting some of the vegetables was fun, and put two varieties on my list for planting next year. Pink Ping Pong tomatoes were the size and shape of ping pong balls, with no similarity beyond that. The flavor was smooth and sweet, but not too sweet, and plants were still yielding well going into October.  Scarlet Ohno turnip sports a scarlet skin that encloses a white flesh having streaks of scarlet. After scraping two-inch diameter roots clean with my knife, I cut slices to eat; the flavor raw was excellent, right out in the field, no doubt enhanced by the surrounding forest getting ready to put on its autumn show, the bright sunlight, and the clear, blue sky. (Scarlet Ohno also tasted good the next day, sliced onto a plate on my kitchen table.)
——————————————————–
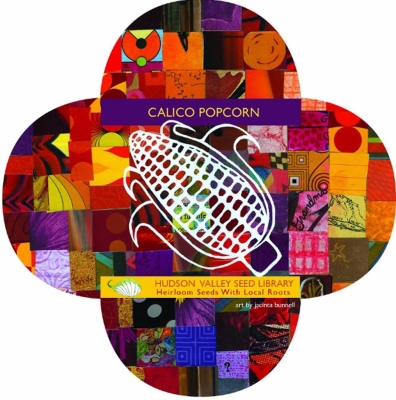
A certain number of Hudson Valley Seed Library seed packets cry out to be looked at. No ho-hum drawings or photos on these packets. Ken commissions artists to do illustrations, not necessarily of the

vegetables or flowers, but of an artist’s representation of the particular variety. So Calico Popcorn’s packet, illustrated by Jacinta Bunnell, sports a line drawing of an ear of popcorn against a colorful calico backdrop. A German Shepherd — Ken’s old dog, Kale — with a mouthful of kale decorates the packet of Dino kale illustrated by Michael Truckpile.

The originals of each year’s new artpacks (not every variety gets an illustrated packet) are featured in an art show that begins locally and then travels around the country. To see the schedule, go to http://www.seedlibrary.org/events/.
————————————————————
As I sit here writing, yeast and Lactobacilli bacteria are having a field day, feasting on moistened wheat flour that’s expanding by the minute as carbon dioxide is generated and trapped in dough. My bread is rising, bread made from seeds I saved for eating — wheat — grown this summer.
I finally tired of looking at the red pillowcase of wheat seedheads that had been sitting on the floor in a corner of my kitchen since the end of July. Whacking the pillowcase was supposed to knock the wheat berries off the stalks; it didn’t, not sufficiently, at least. A reader suggested pounding the pillowcase with a shoe. I did it, and — voilà — one cup of wheat berries from a 15 square foot planting. I ground the wheat into a flour in a coffee grinder.
Fourteen hours later: The bread has been baked, cooled, and sliced. The flavor? Excellent, but no different from my other breads. The yield? One-third of a loaf.
I had wondered how much land would be needed to grow a loaf of bread and now I know: 45 square feet, at least for me, a beginner in grain growing. Average wheat yields in this country are about 40 bushels per acre, which translates to twice my yield, in which case a loaf could be squeezed out of about 23 square feet. However, wheat yields can run as high as 150 bushels per acre — something to strive for (a loaf from 6 square feet).

Beetles and Wheat

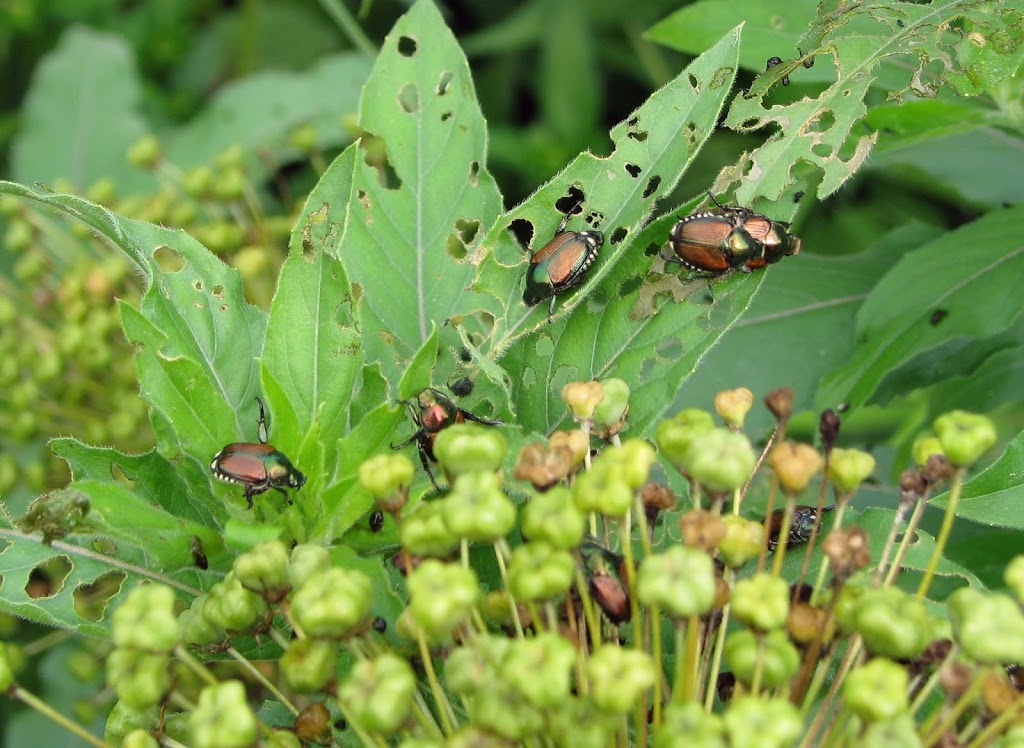
Just as cicadas are returning to their underground homes, Japanese beetles are emerging from these same quarters. (Do they nod to each other as they pass?) In contrast to the 17 year hiatus of the cicadas, Japanese beetles come up to cause trouble every year. Some years are worse than others, and the threat is hard to predict ahead of time.
Last year I was braced for an onslaught because of a moist summer the year before. Moist soil is ideal for the beetles’ egg-laying. Eggs laid later in summer hatch into grubs that feed on roots, especially grass

roots, and emerge the following season. (Beetle grubs are allegedly good eating as are, allegedly, cicada adults.) The beetle onslaught began on schedule last year, then fizzled out. I don’t know what to expect this year, except that I’ve already seen quite a few beetles.

I also don’t know what to do about them. Milky spore disease is a bacterium that specifically targets the grubs in the soil. That seems ideal, except “there’s many a slip ‘twixt the cup and the lip.” Milky spore disease is more effective in theory and in the laboratory than out in real life. Beneficial nematodes are another potential fix for “beetlemania,” but nematodes are unfortunately also subject to that “slip.” Even if either beneficial organism was 100% effective, it would do nothing for the grubs in neighbors’ yards; those grubs morph into beetles that, once they spread their wings on neighbors’ lawns, could just fly over here.
I’ve tried Japanese beetle traps and they were effective in the early years of light infestations here. After awhile, though, the traps attracted more beetles than they trapped even though placed about 300 feet apart at either end of my property.
I’ve never tried, but like the idea of, strapping long, spiked soles to the bottom of my shoes and walking around spearing the grubs. It may be effective, but, again, does nothing about neighbors’ grubs unless you pace their yards also.
Hand to hand combat is most effect and satisfying. The beetles are sluggish in early morning and easily flicked off leaves into a jar of soapy water, the soap preventing their escape. The problem, for me, is too, too many plants for hand to hand combat. The organic spray ‘Surround’, nothing more than kaolin clay, is a deterrent, but again, I have too many plants to douse repeatedly with anything, organic or otherwise.
——————————————
Good gardeners keep a close eye on their plants. Good gardeners also — I believe — purposely don’t always look too closely. I have a friend whose fruit trees look almost perfect, the result of lots of pesticide sprays. He could get by with a lot less spraying if a few holes in leaves or occasional wormy apples upset him less, which might happen if he looked less closely.
Plants tolerate a certain amount of insect and disease damage. More than that, plants compensate, ratcheting up photosynthesis in what’s left of their leaves following damage — up to a point.
Anyway, the last sentence is the rationale for my do-nothing approach to Japanese beetles. I’m also reassured knowing that, although the beetles have cosmopolitan tastes, they don’t attack everything. Two years ago, for some reason, they skeletonized many leaves on one hardy kiwi plant (Actinidia kolomikta) but left a neighboring one (also A. kolomikta) practically untouched.
——————————————
Except for a few sparrows pecking at seeds, my wheat crop has been pest-free, even from Japanese

beetles. The wheat harvest came in last week. Lest you think that “came in” implies sacks of grain, the area planted was a mere 5 foot length of one of the 3 foot wide vegetable beds.

This wheat was winter wheat, planted last September. The green sprouts grew through autumn, went dormant in winter, then started growing again in spring, beginning to develop seed heads once the plants were a couple of feet tall.
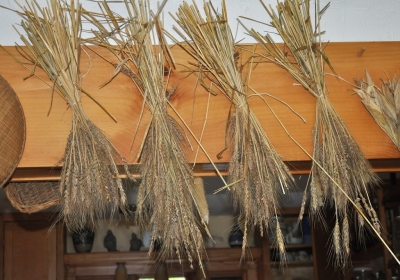
Over the past few weeks the stalks rose to 5 feet high and the seed heads plumped up. Last week, rich soil, drip irrigation, and birds finally got the best of the upright stalks. Enough of them began to flop down and turn tawny that methought harvest was in order so we went at the stalks with pruning shears and threw them in a bucket. The stalks are now tied into small bundles that hang from a kitchen rafter to finish drying.
I’m planning to plant cabbage and broccoli transplants in the 15 square feet vacated by the wheat. I

could have planted right in the wheat stubble but decided, instead, to pull out clumps of wheat plants with minimal disturbance of the soil, spread on inch of compost, and plant. Grasses have extensive root systems (380 miles estimated beneath a single rye plant, another plant in the grass family), and all those wheat roots pushing and prodding the soil hither and thither left the ground in the wheat bed wonderfully soft and crumbly.

Once the wheat harvest is dry, I’ll thresh, winnow, and grind it, then report on the yield, in loaves of bread per square foot of growing area.

Three Fermentations

Here it is, 9:10 am in the morning, and I already feel very accomplished. Three fermentations are well under way. It’s fun and tasty working with our microbial friends.

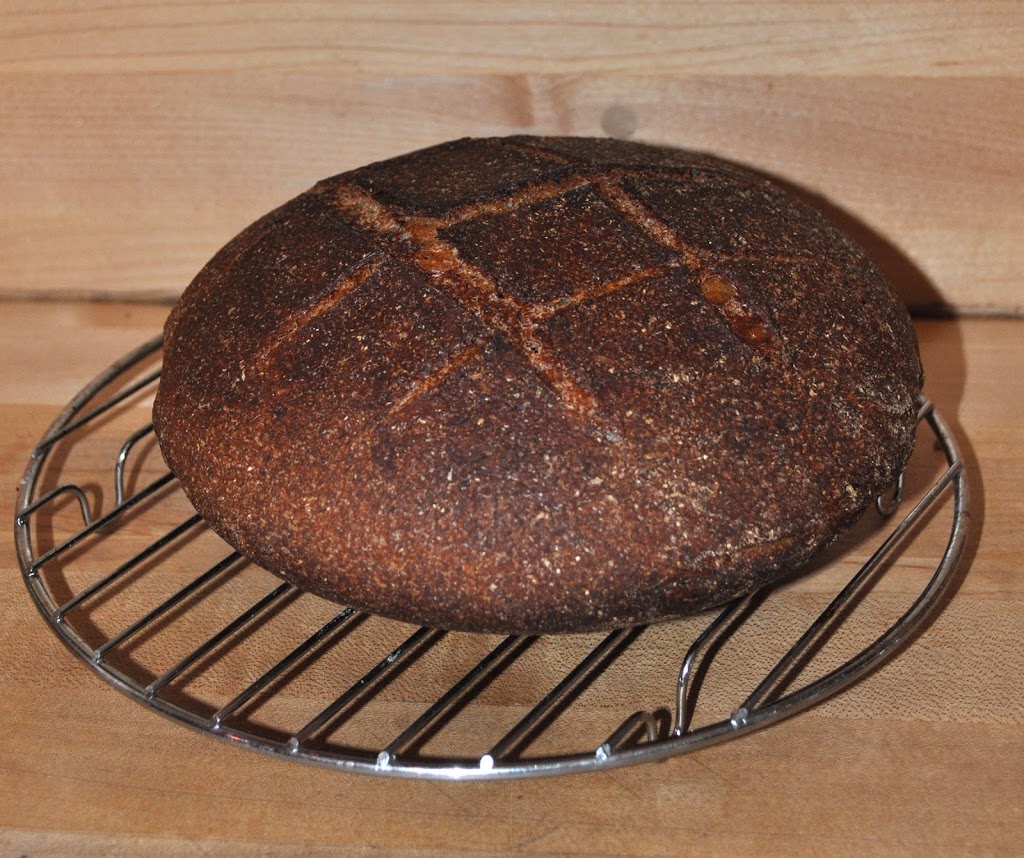
The fun began last night when I scooped out a half a soup spoon’s worth of sourdough starter from a jar in the refrigerator to add to a mix of 3 cups of whole wheat flour, one and a quarter cups of water, and 1/8 cup of maple syrup. That sourdough starter is in its third year — here, at least. I carried it, dried, on a paper towel, back from Alaska, a gift from a friend there who said its caretaker’s ancestry traces back at least 100 years to . . .  was it governor or captain someone? I’ve kept the starter refreshed by stirring a teaspoonful of it every week or two with an eighth cup each of flour and water, and incubating it. The microbial population, a mix of various species of Lactobacillus bacteria and Saccharomyces yeast fungi, has no doubt shifted under my care; whatever the present population, it makes fine loaves of bread.


Back to the bread . . . I mix it in a breadmaker or by hand for a minute or so, incubate it 12 to 18 hours (depending on the temperature), dust it with flour and give it two light folds, let it rise again for a couple of hours, and then throw it (almost literally, and the hardest part) into a pre-heated baking dish from a 450° oven. Into the oven it goes: thirty minutes covered, 15 minutes uncovered, and voilá. Delicious, hearty, fragrant bread.


What’s this got to do with gardening? I wish I could report that I grew the wheat. I tried, last summer. Yields were lower than expected, exacerbated in part by difficulty in threshing it. Kernels were reluctant to part with seedheads despite severe batting of the heads in a pillowcase. I’ll try again, and hope to grow at least enough for one loaf of bread.
————————————————–
One of my sourdough yeasts, Saccharomyces cerevisiae, was invited to my second fermentation, the preparations for which began much earlier this morning. Actually, this second yeast was more probably a relative of the sourdough yeast, a different strain or species, one best suited to fermenting malt syrup into alcohol. The finished product, in this case, will be beer. Saccharomyces cerevisiae came in a sealed packet from a store although beers have been made by mere capture of wild yeasts floating around in the air.
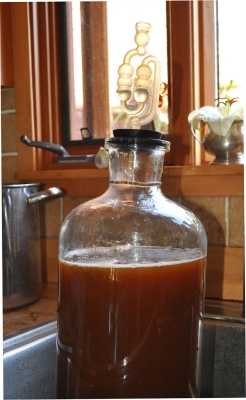

The first step in my brewing was to boil malt extract with hops. I have grown barley, from which malt can be made. Note the “can be;” my barley crop of last year is still hanging, stems and all, from a kitchen rafter. I bought the malt extract rather than go through the threshing, sprouting, toasting, cracking, and sparging steps needed to extract malt from barley. Hops is easier; all you need is the dried seed heads. I grow hops, a decorative and fragrant plant, which is all my young plant is thus far. I also bought hops.


I did go out to the garden after the 45 minute boil to gather black currant leaves and clove currant fruits. These two aromatic plants, steeped along with more hops in the cooling malt-hop mix, will add a subtle and unique flavor to the batch of beer. 


Once diluted to 2 gallons, poured into a glass carboy, and cooled, the mix was spiked with the yeast. An airlock tube with water in it lets carbon dioxide exit without letting air in.


It’s now 1:30 pm in the afternoon, and already bubbling noises from the airlock offer evidence that the Saccharomyces are happily at work. Well, not working, just eating. In two weeks, they will have digested all they can and the brew will be ready for bottling.
———————————————-


Around here, compost-making — the third fermentation du jour, is always in progress. Composting is perhaps the most complicated and the easiest of all the fermentations.


This evening, I plan to get some manure to feed the panoply of microbes that call the compost piles home. Not that manure is necessary for making good compost. Basically, all that’s needed is any organic material, which is anything that is or was living. Microbes in my piles have been eating old lettuce plants, pulled weeds, banana and orange peels from the kitchen, some coarse, weedy hay I cut with my scythe, and occasional sprinklings of ground limestone, kelp, and soil.


Fermentation in the compost differs from that in sourdough bread and beer in that conditions and foodstuffs are always changing. If I add a bunch of material at once, temperatures within the pile rise rapidly, up to about 150° F. Different kinds of fungi, bacteria, and actinomycetes become prominent within different temperature ranges. Also, different microbes become dominant depending on what foods I add to the pile and their stages of decomposition. For instance, old cornstalks are rich in lignin, which only certain fungi can use as food; once the fungi have gone to work on that lignin, certain bacteria might move in to work on byproducts, which include dead fungi.


Compost happens quickest when just the right balance of food, moisture, and air exist within a pile. The nice thing about making compost, though, is that whatever goes into the pile eventually becomes compost no matter what the foodstuffs or conditions. Sooner or later, compost happens


Compost is not, of course, for eating, but spread on the soil makes for some mighty tasty fruits and vegetables.
————————————–


The fun part of working with these microbes is not only the tasty products that result, but the congenial blend of art and science that get you there.