Posts

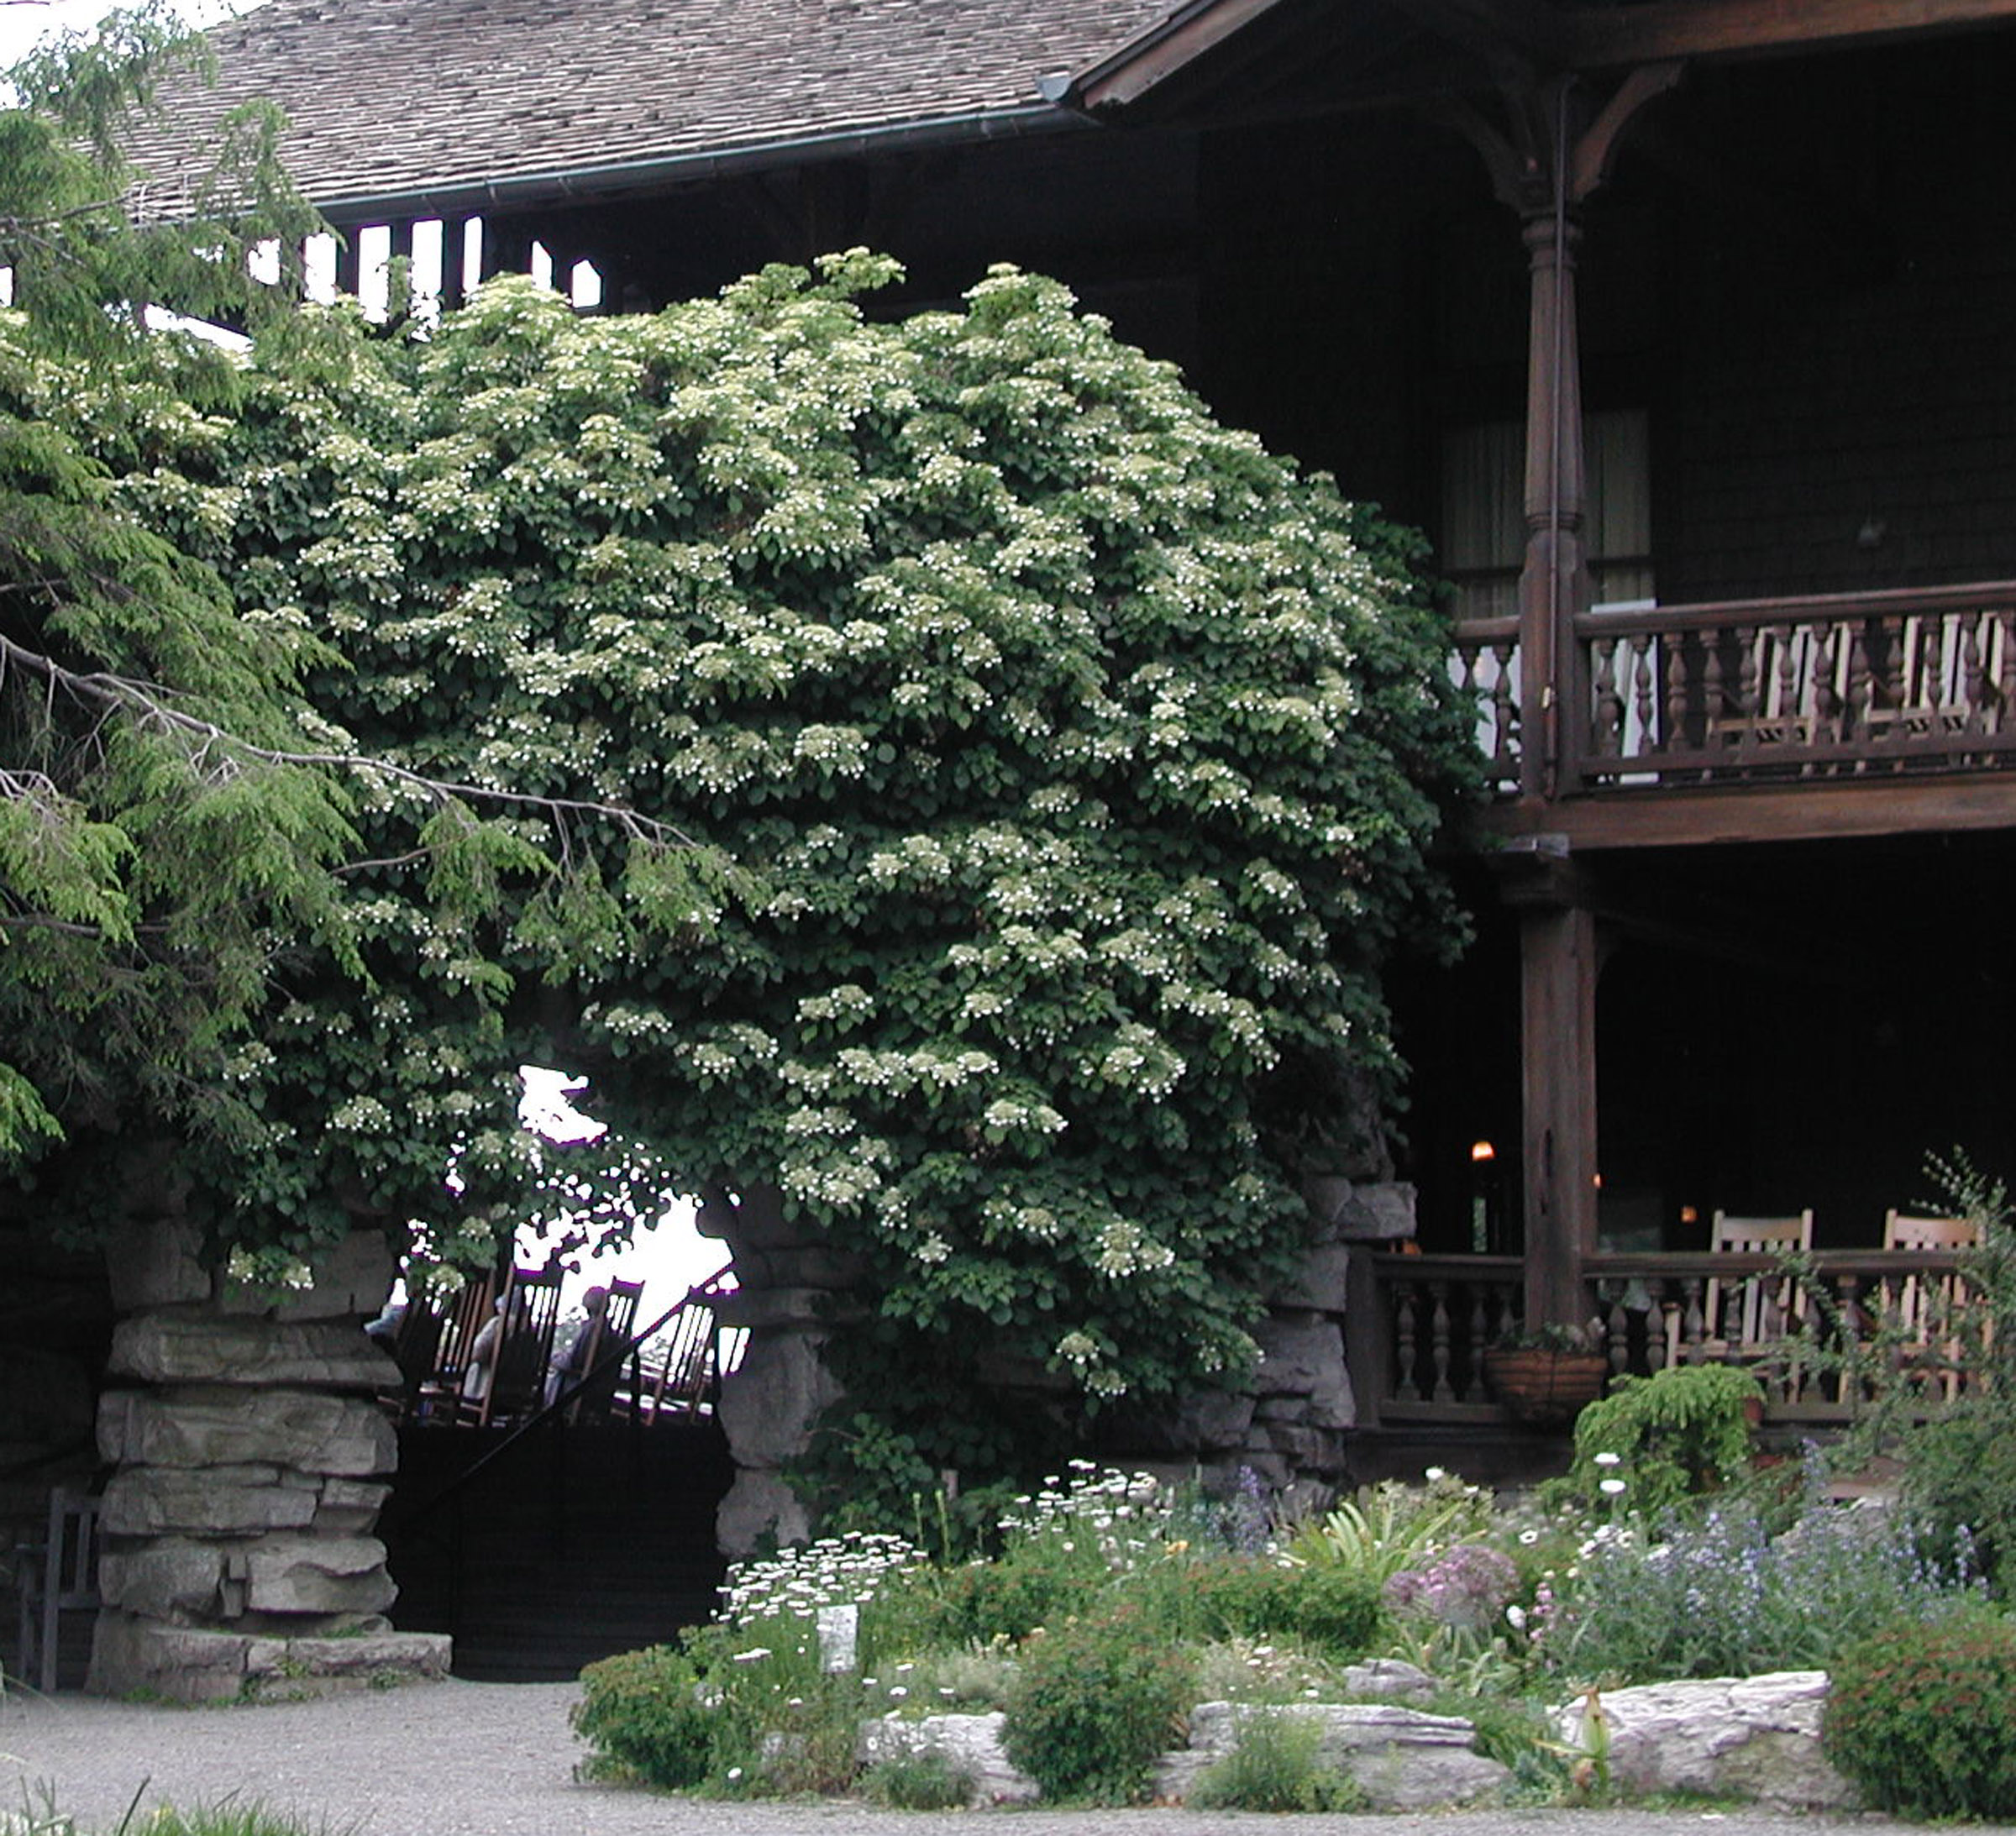
Climbing hydrangea

PRUNING HYDRANGEA

Get hip. Hydrangeas are all the rage these days. If you do have a plant or plants, you may have to prune them. But hydrangea isn’t just one kind of plants; a number of species are popular. Before you approach your hydrangea or hydrangeas, pruning shears in hand, you’ve got to know what species you are growing. They differ in their pruning needs.Climbing hydrangea

Adapting the text from my book, The Pruning Book, I’m going to give you a (figurative) hand by explaining how to identify each commonly  grown species, and then guiding your hand holding the shears.

You’re Probably Growing…

If you grow just one hydrangea, I’ll bet that it’s Bigleaf Hydrangea (Hydrangea macrophylla). This species is most recognizable for sporting electric blue or lively pink flower heads, blue when the soil pH is below 5.5 and pink when the pH is above 6.5. Read more

TELLING SNOW

I Grow Taller

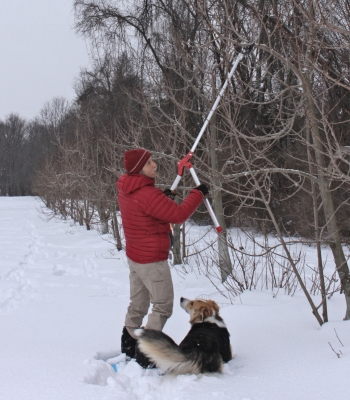
“Make hay while the sun shines” is fine advice in its season. For winter, how about? “Prune while the snow is high and firm.” 

My apple and pear trees are semi-dwarf, presently ranging from seven to eleven feet tall. Even though I have a pole pruner and various long-reach pruning tools, I still carry my three-legged orchard ladder out to the trees with me to work on their upper branches. Sometimes you have to get your eyes and arms and hands right up near where you’re actually cutting.
Pruning on snow
A few years ago, as I was looking out the window and admiring the foot or of snow on the ground, I realized that all that snow could give me a literal leg up on pruning. If I stayed on top of the snow, that is. While the snow was still soft, I was able to do this by strapping on a pair of snowshoes, which I bought, used, just for this purpose. (For travel through snow, I prefer to glide, on skis.) When the snow melted a little and then froze, the icy crust that formed was able to support my weight sans snowshoes.

In any case, when there’s a good depth on the ground, such as today, I gather my tools – minus the stepladder – and walk tall out to the trees.

 Top Down Pruning

Plants, like other creatures, have hormones, and a hormone (called auxin) in every plant generally coaxes uppermost portions to grow most vigorously. Which is why old apple trees become topheavy, with most shoot growth high up. The upshot of this habit is that most fruit is borne high in the branches, out of reach, and lower branches are shaded to become unproductive and prone to disease. 

  Ideally, then, the best place to start pruning is with the most vigorous branches, highest in the tree. That’s also the last place you want to start if you’re standing at ground level. Perched atop a good depth of snow next to my smaller trees, starting near the top was much easier.

  If I get high enough (in the tree), I can imagine that I’m hovering above the branches, looking at them from the perspective of ol’ Sol, which is a good perspective for a grower of fruit trees. This allows a more objective perspective on which branches are going to be blocking light or otherwise cramping others for space.
Pruning in snow
Letting more light and air in among the branches and, at the same time removing potential fruits with pruned branches, channels more of each tree’s energy into perfecting those fruits that remain. Remaining fruits are then healthier, larger, and more flavorful, especially for naturally larger fruits such as apples, pears, and peaches

Snow Tales

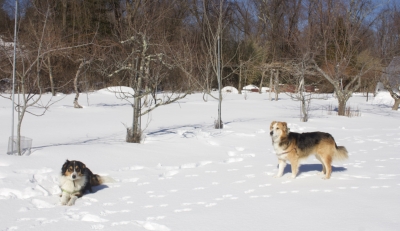
The snow is a blank canvas that records some winter activities. My dogs’ footprints are obvious and telling. They are provincial in their travels, having beaten paths from their doghouses, where they sleep, to the driveway, where they greet humanity, and to the deck, where they lie in the sun.

 Daisy and Sammy at work

Daisy and Sammy at work

Less frequent are their forays out into the hay field to do their business and to see if anything interesting is creeping around out there.

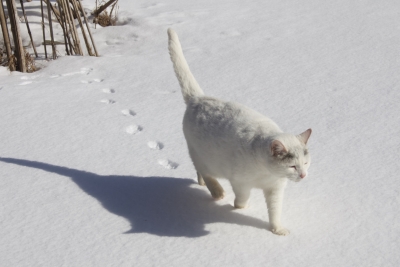
The small, padded footprints of my cat hasn’t beaten out paths. The cat more randomly explores out-of-the-way nooks and crannies. She also likes to steer clear of the dogs, who consider her just another small animal worth chasing.

Cat, Gracie at work

Gracie at work

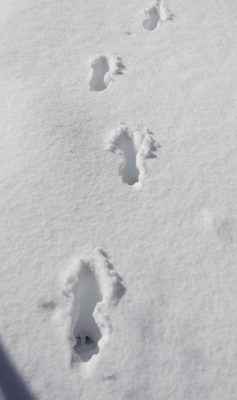
The distinctive footprints that I’m keeping the closest eye out for are those of rabbits and deer. Now, about when I typically delude myself that all danger has past, periods of warmer weather start coaxing rabbits to wander about and eye my trees and shrubs as food. Now is also when cottontail rabbits start reproducing, the first of up to five litters for this year, with a half dozen or so bunnies per litter! Very cute, but deadly to my plants.

  This winter, a couple of deep snows either brought deer here or displayed their abundance with tracks in the snow. For the rabbits, who feed on young trees and low branches, I sometimes make up a spray of white latex paint, water, eggs, cinnamon, and hot pepper. That needs to be re-applied about now. Traps I set out for them are thoroughly and safely (for the rabbits) buried in snow. Perhaps I’ll dig them out and re-set them.

The uncluttered expanse of snow makes it easy to see where I put my pruning tools as I prune the apples and pears. The snow also makes it easy to see where I drop the prunings.

Deer tracks in the snow

Deer tracks in the snow

And why do I care where I drop my prunings? Because I can then quickly look at them to see if any bark has been gnawed off those freshly cut branches. And what would gnaw bark off those freshly cut branches. Rabbits!

No sign of rabbits – yet, at least – on those prunings as well as on tracks in the snow. Thank you Gracie (my cat).

The dogs’ are supposed to be keeping deer at bay, but do so only if they are out and about when deer are around. This year I’ve been relying on Bobbex repellent, which I spray monthly on branches that would be within reach of the deer. So far, the sprays have been 100% effective even on trees with deer tracks right beside them in the snow.

Get Ready for Spring

I will be hosting a WEEDLESS GARDENING webinar on Monday, February 22nd for $35.  It will run from 7-8:30 pm EST and there will be plenty of opportunity to ask questions. For details, go to www.leereich.com/workshops. Or trust me, and go right to registration (required) at https://us02web.zoom.us/webinar/register/WN_WqSCBtOGTqqjGgbOHOuxfg 

MY VINES GET IN ORDER

Pruning vs. Training?

A long time ago, when I first started growing fruit trees and vines, I read a lot about the all-important pruning and training they require. But I couldn’t get clear on my head what exactly the difference was between “pruning” and “training.” I went on to learn that and a whole lot more about pruning (through books, as an ag researcher for Cornell University, and with practical experience), and eventually wrote my own book about pruning, hoping to present the techniques with more clarity and completeness than all the books I had read. Perhaps my book, The Pruning Book, does that.
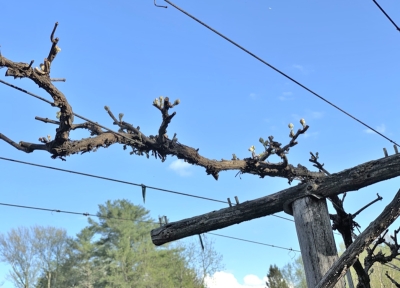
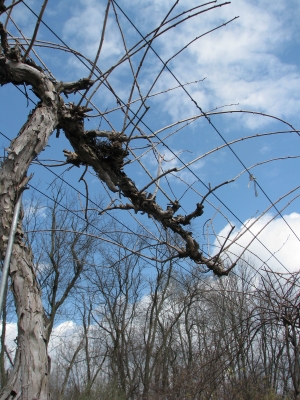
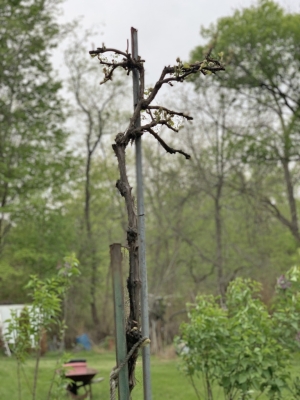
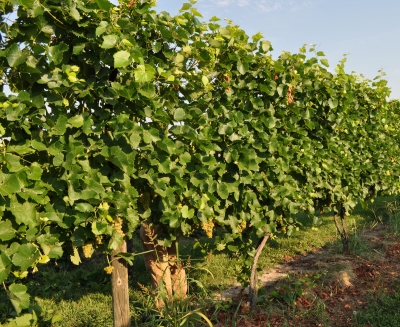
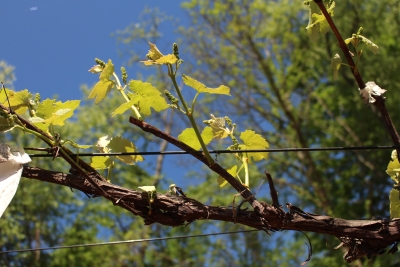
Grape vine in spring
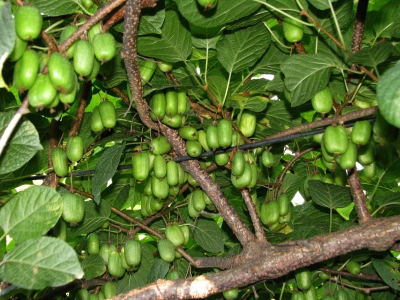
Okay, to answer my question of yore. “Training” is developing the young plant to a permanent framework that is sturdy and will always have its limbs bathed in light and air, and whose fruits hang within easy reach.

Kiwifruit within easy reach

Kiwifruit within easy reach

Training involves some pruning as well as coaxing stems to grow in certain directions. Once a fruit tree or vine’s training period ends, it generally only needs annual pruning.

Vine-y Training

I thought of all this today as I pruned hardy kiwifruit and grape vines. Both fruiting vines have been trained and are pruned similarly, with one slight variation that I’ll soon mention.

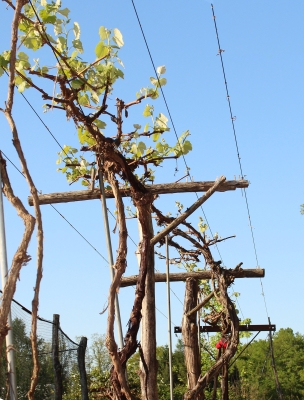
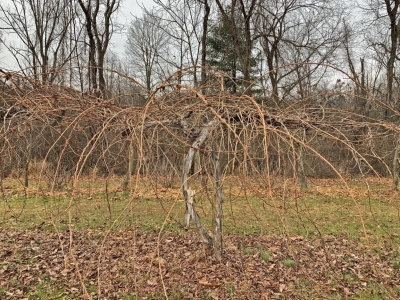
The kiwi and grape vines are trained as “double cordons” which are permanent arms sitting atop a trunk. They run in opposite directions along the middle wire of a 5-wire trellis, the wires parallel and supported about 6 feet of the ground on the cross-arms of T-posts. Each young vine was planted next to a metal or wooden stake to which the plant’s most vigorous stem was tied.

Once that trunk-to-be reached up to the middle wire, I tied it there and cut off all other stems. That trunk-to-be does, of course, keep growing; that new growth gets bent over and tied along the middle wire. Bending coaxes new buds to burst just beneath the bend, one of which is also bent over and trained along the middle wire in opposite direction to the first stem. Both these horizontal stems became the cordons, permanent arms of the plant. Growing off at right angles to the cordons are the fruiting shoots which, weighed down with their weight of fruit, drape onto the other wires.

Vine Maintenance

Today I’m maintenance pruning vines whose training period ended years ago. Maintenance pruning a mature fruiting vine keeps it bearing high quality fruit within easy reach year after year, all accomplished with a renewal method. That is, except for the trunk and the cordon, the vine is completely renewed with each year’s pruning.

I’ll admit it: A vine looks like a tangled mess before being pruned. But step by step, it  begins to take shape and make sense. Kiwi before pruning

Knowing how a plant bears fruit is important in maintenance pruning. Kiwi and grape vines bear on new shoots growing off one-year-old stems. Kiwis bear best if those one-year-old stems are about 18 inches long. Grape one-year-old stems can be left long or short, but for my method of training, I want each one about two buds long, which is just a few inches.

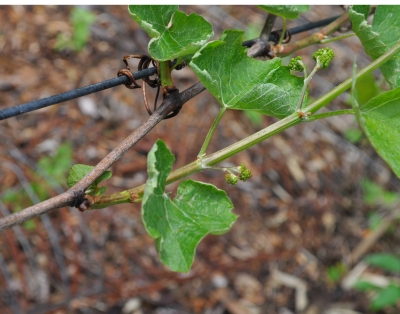
Fruiting grape shoots emerge from 1-yr-old stem

Fruiting grape shoots emerge from 1-yr-old stem

Step one is a no-brainer. The outermost wires are 4 feet apart so I lop all growth back to just beyond those wires. My tool of choice for this is a battery-powered hedge trimmer although pruning shears would also do the trick, except at a snail’s pace.First step in pruning

Step two is to remove excess growth, which does two things. It removes potential fruits so that more of the plant’s flavor-rich goodness gets funneled into those that remain, and it decongests the plant. For this step, I cut back all stems 2 years or older.

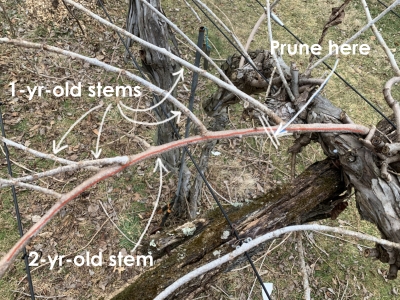
But wait! Two-year-old stems have one-year-old stems, the stems needed for bearing shoots, growing off of them. So rather than cut a two-year-old stem all the way back to its cordon, I cut it back to a one-year-old stem originating near the cordon. Some one-year-old stems also grow right from the cordon. The best one-year-old stems are those that are moderately vigorous and, of course, look healthy. Moderately vigorous stems, for grape or kiwi, are about pencil thick (if you can remember what a pencil looks like; if not, about 1/4” thick).

Kiwi stem and pruning detail

Kiwi stem and pruning detail

There will always be too many one-year-old stems for the plant to make tasty fruit. So I reduce the number of potential fruits by removing some of the one-year-old stems, enough to leave six to ten inches between them on each side of a cordon.

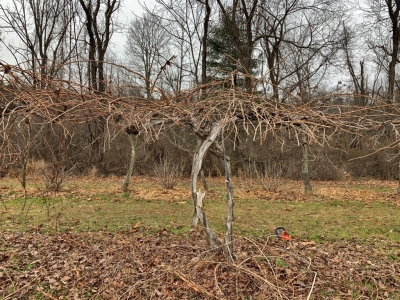
Pruned grapevine

Pruned grape vine

Pruned kiwi

Not finished yet. The final step is to shorten the fruiting shoots. For hardy kiwis, I cut them back to 18 to 24 inches long. For grapes, to about 2 buds or a few inches long.

Oh, one more thing to do: I prune off any new growth rising up from ground level or along the trunk lower than the cordons.

And one more thing: I step back to admire my handiwork. (Here is a video of me pruning a kiwi vine.)  

But What About Bushes?

You might have noticed, early on, that I wrote about pruning and training “fruit trees and vines.” What about blueberries, currants, gooseberries, elderberries, and other FRUITING BUSHES. Yes, they need annual pruning also. No, they do not need training. Although the plants are perennial, their stems are evanescent, all with a limited life. They are pruned by a renewal method — at ground level. All this and much, much more (pruning ornamental plants, houseplants; creating and caring for an espalier; how to scythe; etc) in The Pruning Book, of course.

PRUNING FOR BEAUTY, FUN, AND FLAVOR

Yew Love

Mundane as she may be, I love yew (not mispelled, but the common name for Taxus species, incidentally vocalized just like “you”). Hardy, green year ‘round, long-lived, and available in many shapes and sizes, what’s not to love? Perhaps that it’s so commonly planted, pruned in dot-dash designs to grace the foundations in front of so many homes.

Still, I love her. For one thing, Robin Hood’s bow was fashioned from a yew branch (English yew, T. baccata, in this case). Two other species — Pacific yew (T. brevifolia) and Canadian yew (T. canadensis) — are sources of taxol, and anti-cancer drug.
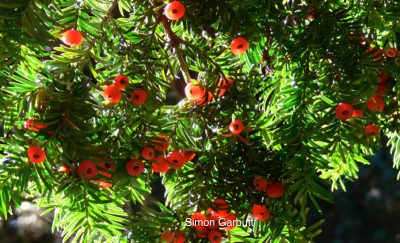
Yew berries
At a very young age, I became intimate with yew bushes surrounding our home’s front stoop, on which my brother and I would often play. Yew’s red berries, with an exposed dark seed in each of their centers, would give the effect of being stared at by so many eyes. Sometimes we’d squish out the red juice, carefully though, because we were repeatedly reminded that all parts of the plant are poisonous. (I’ve since learned that the red berries are not poisonous; but  other parts of the plant, including the seed within each red berry are poisonous.)

If yew has, for me, one major fault, it’s that deer eat it like candy. Interesting, since grazing on yew can kill a cow or a horse.

Mostly, I love yew because she takes to any and all types of pruning. My father once had a very overgrown yew hedge threatening to envelope his terrace. I suggested cutting the whole hedge down to stumps. Following an anxious few weeks when I thought my suggestion perhaps overly bold, green sprouts began to appear along the stump. A few years later the hedge was dense with leaves, and within bounds.

Although usually pruned as a bush, yew can be pruned as a tree. A trunk, once exposed and developed, has a pretty, reddish color. Deer sometimes take care of this job, chomping off all the stems they can reach to create a high-headed plant with a clear trunk. 

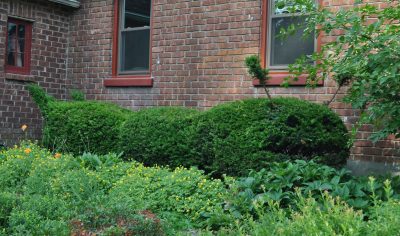
As an alternative to being pruned to dot-dash spheres and boxes, yew hedges can be pruned to fanciful shapes, including animals, or “cloud pruned” (niwaki, the Japanese method of pruning to cloud shapes). Many years ago, I followed the herd and planted some yews along the front foundation of my house, pruning them to one long dash. No dots.
Yew caterpillar
Since then, I’ve converted that hedge to a giant caterpillar and, more recently, tired of the caterpillar and attempted to cloud prune it, not with great success so far. (It’s my shortcoming as a sculptor, not the plant’s fault.) The goal in this case is not the kind of cloud pruning with clouds as balls of greenery perched on the ends of stems. My goal is to blend the four plants together as one billowy, soft cloud.

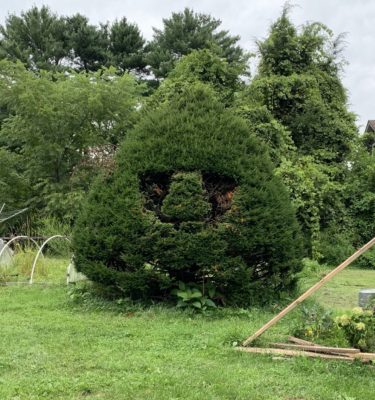
Facing my kitchen window is another yew, a large one that was planted way before I got here. Its previous caretaker, and up to recently I, have maintained it as a large, rounded cone. Last year I decided to make that rounded cone more interesting, copying a topiary in Britain. The design is in its early stages, awaiting some new growth this year to fill in bare stems now showing in interior of the bush.
Yew topiary in progress

Not Too Late for Peaches

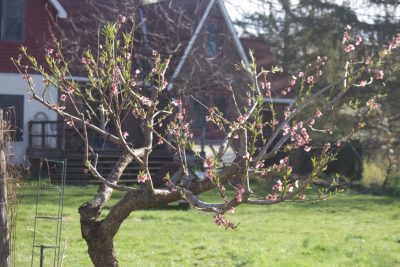
Moving on to more pragmatic pruning . . . peaches. No, it’s not too late. In fact, the ideal time to prune a peach tree is around bloom time, when healing is quick. This limits the chance of stem diseases, to which peaches are susceptible.

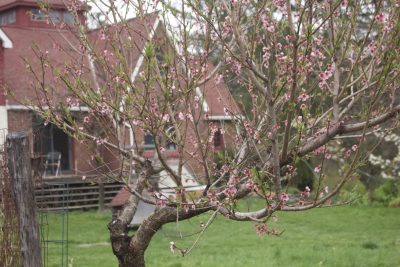
Peach tree, before pruning

Peach tree, before pruning

Peach trees need to be pruned more severely than other fruit trees. As with other fruit trees, the goals are to avoid branch congestion so remaining branches can be bathed in light and air, to plan for future harvests, and to reduce the crop — yes, you read that right — so that more energy and better quality can be pumped into remaining fruits.

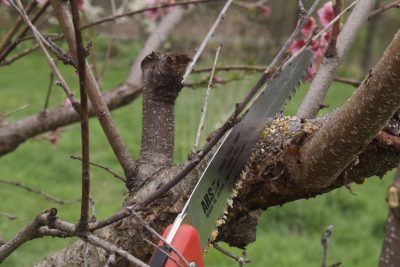
To begin, I approached my tree, loppers and pruning saw in hand, for some Sawing peach limbmajor cuts aimed at keeping the tree open to light and air.

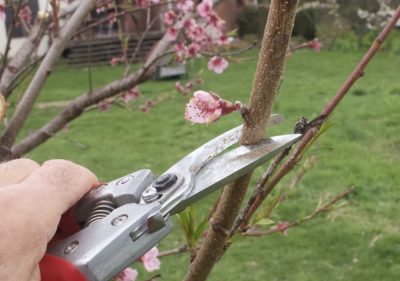
Peaches bear each season’s fruits on stems that grew the previous season. So next, with pruning shears, possibly the lopper, in hand, I went over the tree and shortened some stems. This coaxes buds along those stems to grow into new stems on which to hang next year’s peaches.
Shortening peach branch
And finally, I went over the tree with pruning shears, clipping off dead twigs as well as weak, downward growing stems. They can’t support large, juicy, sweet fruits.

Done. I stepped back and admired my work.
Peach tree after pruningAnd, of course, for more about pruning, there’s my book, The Pruning Book.

Grape Futures

My Rationale for Pruning so Late

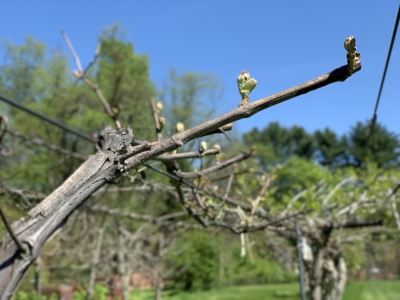
Today I put the finishing touches on pruning my grapevines. Yes, it’s late: The buds have already swollen and expanded into clusters of small leaves. But there’s “method in my madness,” or, at least, my tardiness.

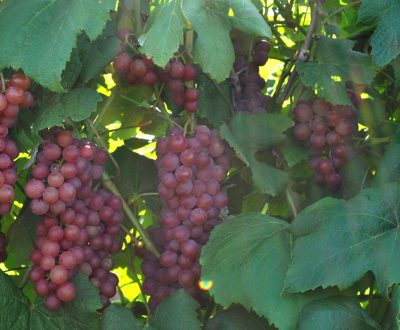
Vanessa grapes

Vanessa grapes

My vines often experience some winter damage, some varieties — New York Muscat, Reliance, and Vanessa, for instance — more than others. Waiting to prune until I see some green saves me from cutting off too many living canes and saving too many dead canes. In winter it’s not so easy to tell them apart.

So I do mostly rough pruning in winter, lopping back canes that have to go whether they’re living or dead. Canes also need to be shortened, even those that are to be eventually saved.

Which brings me to another reason I left the final pruning until today. Plants generally make their earliest growth in the season starting at the tips of shoots or canes. So when I shortened the remaining canes in winter, I didn’t cut them all the way back to their final length. Then if a late frost nips or kills early growth, it’s no problem. The canes are going to be shortened even further — today — to where buds were not as fully awake and susceptible to cold.

But waiting too, too long to prune can be problematic because those swollen buds flick off their resident canes with very little coaxing. Leave too much to prune this time of year and a lot of buds fly off as pruned canes are pulled down off the plant.

Why Prune? How?

A grapevine bears fruit near the bases of shoots that grow off one-year-old canes. Left to its own devices, the vine might grow 50 feet up into a tree, bear so heavily that it can’t provide sufficient energy to pump optimum flavor into each berry, and become a dark, dank, tangled mess of stems — perfect conditions for fungal diseases.
The goal of various methods of training and pruning grapes are the same: to leave a suitable number of canes conveniently positioned for harvest; to provide buds to grow into new, well-placed shoots for fruiting the following season; and to create a form that allows for good light and air circulation. As might be expected of a plant that’s been cultivated for thousands of years, many ways have been devised for training grapes.

The Four-arm Kniffin System is a kind of “cane pruning,” a traditional method of training in eastern U.S.. For support, a two-wire trellis, with one wire 6 feet and the other wire 3 feet above ground, is needed. The mature plant consists of a trunk with four canes growing from it, two trained in opposite directions along the upper wire and two similarly trained along the lower wire.

Pruning begins as four canes to carry the season’s fruits are selected. These canes should be moderately vigorous and originate close to the trunk and near the wires. With this year’s fruiting canes selected, plans for the following season’s crop are made by cutting back some stems to two buds each; these renewal spurs, as they are called, provide points of origin for new shoots (which will become fruiting canes in a year) near the two wires and on either side of the trunk.

Next, lop away all growth except for the four renewal spurs and the four saved canes. Finally, shorten each of the canes to about 6 ft. in length, leaving about 10 buds per cane (not counting bud clusters near the bases of the canes). This leaves ten times four, or 40, fruiting buds on the plant.

Many Methods with the Same Goal 

At the other extreme in pruning is “spur pruning,” where all that’s left is many 2-bud canes (now called “spurs”) from which grow fruiting shoots. “Head training” would be the most basic spur pruning, with the pruned vine left with nothing more than a trunk capped by a number of spurs.
A spur-pruned vine might instead sport a permanent trunk topped by two arms — permanent arms, called “cordons,” in this case — that run in opposite directions along a trellis wire.

Instead of leaving 4 long canes on which to bear fruit, many short, 2-bud canes are left along the cordons. To get the same number, 40, of fruiting shoots on a spur-pruned vine as on a Kniffen-pruned vine, twenty 2-bud spurs are left. All excess are cut away so that those that remain are 6 to 12 inches from their neighbors. Over time, some spurs will stretch, even after being shorted to 2 buds of one-year-old shoots, further away from the cordon. Lopping these back nearer the cordon puts them back in order.

Where to put all those fruiting shoots growing from the spurs? With “midwire” cordon training, cordons are trained along a wire at 3 foot height, and new shoots are trained upward by weaving them into 3 rows of wires strung at one foot above the cordon wire.
With “high-cordon” training, a trunk rising to about 6 feet is capped by two cordons trained in opposite directions along a wire. Fruiting shoots droop downward.High wire double cordon spur pruned grape
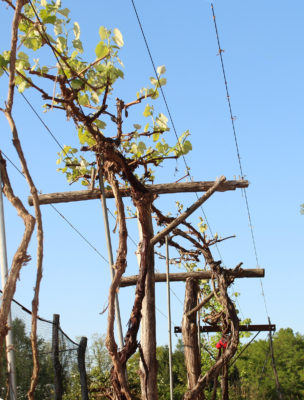
My grapes grow as high cordons, with a wrinkle; their fruiting shoots spread horizontally, rather than droop down. Wooden cross pieces provide this support on my arbor. Although this rigorous pruning puts off how soon the arbor offers relief from early summer sun, the arbor never becomes a tangled mess of stems and disease-ridden berries characteristic of many helter-skelter pruned grape arbors.

The trellis for my other high-cordons have two sets of wires running parallel on either side and one and three feet from the cordon’s wire. These wires provide a ledge on which fruiting shoots can rest, with clusters of grapes dangling just high enough for me to reach for easy harvest.

Fruit Tree Pruning

The Why, and the Easiest

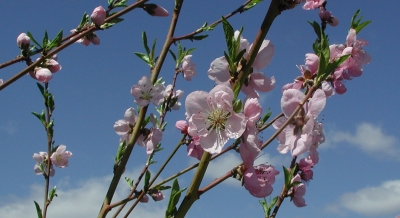
Following last week’s missive about pruning fruiting shrubs, I now move on to pruning my fruiting trees. Again, this is “dormant pruning.” Yes, even though the trees’ flower buds are about to burst or have already done so, their response will still, for a while longer, be that to dormant pruning.Peach blossomsI mentioned flower buds, so these plants I’m pruning are mature, bearing plants. The objectives and, hence, pruning of a young tree are another ball game. As is renovative pruning, which is the pruning of long-neglected trees.

Most fruit trees need to be pruned (correctly) every year. Annual pruning keeps these trees healthy and keeps fruit within reach. This pruning also promotes year after year of good harvests (some fruit trees gravitate toward alternating years of feast and famine) and — most important — makes for the most luscious fruits.

With that said, as I’ve pointed out previously, a number of fruit trees can get by with little or no pruning, nothing more than thinning out congested branches, cutting back diseased branches to healthy wood, and removing root sprouts.

Among these easiest to prune fruit trees are persimmon, pawpaw, juneberry, jujube, quince, and medlar. (These are some of the uncommonly delectable fruits covered in my book Uncommon Fruits for Every Garden.) Trees such as juneberry and medlar are quite ornamental, so I also lop off or back wayward branches on these trees to keep them looking pretty.

Fruits Borne on New Shoots and/or 1-Year-Stems

The most straightforward approach to pruning those fruit trees that absolutely benefit from annual (correct) pruning is by grouping them according to their fruit-bearing habits.

Figs, for instance, are unique in being able to bear fruits on new, growing shoots.

Figlets on new growth

Figlets on new growth

So the way to prune a fig tree — with caveats — is to lop back branches, which promotes new, fruit-bearing shoots. But not too, too far or the fruit will take too long to begin ripening. I prune branches of my potted or greenhouse Brown Turkey fig trees only as far back as their permanent trunks of a couple of feet or more in length.

Also, not necessarily all the stems should be pruned back on figs, because some varieties also — or only — bear fruit on one-year-old stems. My San Piero fig, for instance. I typically leave some one-year-old stems to bear an early crop, and drastically shorten others for the crop on new, growing shoots, which begins ripening later.

Peach and nectarine trees also bear on one-year-old stems, so are also pruned rather drastically.Peach blossoms I shorten some branches to promote new shoot growth for next year’s harvest. I also remove some branches completely to prevent congestion, allowing branches to bask in sunlight, and breezes to dance among them. When finished, you should be able to throw a cat (figuratively) through the branches without touching them.

Fruits Borne on 1-Year + Older Stems

Fruit trees that bear their fruits on one-year-old as well as on older wood are the next grouping, and include plum, apricot, sweet, and tart cherry. The clusters of flower buds on branches of these trees are known as spurs. (Be careful not to put too much general meaning in “spur” because the word parades under a number of guises in the world of gardening.)

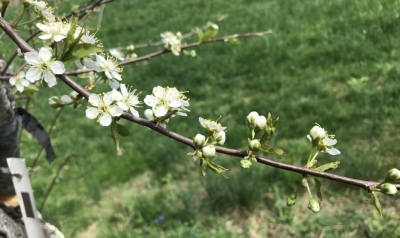
Clusters (spurs) of blossoms on plum

Clusters (spurs) of blossoms on plum

Pruning fruit trees removes some flower buds and potential fruits, which is all for the good because it lets the plant funnel more of its flavor-producing energy into fewer fruits so that those that remain are tastier and larger. Cherries, each of whose small fruits demand little energy, benefit the least of these fruits from such pruning so are the least pruned of the fruits in this category.

Apricot gets the most pruning in this group because its fruit spurs are borne on branches up to 3-years-old. That leaves plums, which get a moderate amount of pruning.

And Even Older Fruit-Bearing Stems

Apples and pears, the final grouping, are the most common tree fruits. Their individual branches each continue to bear flowers and fruits for many years.

Pear sput

Pear spur

Look at an older apple or pear branch and along it you see small, branching stems an inch or less long. These stem clusters are called — and I warned you — “spurs.”

Because their spurs live and bear for a decade or more, apple and pear trees require the least pruning of the fruit trees mentioned.

Then again, spurs do age, eventually becoming overcrowded and decrepit. So I thin out and shorten old spurs so that each has sufficient space and is periodically invigorated with stubby, new growth.

Thinning apple spurs

Thinning apple spurs

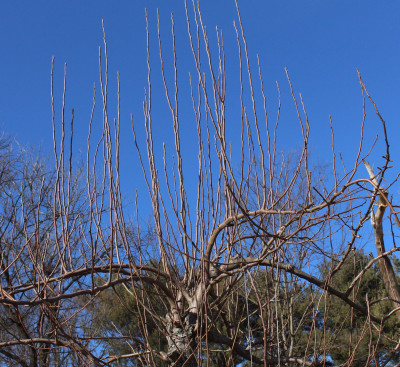
Exuberant, vertical shoots, known as watersprouts, often pop up on apple or pear branches. Mostly, they are unwanted because they’re not very fruitful and, left alone, will shade other parts of the tree. I cut these off right to their bases.

Pear watersprouts

Pear watersprouts

Even better is to grab hold of watersprouts when you first notice them growing and rip them off with a quick downward pull. “When noticed,” in contrast to all the pruning I just wrote about, is not during the dormant season.

Pruning Gets Hectic

Easiest to Prune Plants

Most of the pruning I do is “dormant pruning,” that is, pruning while plants are leafless. A few weeks ago, pruning was a relaxed affair with still-cold temperatures keeping the buds only slowly swelling in anticipation of upcoming growth. Then a few warm days kicked them into gear, making pruning more hectic.

Berries of July

Berries, later

Hecticness is little problem with those plants that are the easiest to prune because the work can be quick; other plants require my standing back with arms folded for some study before every few cuts.

Here on my farmden, easiest to prune plants include mature ornamental trees, shrubs, and vines, and even some fruits. Those fruits are American persimmon, pawpaw, and mulberry. They’re so easy because they can get by with little or no pruning.

Mostly what I do with the three fruit trees, every year or so, is to take a lopper or a saw and hack back . . . whoops, I mean “prune” . . . a tall limb back to a weaker growing, usually more horizontal, side branch. That’s to keep fruit within safe reach or not falling so far of its own accord that it splatters upon the ground. It also doesn’t leave a tree looking like a victim; done correctly and you hardly know that steel has been taken to the tree.

Easy, but Need Annual Pruning

Then there are easy-to-prune plants that do need annual pruning, but pruning them is as easy as following a recipe. Brambles — blackberries and raspberries — are counted in here. They all have perennial roots but their canes are biennial. That is, canes just grow the first year, then fruit and then die their second year.

The first step in pruning these plants, then, is to get down near ground level and cut all the two-year-old canes to the ground. These canes broadcast their age with peeling bark and an old and dead, or dying, appearance.

Gardeners telling tell me about their raspberry or blackberry patches make me cringe. “Patch” does conjure up an image of a cozy, cottage-y planting, but isn’t the way to grow these fruits if you want to make picking easy and limit disease problems. All of which leads to step two of this recipe.

Red or yellow raspberries spread to create a patch by sending up shoots via underground runners; black raspberries and blackberries do so by arching their long canes to the ground where they take root and make new plants. Too many new plants, in either case.
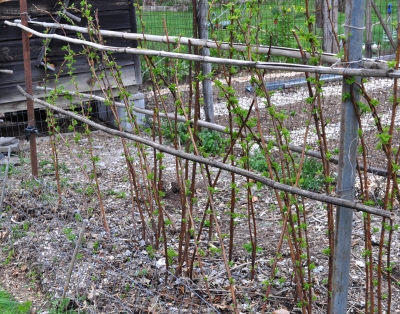
Red raspberry bed, pruned

Red raspberry bed, pruned

So I limit my red or yellow raspberries to a swath only a foot wide, and then within that swath remove enough plants so those that remain are a few inches apart.

With black raspberries and blackberries, I remove any plants closer than 3 to 5 feet apart (depending on their vigor) and then thin out remaining canes in each remaining clump to the fattest and healthiest-looking half-dozen.

One more step for these berries is to shorten red or yellow canes enough to keep them from flopping around. How much depends on how tall they are and how they are trellised, if at all. Black raspberries and blackberries fruit on side shoots; these need to be shortened to about 18 inches long.

(So-called everbearing — aka “fallbearing” — red or yellow raspberries can be pruned as described above. Or, just lop the whole planting to the ground late each fall, sacrificing midsummer harvest but still offering late summer and early fall berries.)

Also Easy

Two more fruits also fall into this easy-to-prune category. 

Lowbush blueberries, like brambles, bear on two-year-old (and, to a lesser extent, three-year-old stems). But they grow too many stems to selectively prune them.

So I take my hedge trimmer and every other year, or every third year, cut all stems to the ground.

Shearing lowbush blueberries

Shearing lowbush blueberries

There’s no crop the year they are pruned but dividing a planting in halves or thirds and pruning a different half or third every year circumvents that drawback.
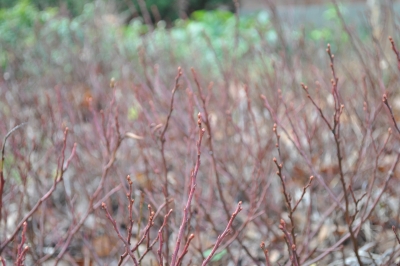
Lowbush blueberries, flower buds

Lowbush blueberries, flower buds

Blackcurrants bear in a similar manner to lowbush blueberries but their stems are few enough for selective pruning. I cut to the ground any 3-year-old stems as well as anything more than the best half-dozen 1-year-old stems.
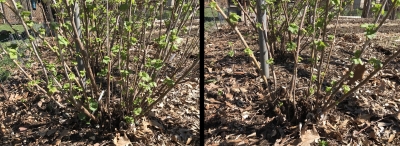
Blackcurrant, before & after pruning

Blackcurrant, before & after pruning

Just a Wee Bit More Difficult

From here, I move on to shrubs — only slightly more difficult to prune — that bear fruit on older wood, which determines which stems I cut out. 

Most gooseberries and redcurrants, for example, bear best on stems 2 and 3 years old. So the strategy here is the same as for brambles, except that the stems that I cut away are those that are 4-years-old. After that I remove excess new stems arising from ground level. When pruning is finished, the shrubs are left with about six each of one-, two-, and three-year-old stems.

Pruning blueberry bushes also follows the same strategy, except that since the bushes bear well on stems up to six-years-old, I prune away stems older than this and cut to the ground all except the healthiest 4 new stems.
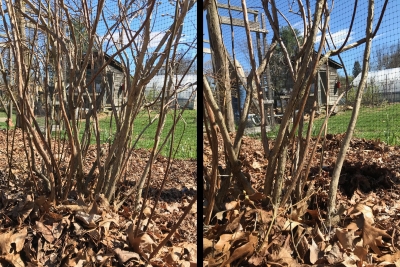
Blueberry before & after pruning

Blueberry before & after pruning

Now on to the fruit trees. Wait, I can’t do it now! I’ve got to run outside, grab my hand shears, lopper, and pocket saw, and do some pruning. Stay tuned next week for fruit tree pruning.
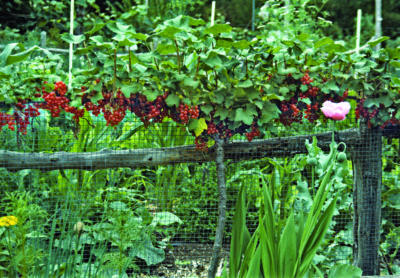
Redcurrant espalier

Redcurrant espalier. How to prune it? Some other time.

For more pruning detail, more plants, and more techniques, see my book The Pruning Book.
Late Winter Sap, Pruning, and Planting

The Sap is Flowing

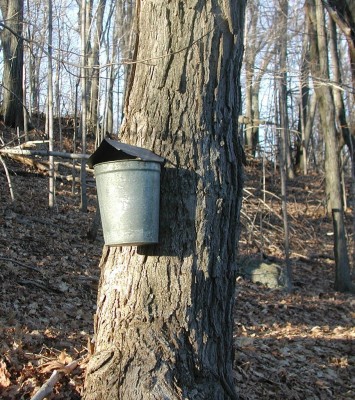
In past years, now is when we would always hope to make enough maple syrup to last until the following year at about this time. Maple syrup consumption has dropped dramatically, leaving me with quite a backlog of the stuff. So trees haven’t been tapped for the past few years.Tapping a maple tree

Not that we ever made that much maple syrup. Four tapped trees always produced sufficient sap for a year’s worth of syrup. It had to, because that’s how many spiles (taps) and buckets we own.

Our operation was nothing like what I came upon a couple of weeks ago cross-country skiing in the woods of northern Vermont. All of a sudden tubes had appeared in the pristine, white wilderness. Tubes everywhere! Baby blue plastic tubes, black plastic tubes, interlocking connectors, everything neatly wired into position at chest height and thoughtfully out of the way of any skiers enjoying the woods.

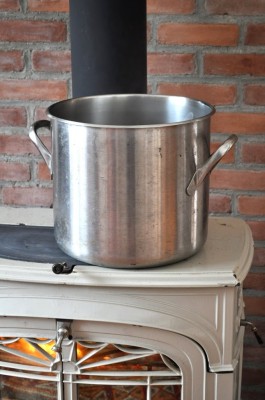
Processing the sap here at home is done quite differently from those commercial operations. Our low-tech approach was to merely add each day’s “catch” from the four buckets to a big stock pot sitting on the woodstove. The woodstove is stoked pretty much continuously this time of year, so the sap was always evaporating, with the added bonus of humidifying the house.Boiling maple sap

I see a few eyebrows going up. Sticky walls and ceiling are what comes to some minds upon the mention of cooking down maple sap indoors. Well, that’s usually myth. Sticky walls and ceiling only result when the sap is in an active boil and bubbles bursting on the surface of the liquid sent little droplets of sugar water into the air and onto walls and ceilings. But until the final stage of our sap-making, the sap was just slowly evaporating. The vapor given off by slowly evaporating, simmering, or boiling a solution of any sugar and water is nothing more than water vapor. That’s why the maple sugar becomes concentrated in the remaining liquid.

In those final stages of concentration, with much reduced liquid volume, the liquid can indeed reach an active boil. The pot of liquid announces that it’s nearing that stage by starting to gurgle like a baby, at which point it needs to be watched closely, mostly so that the syrup doesn’t get too concentrated or burn. The finish point is when the temperature of the liquid reaches about 219 degrees F.

Another Maple, Not So Good

Someone contacted me to say that, “The squirrels were chewing on Norway maple tree last week and sap was seen dripping down,” then went on to ask if that meant it was too late to prune. Perhaps the squirrels were enjoying some of the sweet sap. Yes, you can tap and boil into syrup the sap of all kinds of maples; I’ve tapped and made syrup from silver maple, red maple, boxelder, and, of course, sugar maple.

Getting back the pruning… It’s not at all too late. It’s fine to “dormant” prune any plants up until the time when they unfurl their leaves in spring.

Another good question might be: Why not just cut the Norway maple down to the ground? The trees are invasive and displacing our sugar maples, they have poor fall color, and they create lugubrious shade beneath which grass and much else can’t grow. Mostly, people keep these trees because they are already in place and full grown.

Pea Planting, Almost

Despite snow covering the ground on the ground, I’m still planning to scratch open a furrow and plant peas – the first outdoor planting of the season – on April 1st.

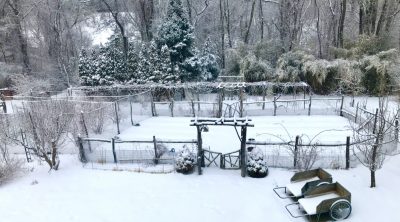
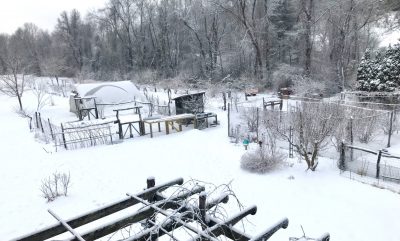
Given the white blanket, which may not be around by the time you read these words, some people might think me crazed for planting peas so soon. Then again, those people who insist on getting their peas in the ground before St. Patrick’s Day might think I’m dragging my heals.Winter scene, N garden

Here are the facts: Peas grow best at cool temperatures, making early sowing a must. The seeds will sprout whenever the soil temperature is above 40 degrees F. But St. Patrick’s Day can’t be the universally best time to sow peas because different places experience different climates on that date. It’s probably too late in Florida, too early in Maine, and just right in Ireland.

So call me a fool if you like, but I’m still planning on an April Fools Day planting for my peas. I’ll wait a few more days if the ground is frozen or covered with snow. Just a few days though, because things move quickly this time of year.Winter scene, looking south

Read the Book, Bro’

To Prune or Not To Prune, That is the . . .

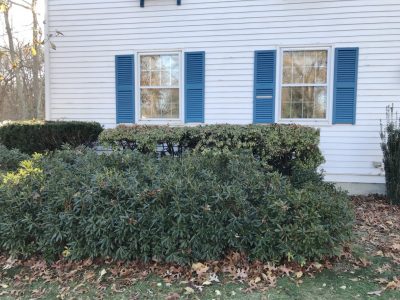
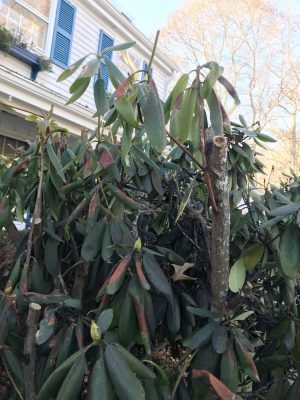
So I visited my brother and his family for Thanksgiving. As usual, we walked around his yard to look at his plantings. As usual, he asked my advice, this time about pruning. (As usual, he didn’t want to consult a copy of my book, The Pruning Book, which I had given him a few years ago. “Why read it, when I can just ask you?!” he says.)My brother's mystery shrub

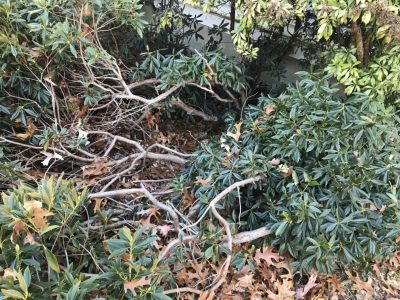
He was considering taking blades to a row of handsome, evergreen shrubs along the front of his house. Over the years, the lengthening branches had sprawled out to encroach upon the bordering lawn, in some places leaving exposed bare stems. He questioned whether new growth would sprout if he lopped all those sprawling stems back to near the roots.Close up of mystery shrub stems

But what was the plant? I had an excuse, admittedly rather lame, for not knowing it: I learned all my ornamentals in Wisconsin where not many broadleaf evergreens are hardy. No matter. Sometimes you can figure out how to prune an unknown plant by just studying its growth habit.

Many evergreens, including most pines, Douglas firs, rosemary, and some rhododendrons, will not sprout new growth if cut back to bare old wood. (At the other extreme are boxwoods and yews, which sprout all over the place no matter how they are cut back.)

I suggested going ahead with drastic pruning of the unknown shrub. My confidence came from seeing many young sprouts emerging from the old stems right near where they emerged from the ground and then bent over from their own weight. Hormones within plants promote sprouting of vigorous, new shoots near the high point of a stem wherever it bends over. Pruning a stem back likewise promotes sprouting right near the cut.

I Pass Judgement

Looking across the front path, bro’ next asked me how I liked the pruning job he’d done on his rhododendrons. Hmmm, pretty good.My brother's pruned rhododendron

As often happens with rhododendrons, they are planted near a home and then too often grow so large as to swallow up windows, even the whole side of the home. His had done so, and he had pruned stems back to the height he wanted.

Two problems with this pruning. First, as noted above, when a stem is pruned back, most regrowth, and the most vigorous regrowth, occurs just below the cut. So although he cut the plant down to size, he should expect it to start growing back up to its previous size quickly.

The other problem with this pruning is that it leaves the plant looking butchered, large wounds gaping out atop thick stems whose upward mobility has been abruptly stopped. The best pruning jobs are ones where a plant looks nice without looking as if it has even been pruned.

My approach would have been to make a few cuts of the largest stems down in the interior of the shrub, where the stems originated. The largest stems would also be the tallest ones, so such cuts would be effective in lowering the plant. If too many need removal at once, the operation could be spread over 2 or 3 years. Then the pruning cuts would hardly be noticed, and letting light down low among the stems would promote healthy new growth starting low.

With all that said, my brother’s rhodies didn’t look too bad — and he has the opportunity over the next year or two to make my suggested cuts. Lucky for him, his rhodie was not one of the few that are reluctant to make new sprouts in lopped back older wood.

Moving On

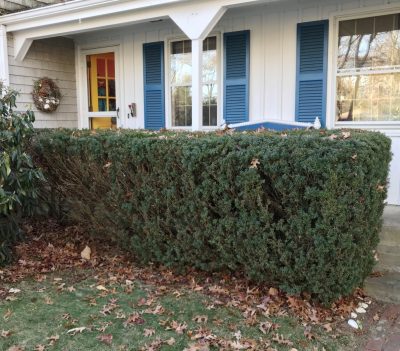
Once I get started pruning, it’s sometimes hard to stop. As I looked at his yew shrubs along another part of his house, I suggested paring down the size of that rectangular block of greenery.My brother's yew hedge

Pruning yew is easy. Since it resprouts up and down stems no matter how severely it’s cut, you can do almost anything to it. His large hedge could even be cut down to stumps to begin life anew — quickly, because it has an established root system.

Most important when reducing the size of the hedge, no matter how it’s cut, is to reduce the whole hedge to a size smaller than finally desired. When maintenance trimming a shrub with hedge shears, trimming is generally further out from where the newest shoots began their growth for the season. That’s why hedges grow larger over time, unless they’re periodically lopped back more drastically, which doesn’t leave them looking that good until those cuts are covered by new growth.

And the Mystery Shrub is  . . . ?

I don’t feel so at a loss at not being able to identify my brother’s mystery shrub: I sent a photo of it to a few experts, none of whom could identify it.

Doing Good with Saw and Lopper

Fruitful Pruning

To begin, I gave the bush in front of me a once over, eyeing it from top to bottom and assuring it that the next few minutes would be all to its good. It was time for my blueberries’ annual pruning, the goals of which were to keep them youthful (the stems, at least), fecund, and healthy.

Blueberries galore

Blueberries galore

I peered in at the base of the plant, eyeing now the thickest stems. Blueberry bushes bear best on stems up to 6 years old, so the next move was to lop or saw any of these stems — usually only 3 or 4 of them, more on a neglected plant — as low as possible.

Sammy & me, pruning blueberries

Sammy & me, pruning blueberries

To keep track of the ages of individual stems, I mark off the age of them each year with a Sharpie. Just kidding! The thickest ones are the oldest ones, and 6-year-old stems are generally an inch or more in diameter on healthy bushes.

Removing those stems that are over the hill frees up space for younger stems to develop. Each year blueberry bushes send up new sprouts from ground level, usually a few too many of them. They need to be thinned out so they don’t crowd each other as they age. I leave a half dozen or so of the most vigorous new sprouts, lopping all others to the ground.

That’s pretty much all there is to pruning a blueberry bush. With the very oldest and some of the very youngest stems cut to the ground, the bulk of pruning the bush is finished.

Blueberry bush, before & after pruning

Blueberry bush, before & after pruning

  I’ll also snip off any dead stems, remove a branch here and there where they are congested, and shorten any stems that will arch to the ground when laden with fruit.

That’s it. Finished, except to step back and admire my handiwork.

And Now, For Other Shrubs

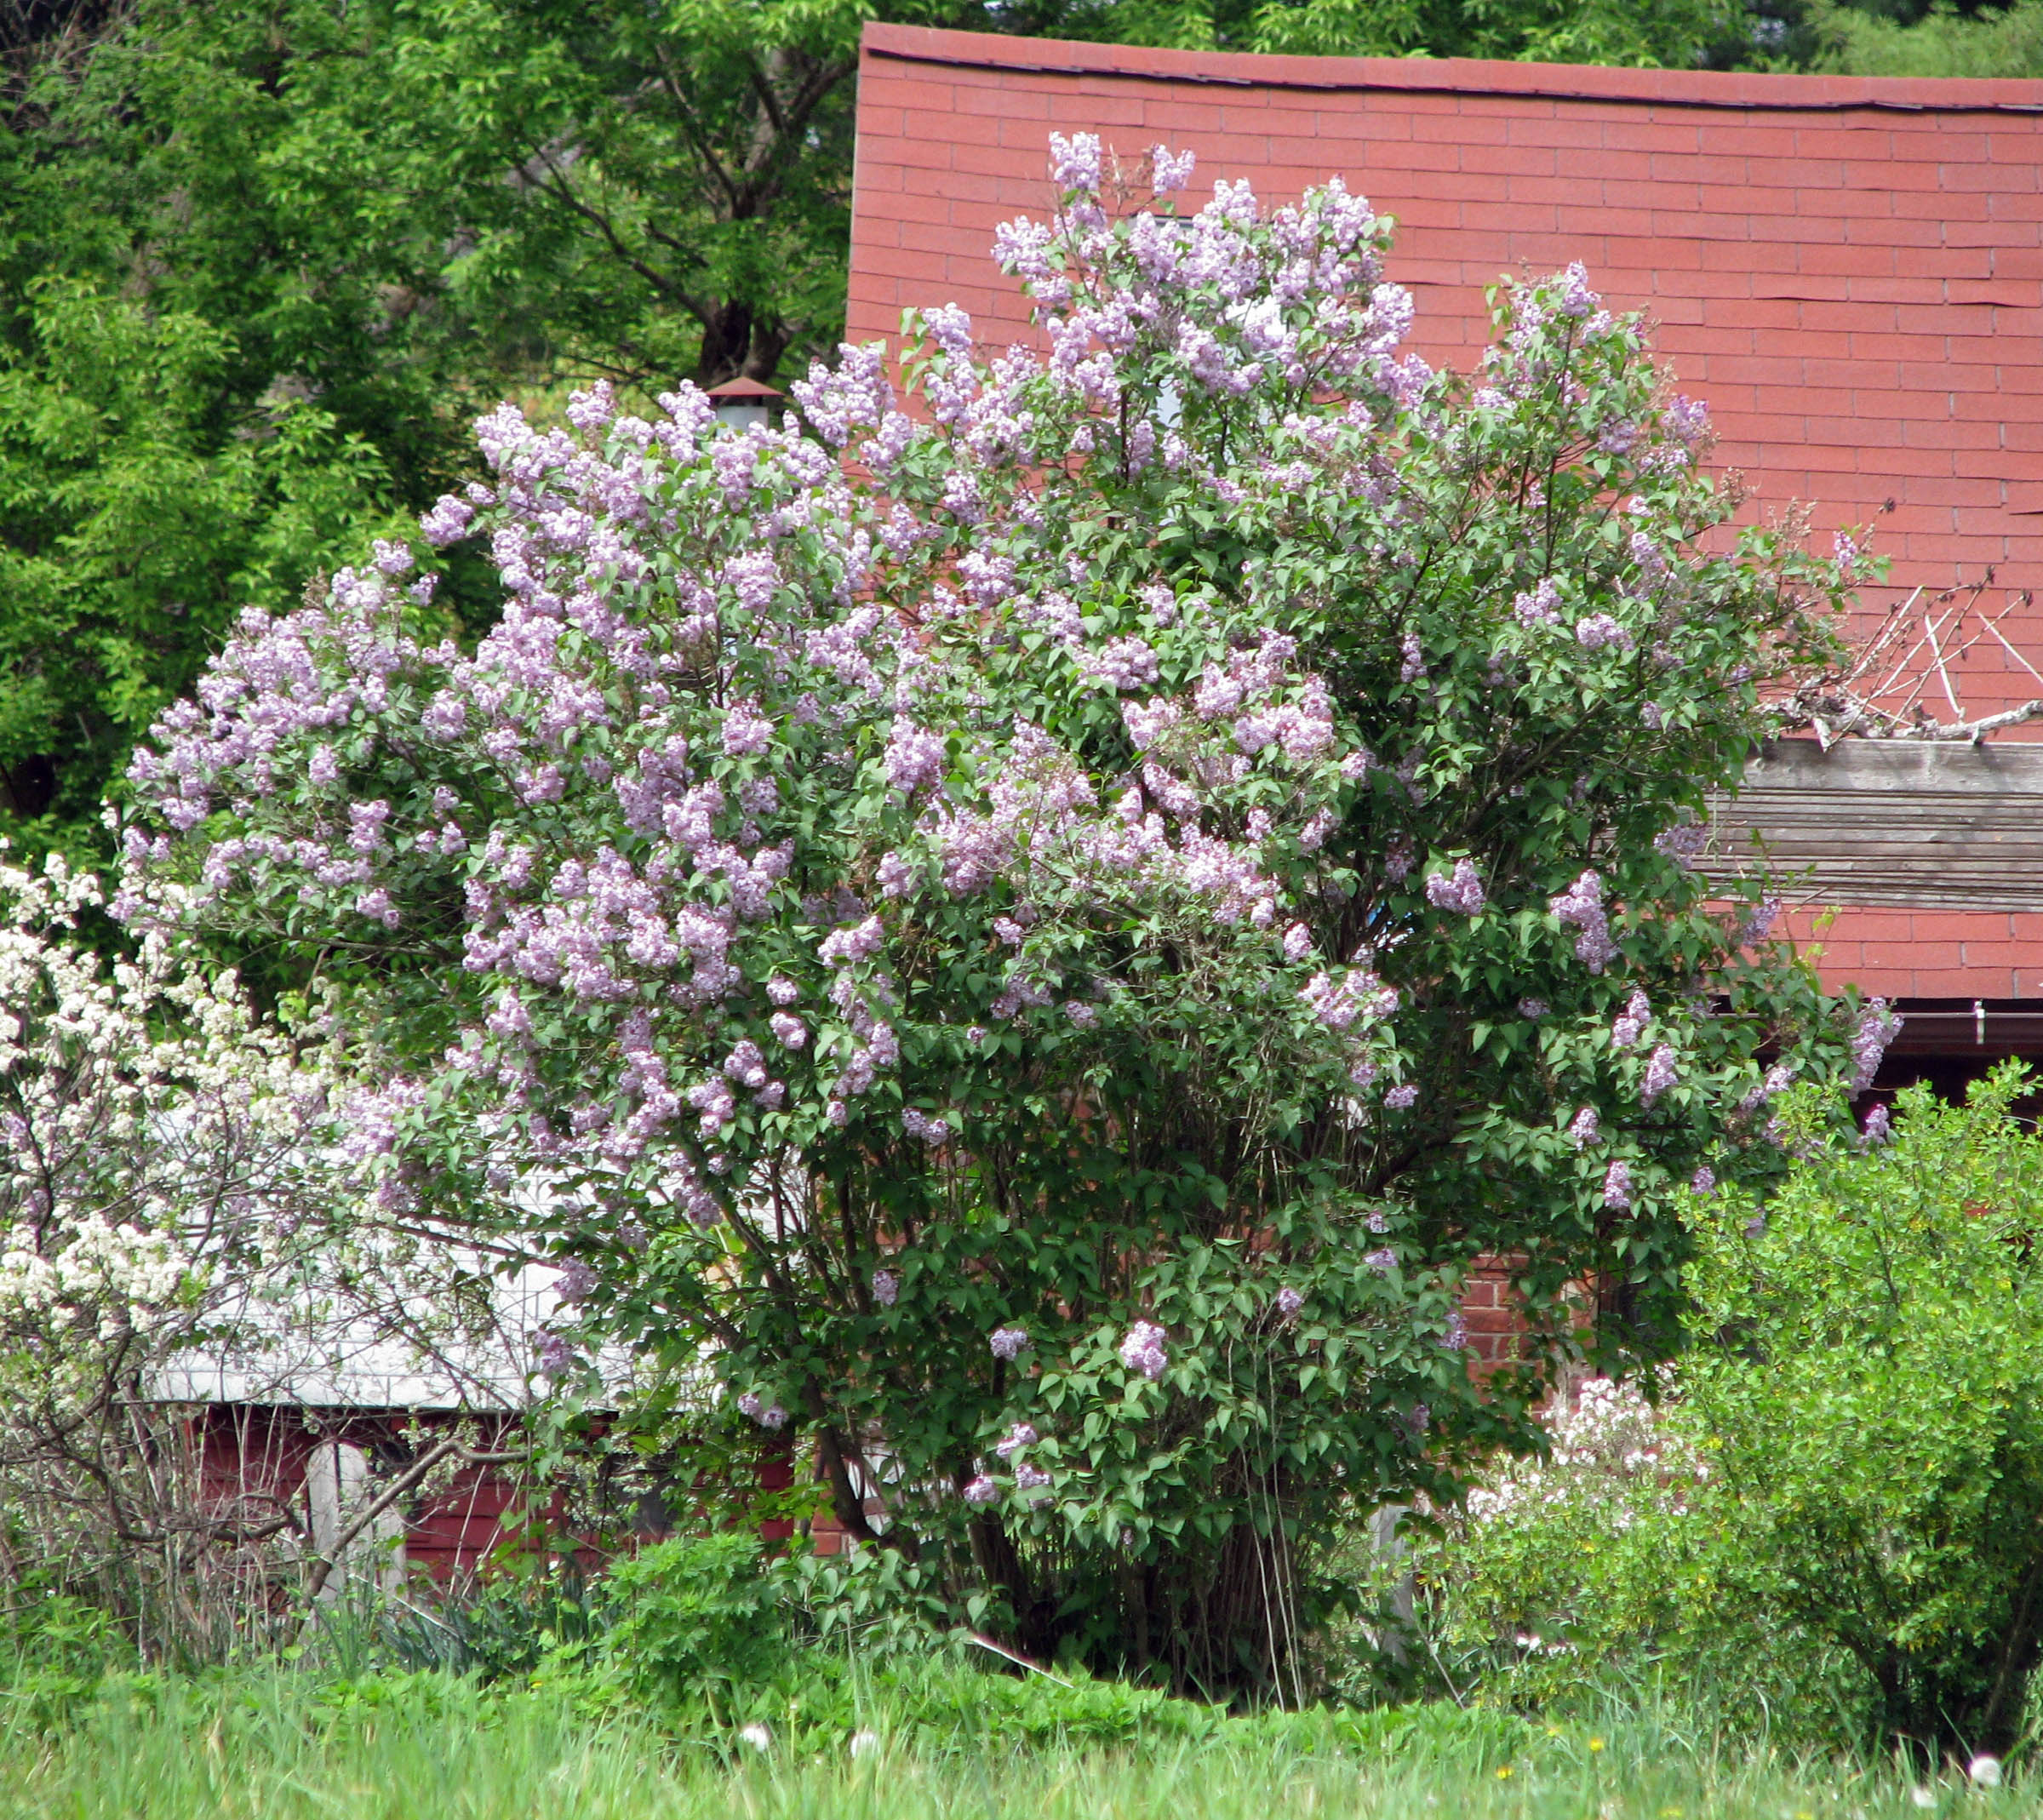
The same pruning done on blueberry could, in essence, be applied to lilac,Lilac in flower forsythia, mockorange, hydrangea, and any other informal shrub. This technique is known as rejuvenation pruning because, over time, the above ground portion of the shrub is annually rejuvenated. In the case of blueberry, the roots live unfettered year after year but the bush never sports stems more than 6 years old. A perennially youthful blueberry bush can go on like this, bearing well, for decades like this.

Not all shrubs perform best on stems up to 6 years old. Some, such as kerria, snowberry, rambling roses, and summer-bearing raspberries perform best on 1-year-old stems. So every year those 1-year-old stems are lopped to the ground and the youngest stems are thinned out.

Some shrubs, such as butterfly bush, everbearing raspberries, and red twigged dogwood, perform best on new stems. In this case, the whole plant gets lopped to ground level each year. (Everbearing raspberries actually bear on both new stems and on 1-year-old stems, so could be pruned as in the previous paragraph. That takes more time but does yield a midsummer crop on the 1-year-old stems and a late summer and fall crop on the new stems.)

At the other end of the spectrum in shrub pruning are witch hazel, tree peonyTree peony blossoms, rose-of-sharon, climbing roses, and flowering quince. These shrubs are among those that perform well year after year on the same old, and always growing older, stems. They also grow few or no suckers each year. The upshot is that thesis shrubs are the easiest to prune: Don’t.

I detail the ages of stems that are “keepers” for every shrub, plus other details in pruning all kinds of plants, in my book The Pruning Book.
Getting Formal

All this pruning refers to informal shrubs. For formal shrubs, such as the privet hedge near one edge of my yard, I put aside the lopper, pruning shears, and pruning saw, and get out the hedge trimmer. Shearing all the youngest twigs, working, this time, higher in the bushes rather than down near ground level, elicits repeated branching which results in dense growth.

To keep this formal hedge clothed from head to toe in leaves, I keep the row of plants narrower towards their upper portions. This lets sunlight beam down on the shrubs from top to bottom.