Posts

The Season Begins

One More Thing? Ha!

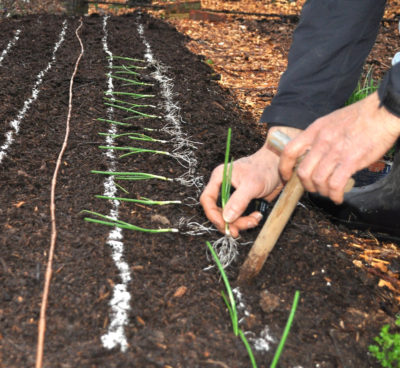
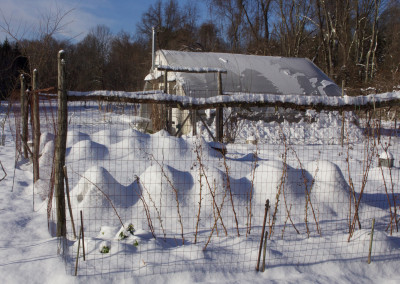
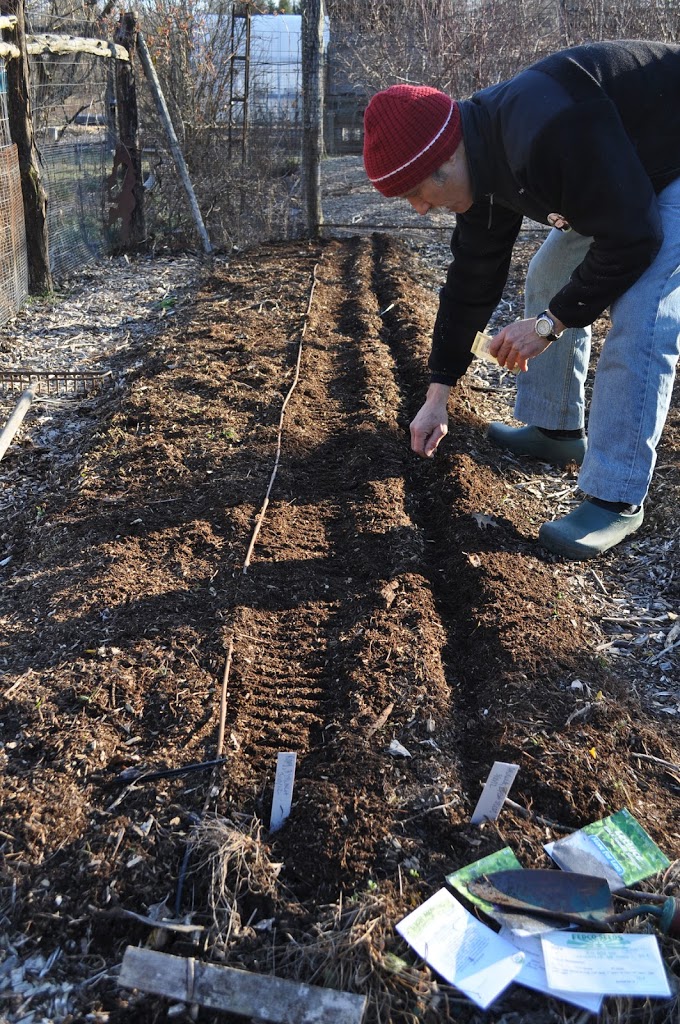
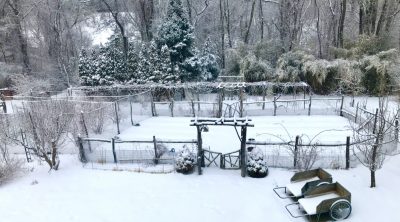
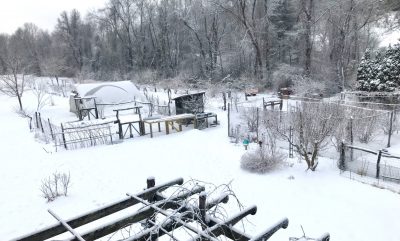
I have one more important task to do before planting any vegetables this spring, and that is the annual mapping out of the garden, something I generally put off as long as possible.

In theory, mapping out my garden should be easy. I “rotate” what I plant in each bed so that no vegetable, or any of its relatives, grows in a given bed more frequently than every 3 years. Garden planning on paperIn practice, I mostly pay attention to rotation of plants most susceptible to diseases, which are cabbage and its kin (all in the Brassicaceae), cucumber and its kin (Cucurbitaceae), tomato and its kin (Solanaceae), beans and peas (Fabaceae), and corn (sweet or pop, in the Gramineae).

Crop rotation prevents buildup of disease pests that overwinter in the ground; removing host plants eventually starves them out. (Insect pest are more mobile, so crop rotation has less impact except in very large plantings.) So one year a bed might be home to cucumbers, melons or squashes. The next year that bed might host cabbage, broccoli, kale, Brussels sprouts, or cauliflower. Then tomatoes, peppers, potatoes, or eggplants. And finally, the fourth year, back to cucumbers. Simple enough.

It would also be nice to rotate carrots and other root vegetables with leafy vegetables, such as lettuce, and fruiting vegetables, such as tomatoes. My garden's beds
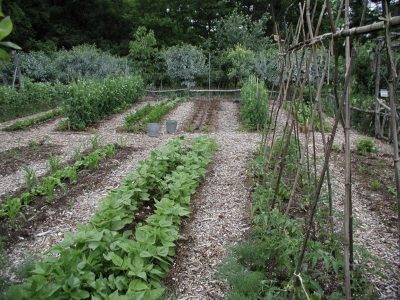
Root, leafy, and fruiting vegetables have somewhat different nutrient needs, so in the ideal garden these crops are rotated to make best use of soil nutrients.

And I do like to get the most out of my garden and confuse potential insect pests by grouping different kinds of plants within a bed.

Are you beginning to understand why I put off committing my garden plan to paper each spring?

Pea Problem(s)

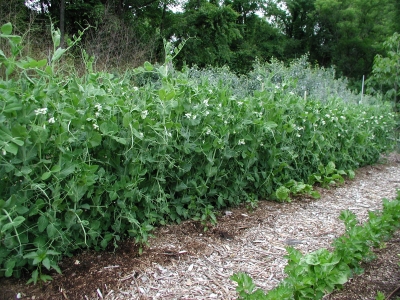
Peas present one more wrinkle in my vegetable garden planning. 
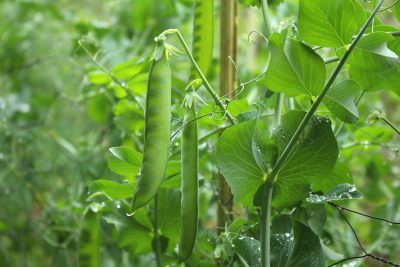
A few years ago they stopped bearing well, collapsing with yellowing foliage not long after they bore their first pods.

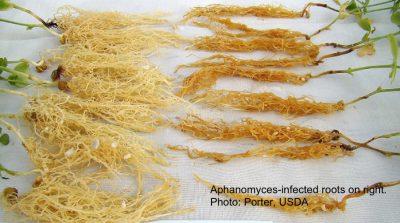
Further investigation has narrowed the problem to – probably – one of two diseases: fusarium or aphanomyces. Both, unfortunately, are long-lived in the soil so that a 3 year rotation does nothing to keep them in check.

Fortunately, I have two vegetable gardens. So, for the past few years I have banned peas from my north garden, planting them only in my south garden, in which they do get rotated. After a few more years, I’ll move the pea show to my north garden and leave my south garden pea-less. I’ve also been planting the varieties Green Arrow and Little Marvel, both of which are resistant to fusarium, at least.

Unfortunately, the problem is more likely aphanomyces, for which resistant varieties do not exist. Aphanomyces is a water mold, so thrives under wet conditions. So my tack will also be to keep any peas planted in my vegetable garden on the dry side, not even turning on the drip irrigation in those beds.

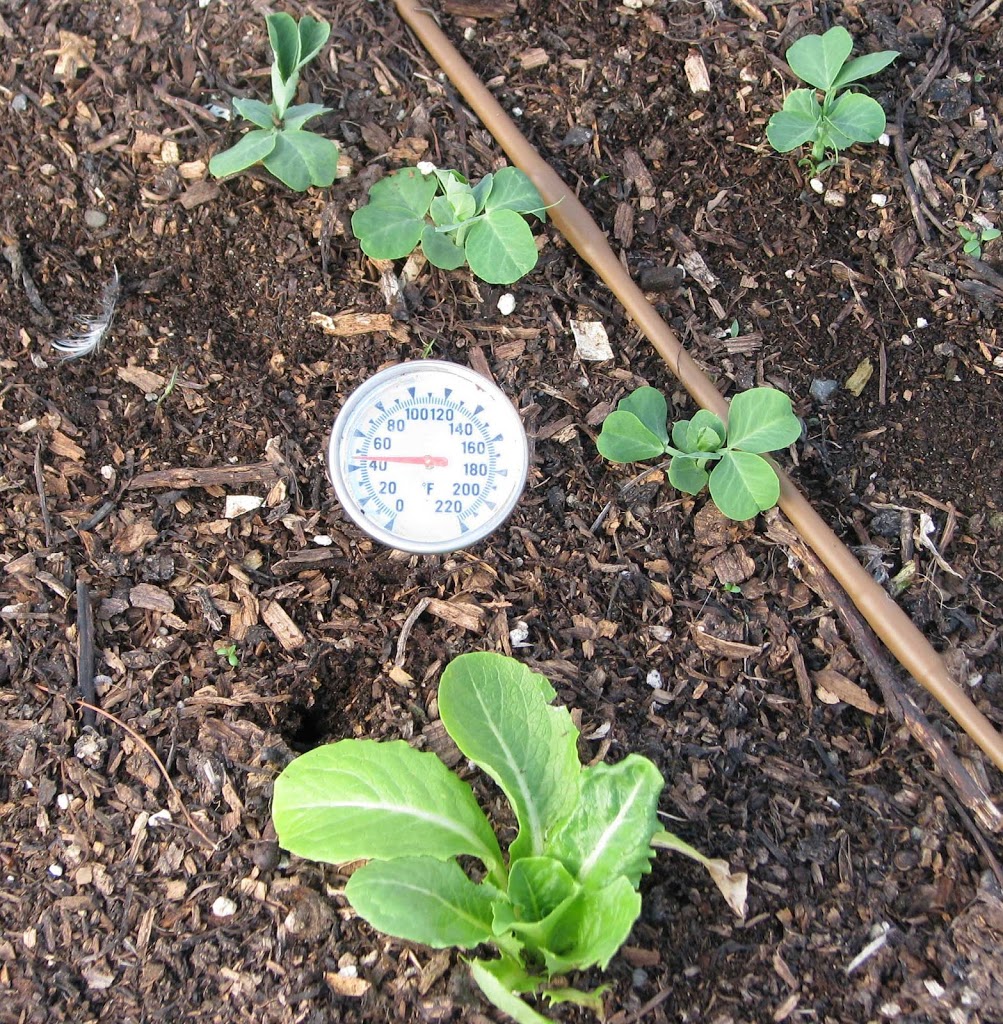
I’ll also be checking the plants more closely for symptoms. Plants infected by fusarium have a red discoloration to their roots. Fusarium-infected pea roots
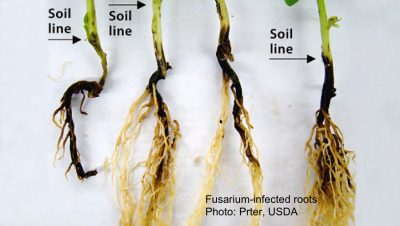
Plants infected by aphanomyces have fewer branch roots and what roots there are lack the plump, white appearance of healthy roots.
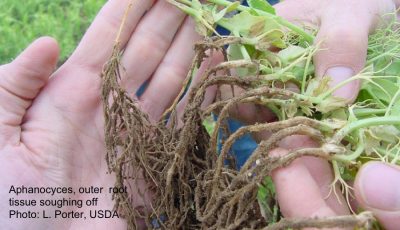
Pea roots with aphanomycesPea roots with aphanomyces

Pea Solution?

I’m also testing out root drenches with compost tea for my peas.

Yes, yes, I know I have dissed compost tea in the past. Mostly, its benefits, if any, have been overstated. But compost microbes have more chance of surviving in the dark, moist, nutrient-rich environment of the soil than on a leaf, where the stuff is often sprayed. I’m drenching the soil with the tea, not just giving the surface a spray, as usually recommended, so a lot more bacteria, fungi and friends are finding their way down there.

I see no reason (and research does not support) of going to the trouble of making the usual compost tea, which is aerated and might be fortified with such things as molasses. Compost tea, quick mixMy tea is nothing more than the liquid strained from compost soaked in water, then applied with a watering can at the base of the pea plants.

I’ve done this for a couple of seasons but have nothing definite to report yet. The hard part is sacrificing a bed as a control. Perhaps this year.

Late Winter Sap, Pruning, and Planting

The Sap is Flowing

In past years, now is when we would always hope to make enough maple syrup to last until the following year at about this time. Maple syrup consumption has dropped dramatically, leaving me with quite a backlog of the stuff. So trees haven’t been tapped for the past few years.Tapping a maple tree

Not that we ever made that much maple syrup. Four tapped trees always produced sufficient sap for a year’s worth of syrup. It had to, because that’s how many spiles (taps) and buckets we own.

Our operation was nothing like what I came upon a couple of weeks ago cross-country skiing in the woods of northern Vermont. All of a sudden tubes had appeared in the pristine, white wilderness. Tubes everywhere! Baby blue plastic tubes, black plastic tubes, interlocking connectors, everything neatly wired into position at chest height and thoughtfully out of the way of any skiers enjoying the woods.

Processing the sap here at home is done quite differently from those commercial operations. Our low-tech approach was to merely add each day’s “catch” from the four buckets to a big stock pot sitting on the woodstove. The woodstove is stoked pretty much continuously this time of year, so the sap was always evaporating, with the added bonus of humidifying the house.Boiling maple sap

I see a few eyebrows going up. Sticky walls and ceiling are what comes to some minds upon the mention of cooking down maple sap indoors. Well, that’s usually myth. Sticky walls and ceiling only result when the sap is in an active boil and bubbles bursting on the surface of the liquid sent little droplets of sugar water into the air and onto walls and ceilings. But until the final stage of our sap-making, the sap was just slowly evaporating. The vapor given off by slowly evaporating, simmering, or boiling a solution of any sugar and water is nothing more than water vapor. That’s why the maple sugar becomes concentrated in the remaining liquid.

In those final stages of concentration, with much reduced liquid volume, the liquid can indeed reach an active boil. The pot of liquid announces that it’s nearing that stage by starting to gurgle like a baby, at which point it needs to be watched closely, mostly so that the syrup doesn’t get too concentrated or burn. The finish point is when the temperature of the liquid reaches about 219 degrees F.

Another Maple, Not So Good

Someone contacted me to say that, “The squirrels were chewing on Norway maple tree last week and sap was seen dripping down,” then went on to ask if that meant it was too late to prune. Perhaps the squirrels were enjoying some of the sweet sap. Yes, you can tap and boil into syrup the sap of all kinds of maples; I’ve tapped and made syrup from silver maple, red maple, boxelder, and, of course, sugar maple.

Getting back the pruning… It’s not at all too late. It’s fine to “dormant” prune any plants up until the time when they unfurl their leaves in spring.

Another good question might be: Why not just cut the Norway maple down to the ground? The trees are invasive and displacing our sugar maples, they have poor fall color, and they create lugubrious shade beneath which grass and much else can’t grow. Mostly, people keep these trees because they are already in place and full grown.

Pea Planting, Almost

Despite snow covering the ground on the ground, I’m still planning to scratch open a furrow and plant peas – the first outdoor planting of the season – on April 1st.

Given the white blanket, which may not be around by the time you read these words, some people might think me crazed for planting peas so soon. Then again, those people who insist on getting their peas in the ground before St. Patrick’s Day might think I’m dragging my heals.Winter scene, N garden

Here are the facts: Peas grow best at cool temperatures, making early sowing a must. The seeds will sprout whenever the soil temperature is above 40 degrees F. But St. Patrick’s Day can’t be the universally best time to sow peas because different places experience different climates on that date. It’s probably too late in Florida, too early in Maine, and just right in Ireland.

So call me a fool if you like, but I’m still planning on an April Fools Day planting for my peas. I’ll wait a few more days if the ground is frozen or covered with snow. Just a few days though, because things move quickly this time of year.Winter scene, looking south

And The Season Begins . . .


St. Patty’s Day Passed; No Matter

Uh oh! St. Patrick’s Day was way passed and I hadn’t planted my peas. No matter. St. Patty’s Day is the right time to plant peas in Virginia, southern Missouri, and other similar climates, including, probably, Ireland.Peas in pod

Around here, in New York’s Hudson Valley, where the average date of the last killing frost is sometime in the latter half of May, April 1st is more like it. That’s the date that I shoot for, at least. Some springs, like the spring of 2017, earlier plantings would have done better. But you never know what bodes for the weather, so playing the averages is the best bet.

The problem with planting pea seeds too early is that the seeds will just sit and perhaps rot in cold soil. The problem with planting peas too late is that temperatures are too hot when the plants are supposed to be in all their glory, so they peter out rather than bear well. Again, an April 1st planting date, around here, generally works best.

Soil temperature is an even better guide than calendar date; pea seeds germinate when the soil warms to 40°F. Or a phenological indicator; blossoms of spring-flowering trees and shrubs open in response to warmth. Forsythia blossoms are just about to open at about the same time that the ground has warmed to that 40° temperature.

Get ‘Em Up

Peas grow as vines anywhere from a foot and a half tall to more that 6 feet long. Whether short or long, the vines are not self supporting. The laissez faire gardener just lets the vines sprawl on the ground, then lifts them to harvest.

For a neater garden and cleaner pods, I trellis my peas. By exploiting a third dimension — up — I also reap more productivity per square foot of garden space from trellised peas. Peas on trellis
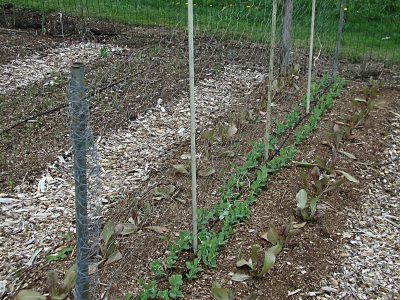
Plus, if the peas are planted down the center of my 3-foot-wide garden beds, I can flank them with other vegetables, such as carrots, radishes, lettuce, and arugula.

Peas, like other vegetables, should be rotated around the garden, that is, not planted in the same place again within 3 years. Crop rotation avoids the buildup of pest problems that overwinter in the ground. Without their host plants, they starve.

With this caveat, peas need temporary trellising, trellising that can follow them around the garden.  Traditional temporary trellising for peas, and very British, are pea sticks. Looking quite charming, this trellis is made by merely sticking brushy twigs into the ground along the pea row. Pruning off branches sticking out perpendicular to the row leaves a flat plane of twigs up which the clinging vines can clamber.

The traditional pea trellis takes some time to set up and requires some time gathering a lot of suitable twigs.

Second Best Pea Trellis

I opt for the “second best pea trellis” which starts out by my pounding an old piece of inch-thick iron plumbing pipe into the ground at each end of my pea row. The trellis itself is chicken wire, each end of which I weave onto the pipes. The chicken wire can then be cut to the length of the row, or excess roll can just be left standing just beyond the pipe. The chicken wire slides down the pipes most easily if kept almost parallel to the ground, so I attach one end partway on one pipe, then the other end partway on the other pipe, and keep going back and forth easing the mesh down to the ground.

At this point, the trellis is quite floppy. I strengthen it with some of those inexpensive, fiberglass posts sold for electric fencing, weaving one of these posts into the chicken wire every three feet or so and then pushing it into the ground.Pea trellis

Presto! In about fifteen minutes, I’ve erected a serviceable and inexpensive pea fence. This fence can be erected just after the peas emerge through the soil, so what it lacks in beauty it makes up for by spending little time uncovered with pea vines. After pea harvest is over, I pull the vines down off the trellis and dismantle the fence in a reversal of the steps described. The fence, not being permanent, can move around the garden to a different location each spring — just as should the peas.Snow peas on vine

Making Sense

Lilies, More Than Just Pretty

I’m triply thankful for the lily stems in the vase in the kitchen.

First, for their beauty. The large, lily-white (of course) petals flare out into trumpets, from whose frilly throats poke groups of rust-red anthers and single tear-capped stigmas. The petals spread about 8 inches wide from one side to the other, and the single stalk I plunked into the vase sports six of them!Lilies in vase

Second, I’m thankful for the lilies’ fragrance. The heady, sweet fragrance fills the whole room.

And third, I’m thankful that the plants, cut from outdoors where they share a bed with staked Sungold tomato plants, are alive. They’ve been threatened by a relatively new pest, the lily leaf beetle (Lilioceris lilii). This European pest made its North American debut in Montreal in 1945, and its debut on my farmden in 2015.

Lily leaf beetle can be controlled by sprays, even organic ones such as Neem or spinosad. But I’m not keen on spraying anything on plants rubbing elbows with edibles, in this case my Sungold tomatoes.
The beetles’ bright red color makes them easy to spot, at which point they can be crushed. Battling the beetle mano a mano is a viable control for a backyard planting. This was my approach a couple years ago. With other garden distractions and many crown imperial (Fritillaria) plants, which also are attacked by the beetle, I abandoned any efforts to control the beetle.

Yes, I saw some beetles on the lilies this season; yes, the plants are still doing well. Plants can tolerate a certain amount of pest damage and still do fine.

Play It Again Sam

My awesome lilies aren’t just any old lilies. They’re true lilies (Lilium species), not daylilies (Hemerocallis species). Once we’ve narrowed down “lily” to the genus Lilium, there are about 100 species within that genus from which to choose.

My lily is one of many varieties of Asiatic hybrid lilies. Its name: Casa Blanca. I highly recommend growing it.

Casablanca lily in the garden

Casablanca lily in the garden

Popeye’s Delight, Later

With eyes and nose taken care of, let’s move on to another of the senses, taste. I’d like some spinach. But I can’t have it — yet. I can plant it very soon, though, and then in a month or so I can be eating it.

So why didn’t I plant it a month ago so I could be eating it now? The reason is that spinach is a long day plant, which flowers (aka “goes to seed”) during summer’s long days. Planted a month ago, even two months ago, and after making a rosette of a few leaves the plant would pump its energy into flowers and seeds. Besides yielding a paltry harvest of leaves, that whole “going to seed” thing also ruins the flavor of the leaves.

Actually, it isn’t long days that make spinach gustatorily morph from Dr. Jekyll to Mr. Hyde; it’s short nights. (Photoperiodism, the name for this response, was originally though to be the response to daylength; calling it a response to “daylength” stuck even after it was discovered that the response was to the length of the the night.) Beets, gladiolas, lettuce, and radishes are also “long day plants.”

Photoperiod doesn’t work alone in prodding plants to grow or flower. Temperature, either before germination or while the plants are growing, also figures in, as does light intensity and soil moisture. Spinach usually flowers when days are 14 or more hours long (more correctly, short nights that are 10 or less hours long), but will also do so following 8 hour days (16 hour nights) if the seeds are chilled.

Nights are now just over 10 hours long so I can plant spinach. While the plants are growing, cooler temperatures, which are coming this way, and adequate water, which my plants will get thanks to drip irrigation, also factor in to keep spinach from going to seed. So the spinach that I sow today will put all its energy into growing large and tasty leaves.

Peas, Please

A taste of peas would also be nice. The spring harvest was good. Still, some gardeners successfully plant peas in summer for an autumn harvest. Not me.Peas in pod

Daylength isn’t what messes up late sown peas, for me, at least. Heat is. Peas languish during hot weather, common through August and even lingering into early autumn. So the peas grow poorly, and if they do weather the hot weather, they are apt to be struck down by the first frost of autumn.

I’ve heard that Wando is a pea variety that can take some heat. I haven’t tried for an autumn harvest for many, many years. With climate change, perhaps autumn peas are worth another try.

NO SIGN OF SPRING HERE YET, BUT . . .

The Onion Cycle Begins Again

Early February, February 6th to be exact, was the official opening of my 2017 gardening season. No fireworks, waving flags, or other fanfare marked this opening. Just the whoosh of my trowel scooping potting soil into a seed flat, and then the hushed rattle of seeds in their paper packets. And the grand opening was not for a flamboyant, who-can-reap-the-earliest-meal of a vegetable like peas or tomatoes.

No, the grand opening for the season is rather sedate: I sowed onion seeds in mini-furrows in a seed flat. Why onions? In addition to the fact that I love the flavor of onions raw and cooked, onions need a long growing season. The summer growing season is cut short because the plants stop growing new leaves to put their energy into swelling up their bulbs when daylengths grow sufficiently long, 14 hours long, to be exact. Around here, that happens sometime in May. The more leaves the plants make before then, the bigger the bulbs. Hence my early planting.Sowing onions indoors

So I poured about a 3-inch depth of potting soil into an 18 by 24 inch plastic tub in which I had drilled drainage holes, and then made seven parallel furrows in the soil into which I dropped onion seeds. This year I’m growing New York Early, Patterson, and Ailsa Craig. (I also sowed leeks in one of the furrows.) After closing up the furrows, I watered, covered the tub with a pane of glass, and put the tub on a heating mat set at 75 to 80° F.

Done. The season has begun.


Other Beginnings

There are so many ways to grow onions. Let me count the ways, some other ways.

1, and easiest, is to just plant onion sets, those mini-onions you can buy to plant as soon as the ground outside warms and dries up a bit. One downside to sets is that the variety selection is very limited. Not only limited, but also restricted to so-called “American-type” varieties, which keep very well but are very pungent and not very sweet. Onion sets that are too large — larger than a dime — tend to go to seed. Plants going to seed look very pretty but don’t make bulbs for eating.

Number 2 method overcomes one of the limitations of method number 1: Purchase onion plants, which are growing plants, with leaves. The sweet “European-types” — Ailsa Craig, Sweet Spanish, and Granex, for example — are available in this form. The plants are grown in fields in the South, and there’s the potential to bring a disease into the garden on these plants. Also, “organic” onion plants might be hard to find.

Setting out onion transplants

Setting out onion transplants

Method number 3 is the most involved. (I’ve never tried it.) Grow your own onion sets. The trick is to sow the seeds outdoors densely enough so that they bulb up while still small — dime size. Once bulbs mature, their harvested to store for winter, and then planted in spring just like the sets in Method 1.

Method number 4 is fairly easy, and that is to sow seeds of the Evergreen variety onions right in the ground in spring. This variety never forms bulbs but makes tasty green onions, or scallions. It’s also perennial, so any scallions left in the ground will multiply year after year. The downside here is that you don’t get onions for winter. I grow these every year and do get them for winter use also, in my greenhouse. 

Method number 5 is easiest of all. Grow Egyptian, or Walking, onions. This is another perennial onion. It “walks” by forming bulblets on top of some stalks. The weight of the bulblets pulls down the stalk, and when the bulblets touch ground, they root to make new plants. The new plants eventually send up bulblet-topped stalks which likewise bend to the ground, etc., etc., walking the plants around. To me, Egyptian onions are all hotness with little other flavor. I no longer grow them.

Walking onions

Walking onions

I learned of method number 5 from Jay at Four Winds Farm. Simple enough. Just sow the seeds outdoors as soon as the ground is warm enough and dry enough for a nice seedbed. A nice seedbed is key here, because onions compete very poorly with weeds and the goal is to get the seeds to germinate as fast as possible. I tried this last year and the bulbs ended up pretty much the same size as those from the plants I sowed last February and then transplanted into the garden in April. So I get a wide choice of varieties without having to start the seeds in February. Thanks Jay. (I’m growing transplants and direct seeding this year, just to make sure.)

My Pea Planting Will Not Be On St. Pat’s Day!

My early February onion-sowing date isn’t some magical date. My greenhouse is only minimally heated, making for very slow growth early in the season. Growth picks up as sunlight grows more intense and further warms the greenhouse. A week or more difference in sowing date early in the season doesn’t translate into that much difference in growth near harvest time.

The same goes for pea-planting, which is attended by more fanfare than onion planting. Many gardeners rush to get their pea seeds planted by St. Patrick’s day, but planting a week later doesn’t delay that harvest by a week. Perhaps by a couple of days or by a few hours, depending on the season. And anyway, St. Patrick’s day might be the traditional date for planting peas in Ireland, but it would be way too early in Maine and way too late in Georgia. I plant peas here in Zone 5 on April 1st, give or take a few days.

In my book Weedless Gardening, I have a chart that shows what and when to plant, whether as seeds, indoors or out, or as transplants, for all regions. All you have to do is plug in your average date for the last killing frost of spring and the first killing frost of autumn. This date is available from your local Cooperative Extension Office. 

IT’S ALL ABOUT THE WEATHER

Snow!!

    The talk of the town these days is the weather. In this town, at least, and other towns throughout the Northeast. After a relatively snowless winter punctuated with warm spells, spring knocked early at winter’s door and was let in. Even I, who try to be guided by the calendar rather than my gut, succumbed, planting peas a full two weeks earlier than my usual date of April 1st. Flowering trees and bushes — and more importantly, those whose flowers later morph into luscious fruits — similarly fell prey to spring weather’s apparent arrival.
    As I write, snowflakes tumble down from a gray sky, adding to the three inches of snow already piled onto spring green grass. Temperatures tonight and tomorrow night are predicted to drop near 20 degrees F. We’ve all been duped!!

Nanking cherry flowers with snow

Nanking cherry flowers with snow

    I’m most concerned, and least able to do anything about, weather’s effect on my fruit trees and bushes. Nanking cherries were in full bloom a few days ago, a full two weeks earlier than average. Asian pear flower buds look about to pop open, blueberry buds have fattened in preparation for opening , and black currants and gooseberries have almost fully leafed out.
    Options available to commercial orchards are not feasible in backyards. Such as sprinkling plants with water so that the heat of fusion released as water freezes keeps buds warm; you can’t stop sprinkling until weather warms enough to melt all ice. On clear, cold nights, heavier, cold air sinks but can be warmed by mixing in warm air from higher up. Not many backyard gardeners have wind machines or are willing to have a helicopter hover overhead all night pushing down warmer air.
    What we backyard growers can do that orchardists cannot, feasibly, is to snug a few small plants — bushes and dwarf trees — beneath a blanket. (Except that I have a lot more than a few small fruit plants.) That’s about it. Besides keeping fingers crossed and hoping for the best.

Winter Cold!!

Peach flower buds, dead

Peach flower buds, dead

   Peaches are famous for their early blossoming, so I was especially worried for them. My peach tree spent its first few years in a large pot which could be conveniently lugged into the garage whenever cold weather threatened its blossoms.
    No need to worry this year. I checked the fat, flower buds, and they are already dead. Winter’s cold and/or fluctuating temperatures evidently had already done them in.

(Too) Early Peas

    My early planted peas took advantage of the last couple of weeks of balmy weather and sprouted quickly. Temperatures near 20° will surely freeze those sprouts. They might resprout from protected buds below ground, or not.
    I nudged ol’ man winter aside and created a warmer microclimate over the sprouts by putting up metal hoops covered with row covers over them. They may have been better off with the blanket of snow tucked all around them. Then again, the snow cover might settle too much, or blow away.
    In a few days, I’ll see how the peas fared. Worst case scenario: replant.

Not Climate Change

    “Climate change” is the battle cry for this whacky weather. But is it really so whacky?
    As far as the cold, the average date for the last killing frost of spring in my garden is around the third week in May. The key word here is “average.” Looking at a tabulation of percent chance of cold temperatures on various spring dates (davesgarden.com), on average there’s a 50% chance of the thermometer hitting 24° on April 14th around here, a 10% chance on April 27th.

Peas under tunnels & snow

Peas under tunnels & snow

    “Frost” means 32°F. For that magic 32°, which is lethal to tomato and pepper seedlings but of no consequence to cabbage and onion transplants, there’s a 50% chance of that temperature on May 13th, even a 10% chance on May 27th.
    Of course, temperatures in my (or your) garden could be a few degrees different from those at nearby weather stations, which supply those averages. Still, looking back at my own records, while last year Nanking cherries blossomed here on May 2nd in 1999, they blossomed on April 18th in 2004, on April 26th in 2012, and on March 29th in 2015.
    So it seems like whacky weather is the norm. Except this year, it does still seem that the early warming was slightly earlier, and the later cold — 15°F, now, the day after the snowfall — more intense. Then again, Nanking cherries have never failed me.

Peas Please Me

In some gardening circles, a gardener’s worth is measured by how well he or she grows peas: how soon the first pea gets to the table, the crop’s abundance, and, of course, the flavor.  Sad to say, I haven’t been able to grow peas well for about 10 years.

Pea pods on vinePeas require a humus-y, moisture retentive soil and early planting, all of which I provide. But about 10 years ago, just as the crop was coming on strong, vines began to turn yellow, leaves would flag, and plants would die. The probable cause was fusarium wilt disease (caused by Fusarium oxysporum). This soil-borne fungus invades plant roots and then clogs up the vascular system.

(You may have heard of fusarium wilt of tomatoes and other vegetables. Fear not spread of fusarium among these vegetables, because different vegetables have their own fusarium subspecies. Cucumbers have F. oxysporum f.sp. cucumerinum, canteloupes have F. oxysporum f.sp. cubense, and peas have F. oxysporum f.sp. pisi. How cozy.)

Fusarium wilt probably never made it past my garden gate. It was probably already in my soil at some low level. Over the years, I’m guessing that it built up to a critical mass and was inadvertently spread — by me — on trowels, boots, and tellising. Which leads to one way to keep the disease in check: Clean trowels before planting peas; clean hoes before hoeing peas; and clean or torch the chicken wire trellises and metal support posts that keep the vines off the ground.

Some pea varieties are resistant to fusarium disease. But there are a few races of the disease. A variety resistant to one race may be susceptible to another race. Planting a resistant variety one year did not ratchet up my “good gardener rating.” The plants succumbed to the disease as in other years, and understandably so since I did not know which fusarium race I was up against, and variety descriptions for wilt resistant peas don’t always specify to which wilt race the variety is resistant.

Fusarium conquered(?)

This year I’m back in the game again with peas — and an excellent harvest it is: abundant, early, and flavorful! (These are shelling peas, which take longer to mature than snap peas or snow peas, but also taste better even if they do need shelling.)

peas on trellis

One thing that I did this spring — the thing that I’m touting as responsible for my good crop — was to plant the pea seeds in my south vegetable garden, where I haven’t grown peas for the past 6 years. My wan efforts over the years have been plantings in my north vegetable garden, and they have been consistent failures.

F. oxysporum f.sp. pisi survives from year to year in the soil as spores, very hardy spores. So hardy that the recommendation is frequently made not plant peas again, ever again, in tainted soil. Other recommendations are to wait 5 or 10 years before replanting. In either case, of course, it’s necessary to be very careful about spreading the disease again on tools, boots, or trellises.

And again, the ideal would be to plant disease resistant varieties.

Good rotations

People sometimes ask me if I rotate my crops each year. Crop rotation does not involve twirling plants; it’s moving certain plants — be they in a botanical family or part eaten — to different parts of the garden each year.

Sammy, the pup, guarding garden beds

Sammy, the pup, guarding garden beds

In the case of plant families, it’s a way to reduce pest problems because family members may host the same pest (clubroot disease of broccoli, cabbage, turnips, and radishes, for example). A pest that overwinters in the ground will eventually starve if a suitable host is not on hand on which to feed. A pest that flies or that shoots spores far and wide can travel some distance to find a host, but that, fortunately, is beyond the capacity of many pests.

In the case of rotating by part eaten, such as leaf, fruit, or root, the idea is to balance nutrient uptake. Leafy vegetables are hungry for nitrogen, root vegetables for potassium, and fruiting vegetables for phosphorus.

It’s generally safe to rotate vegetables on a three year cycle. That is, not to return a vegetable in the same family or with the same part eaten to the same place sooner than within 3 years. Planting in beds makes this easy because once the garden is planned out, you just move the crop to the next bed, or two beds away for further distance, each year.

Garden bedsDo I rotate my crops? You betcha’. With peas, I’ll try the 3 year rotation in the south vegetable garden. And I’ll wait at least another 5 years before planting them again in the north vegetable garden, then giving the south garden a “rest” from them. It’s good to again be unzipping green pods and scooping out the sweet peas within.

Fuzzy Buds and Snow Removal; Where’s the White Cat?

Did the cheery looking box of “Mickey Mouse” adhesive bandages my friend Bill handed me actually contain adhesive bandages? No. Instead, fuzzy green buds spilled out. An illicit drug? No, again. Those “buds” were sweet fern seeds, which Bill suggested planting.
Sweet fern (Comptonia peregrina) is a native plant, one of my favorites, valued for its resinous aroma. That aroma always transports me in time back to summer days hiking in the White Mountains along sunny, dirt roads lined with sweet fern when I was nine years old. Poor  (but well drained) soil and hot afternoon sun bring out the best in sweet fern. The plant makes do in poor soil by getting its nitrogen from the air with the help of a symbiotic microorganism.
Sweet fern is attractive even if it lacks the flamboyance of showy flowers or colorful leaves. Picture clumps of 3-foot-high stems clothed in dark green fern-like leaves. “Fern-like” because sweet fern is not, in fact, a fern but a member of the Myrtle family, along with bayberry.
So, yes Bill, I would like to grow sweet fern. But I have reservations about starting it from seed. The seed retains its viability for decades but sprouts only after jumping through a few hoops. Old seeds that have been lying dormant in the soil, perhaps for decades, sprout readily. Over time, their seed coats have been softened, chemical inhibitors have been leached away, and a spate of cool weather has reassured them that winter is past and it’s safe to sprout.
To get seeds to sprout in a more reasonable time, the seed coats need to be scarified, or made permeable. Nicking the seed with a wire cutter, rubbing it with sandpaper, or soaking it in sulfuric acid will do the trick but care must be taken to avoid damage. Mixing the seeds with moist potting soil  and refrigerating it for a month or two gives it the chilling required. After that, greatest success in germination comes with soaking the seed in a solution of gibberellic acid, a plant hormone.
You know what? I’m not going to bother with the seeds. Sweet fern is easily propagated from rhizome (root-like subterranean stem) cuttings — as long as I can find someone with sweet fern who will let me take a few cuttings. All that’s needed is to dig up some of the shallow, horizontal rhizomes, cut them into 2 to 4 inch lengths (the longer pieces for the thinner rhizomes), and set them 1/2” deep in a mix of equal parts peat and sand or peat and perlite or just vermiculite. New roots and shoots will develop and, this summer I could imagine that I am again walking along again in my white T-shirt with a pack on my back, canteen at my side, and Ked’s sneakers on my feet, wafting in that delicious aroma from along a sun-parched road.
————————————————
Much, much easier to grow from seeds than sweet ferns are peas. If I can only get out in the garden to plant them! The time to sow peas around here is April 1st but — as I write this on March 19th — night temperatures are in the ‘teens and the garden sleeps beneath a blanket of snow.
(St. Patricks Day, contrary to popular notion, is not the right time to sow peas around here, or in many other places. It depends where you garden. That’s probably the right date for sowing peas in Ireland and in South Carolina, but it’s too late in Florida and too early here.)

The reason to rush peas into the ground as soon as possible is because the bearing plants don’t like hot weather. The earlier they get into the ground, the sooner they begin to bear. Once weather turns torrid, I pull the peas out and plant bush beans, fall cabbage, or some other vegetable where they stood.
The reason I don’t plant peas on St. Patrick’s day is because, first of all, it would be hard to plant in usually frozen ground. Also, peas don’t germinate until soil temperatures hit 40°F. If they just sit in cold, moist soil without sprouting, they’re apt to rot.
————————————————
No need to twiddle my thumbs waiting for the soil to warm. Sprinkling some wood ash on the garden should hasten soil warming. The ashes hasten disappearance of the snowy blanket both from a “salt” effect (from the mineral salts, not sodium chloride, in the wood ash) and from their dark color.
Wood ash also helps nourish garden soils, making the soil less acidic and adding potassium and a slew of micronutrients. But restraint is needed to avoid too much of a good thing. Excess potassium or alkalinity ends up feeding plants an imbalance of nutrients.
The mere dusting I spread a few days ago began its work quickly, soon pitting the surface to look like a miniature range of jagged mountain peaks.

(Update: The snow, since I initially wrote the above, has thoroughly melted except in a few shaded areas. Nothing like a few 50 degree days to make spring’s presence finally known.

Planting Dates

A few weeks ago I wrote of the earliness of the season, as evidenced by one of the earliest of the early bloomers, witchhazel. It was already in bloom at Longwood Gardens in Pennsylvania, and the large bush at the front corner of my house has also since come into bloom. A reader, writing from  where temperatures are colder than in my garden, wrote to tell me that he has a witchhazel that started blooming in January! I don’t doubt it.

Witchhazel can mean any one of a few species: Japanese witchhazel (Hamamelis japonica), Chinese witchhazel (H. mollis), vernal witchhazel (H. vernalis), and H. X intermedia, the last of which includes hybrids of the Japanese and Chinese species. Depending on site, species, and variety, the strappy petals might unfold sometime from late fall right into spring. The reader’s plant, the variety, Jelena, at his site probably bloomed earlier than usual this winter. I grow the variety Arnold’s Promise.
————————————————-


Quoting Alfred, Lord Tennyson, “In the Spring a young man’s fancy lightly turns to thoughts of” . . . planting, of course. This guy’s thoughts, at least. And especially this year, with spring sprung so early, for now at least. March is a capricious month, with a winter reminder of snow not an impossibility before the month is out.


It was over a week ago that I was visiting Guy Jones’ nearby Blooming Hill Farm and he innocently mentioned to me that he had already sown some lettuce, spinach, and other hardy greens in his fields. Already they were sprouting.


I usually plant by the calendar, with early April being my greens-sowing date. The 70 degree, sunny weather the day after my visit with Guy got the better of me. Out came packets of seeds, a trowel, and a garden rake. I carved four parallel, approximately equally spaced furrows down each of two beds, and into them sprinkled Buttercrunch, Black Seeded Simpson, and Majestic Red lettuce, arugula, and Joy Chen baby bok choy. Covered with soil then firmed with the garden rake, the seeds have all they need to begin sprouting and growing. 
Continued warmth and some water will make things happen. 
—————————————————-


I roll my eyes whenever someone tells me that the time to plant peas is on St. Patrick’s Day. Put simply, a gardener in Austin, Minnesota might need a pickaxe with which to plant peas on St. Patrick’s Day while a gardener Sarasota, Florida would need a time machine. Fall would have been the time for planting for the Floridian.


Peas enjoy — no, need — cool weather to thrive, which is one reason for planting them early. You want them up, bearing, and then cleared away before hot weather sets in. Heat is not a concern in very northern or coastal regions where summers never get very hot; in such places, peas can even be sown in summer for an autumn harvest.


But back to St. Patrick’s day: That partial myth probably got started because St. Patty’s is the perfect time for planting peas in Ireland. Except far enough south where peas are seeded in autumn for a winter harvest, the correct time to plant peas is when the ground has warmed enough so that the seeds sprout, rather than rot, when they hit the dirt. Pea seeds sprout at about 40 degrees F so if you really want to know when to plant them, stick a thermometer in the ground and wait for that temperature.


  Another way to know when to plant peas is by looking around at what’s blooming. Perennial woody and herbaceous plants are cued into seasonal temperature trends. I used to use forsythia bloom time as my prompt to sow peas but realized for the past few years that those blooms open at about the last, rather than the first, date for pea planting. Just about everybody grows crocus and this little flower is up and out of the ground, and spreading its pretty petals, about when the soil temperature hits that 40 degree mark.


Usually I just play the averages and plant peas on April 1st. But the climate has been a-changin’. I see that my crocuses are up. Hmmm. Just to make sure, I took the temperature of the soil and it’s almost 50 degrees F.  Breaking tradition (mine), I planted peas today. This year, peas on St. Patrick’s Day is the right time for pea planting both here and in Ireland.