Posts

FERTILIZING 101

Feed Sooner, Not later

Although shoot growth of woody plants ground to a halt weeks ago, root growth will continue until soil temperatures drop below about 40 degrees Fahrenheit. Root and shoot growth of woody plants and lawn grass are asynchronous, with root growth at a maximum in early spring and fall, and shoot growth at a maximum in summer. So roots aren’t just barely growing this time of year; they’re growing more vigorously than in midsummer. 

Compost mulch on pearsRemember the song lyrics: “House built on a weak foundation will not stand, no, no”? Well, the same goes for plants. (Plant with a weak root system will not be healthy, no, no.) Fertilization in the fall, rather than in winter, spring, or summer, promotes strong root systems in plants.

By the time a fertilizer applied in late winter or early spring gets into a plant, shoots are building up steam and need to be fed. Fertilization in summer forces succulent shoot growth late in the season, and this type of growth is susceptible to damage from ensuing cold.

They Hunger For . . . 

The nutrient plants are most hungry for is nitrogen. But nitrogen is also the most evanescent of nutrients in the soil, subject to leaching down through the soil by rainwater or floating off into the air as a gas. The goal is to apply nitrogen so that it can be taken up by plants in the fall, with some left over to remain in the soil through winter and be in place for plant use next spring. 

Two conditions foster nitrogen loss as gas. The first is a waterlogged soil. If you’re growing most cultivated plants — yellow flag iris, marsh marigold, rice, and cranberry are some exceptions — your soil should not be waterlogged, aside from considerations about nitrogen. (Roots need to breathe in order to function.) Nitrogen also evaporates from manure that is left exposed to sun and wind on top of the soil. Manure either should be dug into the soil right after spreading, or composted, after which it can be spread on top of the soil, or dug in.

Leaching of nitrogen fertilizer is a more common and serious problem, especially on sandy soils. The way to prevent leaching is to apply a form of nitrogen that either is not readily soluble, or that clings to the soil particles. Most chemical fertilizers — whether from a bag of 10-10-10, 5-10-10, or any other formulation — are soluble, although a few are specially formulated to release nitrogen slowly.

Fertilizer label
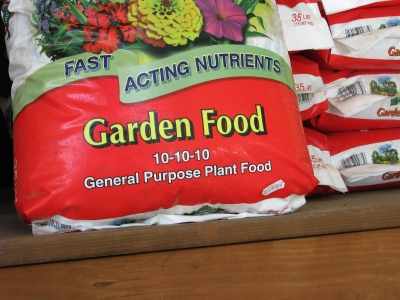
The two major forms of soluble nitrogen that plants can “eat” are nitrate nitrogen and ammonium nitrogen. Nitrate nitrogen will wash right through the soil; ammonium nitrogen, because it has a positive charge, can be grabbed and held onto negatively charged soil particles. Therefore, if you’re going to purchase a chemical fertilizer to apply in the fall, always buy a type that is high in ammonium nitrogen. The forms of nitrogen in a fertilizer bag are spelled out right on its label.

Go Organic

Rather than wade through the chemical jargon, nitrogen loss through the winter can be averted by using an organic nitrogen fertilizer. Nitrogen in such fertilizers, with the exception of blood meal, is locked up and held in an insoluble form. As soil microbes solubilize the nitrogen locked up in organic fertilizers, it is released first as ammonium nitrogen. So by using an organic nitrogen source, the nitrogen is not soluble to begin with, and when it becomes soluble through the action of microbes, it’s in a form that clings to the soil particles and not wash out of the soil.Organic fertilizers

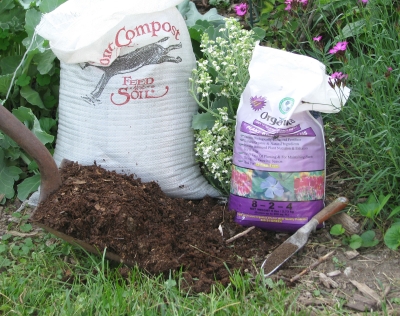
(Except in very acidic soils, other soil microbes then go on to convert ammonium nitrogen to nitrate nitrogen. This reaction screeches almost to a standstill at temperatures below 50 degrees Fahrenheit, so the ammonium nitrogen can just sit there, clinging to soil particles, until roots reawaken in late winter or early spring.)

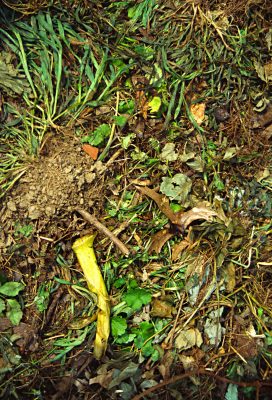
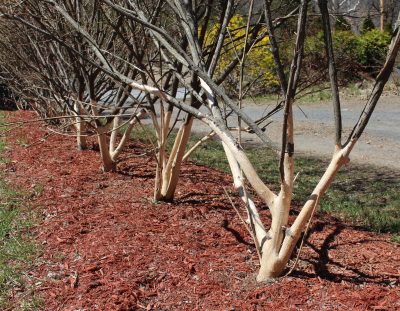
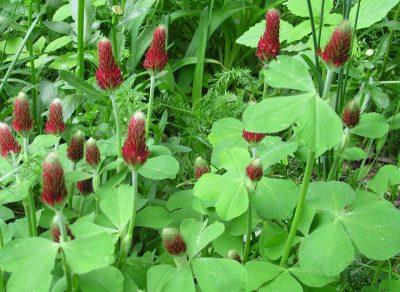
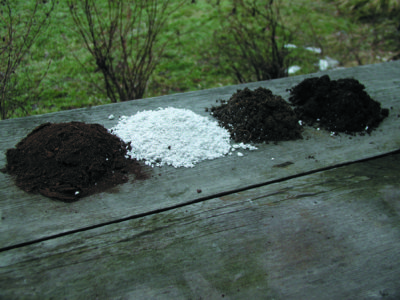
Common sources of organic nitrogen include soybean meal, cottonseed meal, fish meal, and manure. Hoof and horn meal, leather dust, feather dust, and hair are esoteric sources, though plants will make use of them as if they were just ordinary, organic fertilizers. Even organic mulches, such as wood chips, straw, and leaves, will nourish the ground as they decompose over time.Fertilizer application Woor chip mulching

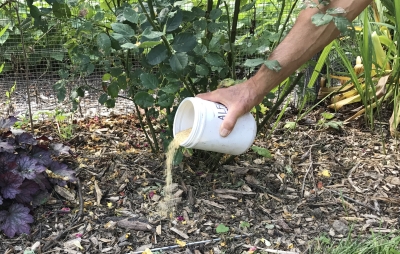
The Cadillac of fertilizers is compost. Compost offers a slew of nutrients, in addition to nitrogen, released slowly into the soil as microbes work away on it. Compost — most organic fertilizers, in fact — are not the ticket for a starving plant that needs a quick fix of food.Compost bins

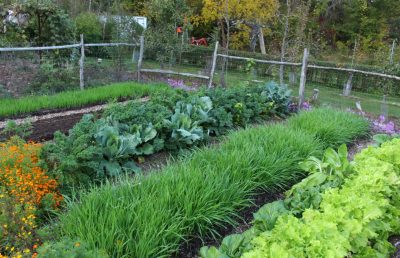
Every year I spread compost an inch deep beneath especially hungry plants like vegetables and young trees and shrubs to keep them well fed. Less hungry plants get one of the above-mentioned organic mulches. The benefits of these applications continue, trailing off, for a few years, so annual applications build up continual reserves of soil nutrients, doled out by soil microbes, that translate to healthy plants and soil.Composted garden beds
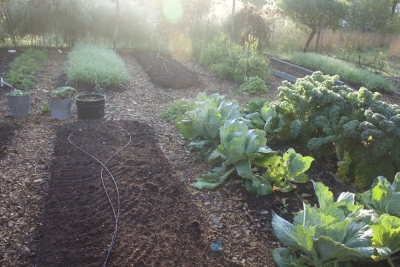
(More details about fertilization can be found in my book Weedless Gardening.)

COMPOST, LOOKING AHEAD, LOOKING BACK

Spring Readiness

  I’m frantically getting ready for spring. A large portion of that readying means making compost. Compost piles assembled now, while temperatures are still relatively warm, have plenty of time to heat up right to their edges, quickly cooking and killing most resident weed seeds, pests, and diseases.
My compost bins
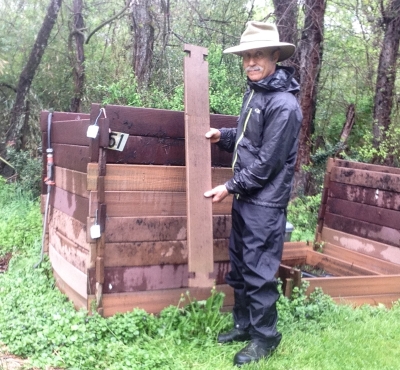
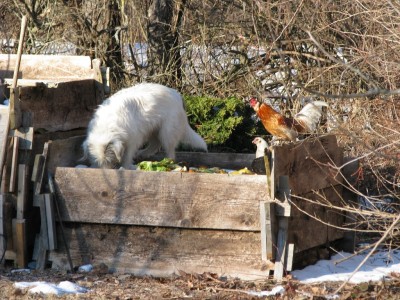
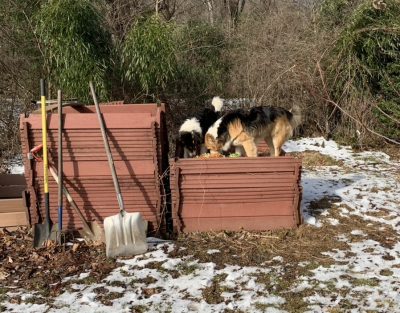
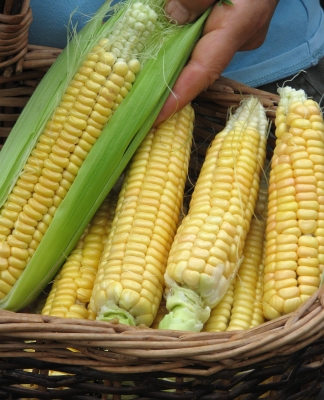
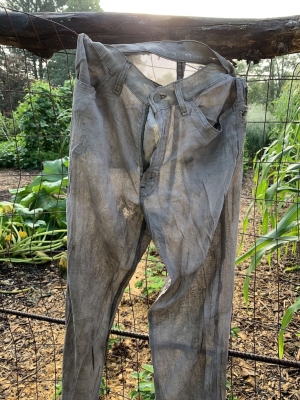
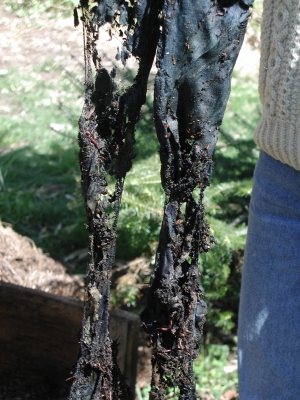
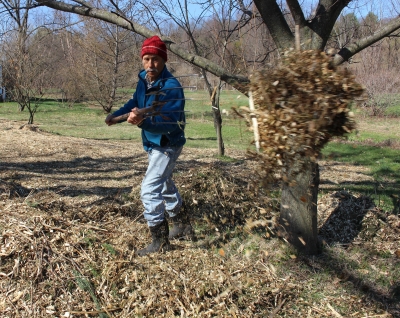
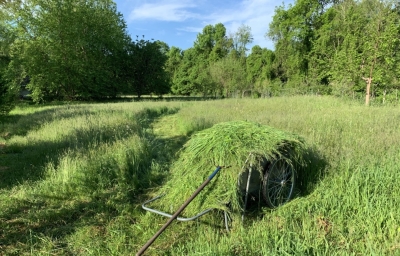
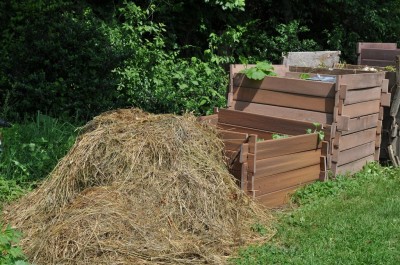
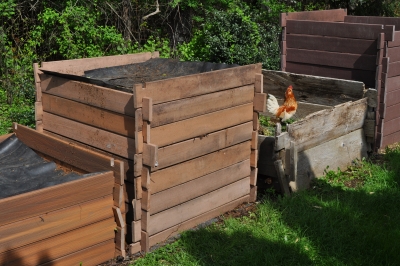
I like to think of my compost pile as a pet (really, many pets, the population of which changes over time as the compost ripens) that needs, as do our ducks, dogs and cat, food, water, and air. Today I’ll feeding my pet — my compost pet — corn stalks, lettuce plants that have gone to seed, rotten tomatoes and peppers, and other garden refuse. Plenty of organic materials are available to feed compost piles this time of year.

  In case you’re wondering, no, I’m not taking a close look at each leaf, stalk, and fruit to make sure it’s free of pests before getting tossed on the growing pile, as is suggested by some people. Look closely enough, and you’d find that just about everything would have some hostile organism on it. But given some combination of time and heat, a well-fed compost pile will take care of such potential problems.
Compost, in the making
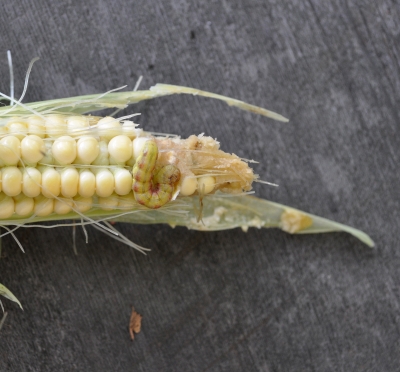
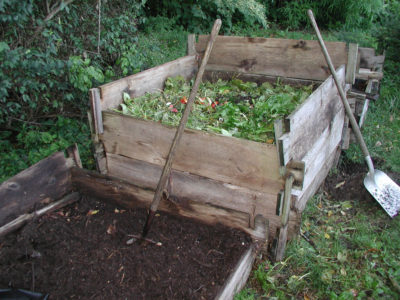
Joseph Jenkins, in his excellent (and fun-to-read) book, The Humanure Handbook, quotes research showing complete destruction of human pathogens in humanure composts that reach 145°F for one hour, 122°F for one day, or 109° F for one week. The same should be true for plant pathogens and pests. For decades, I’ve tossed everything and anything into my compost piles and never noticed any carry over of pest or disease problems.

  Heat and time also do in weed seeds. Survival depends on the kind of weed: Research shows that a couple of weeks at 114°F kills pigweed seeds, while only about a week at that temperature kills seeds of tomatoes, peppers and their other kin in the nightshade family. Generally temperatures of 131°F for a couple of weeks kills most weed seeds.

  Heat and time aren’t the only threats faced by pathogens, pests, and weed seeds in the innards of my compost piles. In addition to heat, various antagonistic organisms — including friendly (to us) bacteria, fungi, and nematodes — stand ready to inhibit their growth or gobble them up.
Compost thermometer
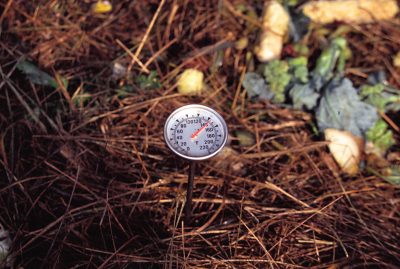
This time of year, my compost piles dial the heat up to around 140°F, and hold that temperature for a couple of weeks, or more, before slowly cooling down.

Weedy Revenge

  Speaking of weeds, they also make excellent food for my compost pet. What sweet revenge I get tossing mugwort, creeping Charlie, and woodsorrel onto a growing compost pile and then get them back transmuted as dark, rich compost.

  Other organic materials that go into my compost piles are a mix of goldenrod, bee balm, grasses, yarrow, and whatever else is growing in my south field. I cut parts of it with a scythe, let the scythings wilt for a day, then rake and pitchfork them up.
Haystacks and compost piles
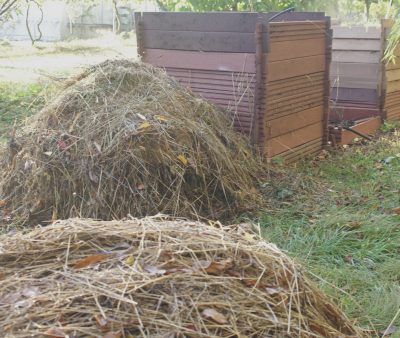
Also on the menu is some horse manure from a nearby stable, which I like mostly for the wood shavings that provide bedding for the horses. The manure itself furnishes nitrogen, which compost pets need for a balanced diet — 20 parts carbon to 1 part nitrogen but no need to be overly exacting because it all balances out in the finished compost. Lacking manure, soybean meal is another nitrogen-rich feed, as are grass clippings and kitchen waste.
Organic materials feed compost pile.
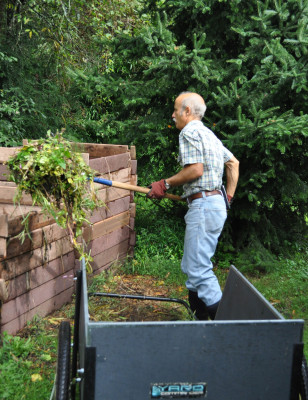
Feeding a variety of compost foods provides a smorgasbord of macro- and micronutrients to the composting organisms and, hence, to my plants. Every few inches I also sprinkle on some soil, to help absorb nutrients and odors, and some ground limestone, to lower acidity of our naturally increasingly acidic soils, and to improve the texture of the finished compost.

The Annual Cycle of Compost Here

  Compost made this time of year typically gets turned next spring, then, later in the growing season, pitchforked into the garden cart for spreading on vegetable beds. 

Turning compost

A one-inch depth of ripened compost supplies all that bed needs to grow intensively planted vegetables there for the whole growing season.Spreading compost
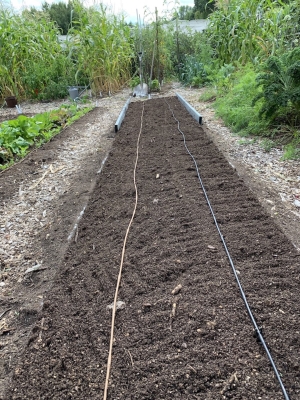
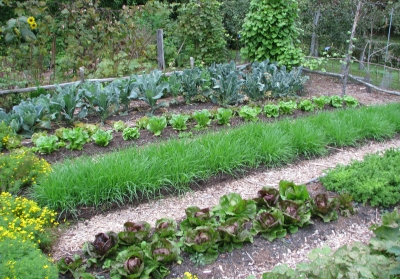
It was too late to plant a late vegetable crop in the bed I just cleared of old corn stalks, so I blanketed that bed an inch deep in compost. The same goes for a bed in which grew an early planting of zucchini.

  Any beds that get cleared before the end of this month will get, before I lay down that blanket of compost, a dense sprinkling of oat seeds. The seeds will germinate and the seedlings will thrive in the cool weather of autumn and early winter.

Cover crop, 3 beds with cabbage

This “cover crop,” as it is called, protects the soil surface from pounding rain and insulates the lower layers. The oat roots latch onto nutrients that might otherwise wash down through the soil. And as the roots grow, they nudge soil particles this way and that, giving the ground a nice, crumbly structure that garden plants like so well.

  Beds cleared after October 1st get only compost, no oats, which is almost as good. In all honesty, I’ve never noted any difference in the soil or in vegetable plant growth from using compost alone as opposed to compost plus a cover crop. That much compost, year after year, probably way overshadows the effect of a cover crop. The green cover does look nice going into winter, though.

(I deal more in-depth with composting, using compost, and cover crops in my book Weedless Gardening.)Oat cover crop

COMPOSTING, A DIDACTIC & A PERSONAL VIEW

Start With The Carbs

A bit of chemistry might be good for your compost. Just a bit. Actually, we mostly need to deal with only two familiar elements of the 100 plus known ones. These two elements are carbon and nitrogen, and they are the ones for which the “bugs” that do the work of making compost are most hungry.

“Work” is too strong a word, though, because these composting bugs do nothing more than eat. Nonetheless, a balanced diet — one balanced mostly with respect to carbon and nitrogen — does these bugs, the composting microorganisms, good.

This time of year, the microorganisms’ smorgasbord is set with an especially wide array and abundance of carbon-rich foods. You can identify these foods because they are old plants or plant parts. As such, they are mostly brown and mostly dry. Autumn leaves, for example. Other carbon-rich foods include wood chips, straw, sawdust, hay, and even paper, made — after all — from wood pulp or other old, dry plant material.
Haystacks and compost piles

By far the bulk of high carbon — carbohydrate — foods for my compost organisms this time of year is hay that I scythe from odd corners here and there in my meadow. (Most of the meadow gets mowed by tractor once a year.) The hay is a mix of a wide variety of plants, mostly various species of grasses and goldenrods, but also, depending on where I cut, loosestrife, asters, New York ironweed, Joe Pye weed, and others. That varied mix is good for a compost pile; those microorganisms, like us, thrive on a varied diet which provides a slew of macro- and micronutrients which then end up in the finished compost and then my vegetables.

Next, Some Proteins

Just as we humans cannot live on bread and pasta alone (carbon-rich foods), so it is with composting microorganisms. So let’s now peruse the smorgasbord for some nitrogen-rich fare. This would include green stuff: young, succulent plants and plant parts. There’s not a whole lot of this stuff around this time of year, but there is some, including grass clippings, kitchen scraps, and microbial fare such as old, spent tomato, broccoli, pepper and other garden plants.

My scythed hay also provides some nitrogen-rich food — early in the season when its lush and green and only a foot or two high. But it has to be used in moderation because there’s not a whole lot of carbon-rich foods early in the season. Except that is, for the previous autumn’s fallen leaves and arborist wood chips that I stockpile. I also make some haystacks to save late-season hay for use in winter and early in the growing season.

Meadow with cartful of scythed hay

Early season scythings

When there’s insufficient nitrogen foods to balance out all the carbon foods you could now find for your compost, it’s time for dietary supplements. Nitrogen-rich supplements for the compost pile include manures and nitrogen fertilizers. Manures usually also add some carbon food, in the form of the straw, wood shavings, or whatever else the animal was bedded in.

No need to get out the chemistry set to analyze how rich a food is in carbon or nitrogen so that you can get them in exact balance (which, if you must know, is a ratio of 20:1). Just keep in mind that the younger the plant part, the richer it is in nitrogen. Also that rabbit manure is richer in nitrogen than is chicken manure, which is richer than, going down the line, sheep, horse, duck, cow, and, finally, pig manure. Nitrogen fertilizers are very concentrated sources of nitrogen.

If I need to supplement the compost diet with extra nitrogen, from fertilizer, I use something that acts organically in the soil, such as soybean meal, which is readily available from feed stores. Its nitrogen is released as various microorganisms feed on it.

Pile It In, and Monitor

So pile anything and everything that was once or is living into your compost bin, balancing carbon-rich foods with nitrogen-rich ones. After garden and backyard cleanup is finished for the season, the scale tips the other way as vegetable scraps become the most significant additions to your compost pile. Balance the food value of this nitrogen-rich material with an occasional cover of wood chips or hay from a pile you keep handy next to your compost bin.

The most important thing in making compost is a good bin. A “good” bin will keep scavengers at bay, be a barrier to weed seeds that might waft into the finished compost, is convenient to fill and empty, and maintains moisture and warmth within. It also keeps everything neat, looking like a compost pile rather than a garbage pile.

If you want to see how you’re doing as a compost “bug” dietician, monitor the goings on within your pile with a long-probed thermometer and your nose. If the materials are moist and outdoor temperatures not frigid, the well-fed pile will be decidedly warm — 120 degrees F., or more. Lack of heat reflects an excess of carbon-rich foods or insufficient water; odors are the result of excess nitrogen or too much water.
Compost thermometer

I take care of my pile’s water needs in two ways. First, when I build the pile I add materials of various texture so that the mix drains well — but not too well so that it can’t cling to sufficient moisture. A lot of water is needed to really wet the innards of pile. Add a lot of material to a compost pile at one sitting and you’d have to stand there, hose in hand, for a long time to really wet it. I’m not that patient, so the second way I take care of the pile’s watering needs is to hook up a small, static sprinkler to a hose along with a valve for adjusting the width of the spray to only cover the top of the pile. About 20 minutes of watering does the trick. (I periodically check moisture deep within the pile with a long-probed moisture meter.)

Keeping records of what you add to your compost pile and how it responds helps you remember what you did right and wrong. But “wrong” is too strong a word, because the material you put in your compost bin

Compost happens bumper sticker

will always turn to compost. As my bumper sticker reads, “COMPOST HAPPENS,” even if the process takes longer or becomes “aromatic” along the way.

For me, making and spreading compost is as rewarding and enjoyable as is gardening per se.

(For more about making compost, using it most effectively, and buying compost, see my book Weedless Gardening.)
Composted garden beds, S garden

READY FOR 2021

Why Now?

For the past week or so I’ve been getting parts of the garden ready for next year. Too soon, you say? No, says I.

Pole beans

Pole beans

A bed of corn and a bed of bush beans are finished for the season. Not that that’s the end of either vegetable. I planted four beds of corn, each two weeks after the previous, and the two remaining beds will be providing ears of fresh Golden Bantam — a hundred year old variety with rich, corny flavor — well into September.

The bed of bush beans will be superseded by a bed of pole beans, planted at the same time. Bush beans start bearing early but peter out after a couple of harvests. Pole beans are slower to get going, but once they do, they keep up a quickening pace until slowed, then stopped, by cold weather.

Why, you may ask, ready those beds now for eight months hence? One reason is that the garden is always such a flurry of activity in spring that I welcome one less thing that needs doing then. Also, part of garden preparation is thorough weeding (which I also keep up with, though less thoroughly, all season long). Any weeds checked now means less weed seed to spread around the garden and, in the case of perennial weeds, less opportunity to gain a foothold.

Bed of lettuce and chinese cabbage

And later in the season…

Planted bed, endive, lettuce

And, later in the season

And beds prepared now need not sit idle till spring. Right after getting the old bean bed ready for spring, I’ll plant it with vegetables that thrive in the cool weather of fall, vegetables such as lettuce, endive, turnips, Chinese cabbage, and winter radishes. The bed will be ready as soon as fall vegetables are harvested and out of the way.

And How? Simple.

No magic potions or secret techniques ready my beds now for next year. What’s needed, besides weeding and fertilizing, is to maintain or increase levels of soil organic matter. Organic matter is integral to good fertility, maintaining a diverse population of beneficial soil microbes, and improving soil aeration and moisture retention. It’s what put the “organic” into organic gardening.

The way I provide all this can be summed up in one word: compost.

Okay, there is more to it. My vegetable garden is laid out in beds that are 3 feet wide with 18 inch wide paths between them (and a 5 foot wide path up the middle of the garden for rolling in cartfuls of compost). Soil in the beds has not been tilled or otherwise unduly disturbed for decades, which has many benefits that I delve into in my book Weedless Gardening.

First step in getting the garden ready for next year is to remove all existing plants, be they corn, bean, or weed plants. I excise most plants, including weeds, by grabbing each near its base and giving it a slight twist to sever it from its fine roots, which are left in place. Coaxing with my Hori-Hori knife is sometimes needed. Corn plants definitely need coaxing, which I do by digging straight down around the base of each plant and then giving it a yank. After all this, I smooth out the ground, if necessary, with the tines of a rake or pitchfork.

A one inch depth of finished compost should provide all that intensively grown vegetables require for a whole season. That one inch of compost is laid down like a rich icing right on top of the bed. Finished!
Composted garden bed
Okay, there’s sometimes a little more to it. I noticed weak growth in one of the later corn beds, possibly due to nitrogen deficiency, although untimely, temporary malfunction of my drip irrigation system at a critical growth stage for the corn is another possibility. Just too make sure, I will sprinkle some organic nitrogen fertilizer (soybean meal) in that bed when I prepare it.

(I could test the soil for some other nutrient deficiency, but after years of using compost made from diverse feedstuffs, some other nutrient deficiency is doubtful. There’s no good test for nitrogen because of its evanescence in the soil.)

Okay, there’s sometimes even a little more to my soil prep. If a bed is finished for the season and I have enough cleared beds for all the cool season vegetables, I could just prepare the bed, as above, and that would be the end of the story. But I don’t like to look at bare ground, so beds cleared and prepared early enough in the season, which is about the end of September here in Zone 5, get planted with a cover crop. Cover crops protect soil from wind and water erosion, latch onto nutrients that would otherwise leach down and out of the ground, and crumble the soil to a fine tilth with their roots. And going into winter, I’d rather look at a lush, green cover crop than bare ground.

Cover crop in autumn

Cover crop in autumn

My usual cover crop of choice is oats or barley. Both thrive in autumn’s cool, moist weather. They mesh well with no-till because they winterkill here in Zone 5.

This year, especially for my beds of corn, which is a nitrogen-hungry plant, I’ll mix crimson clover in with the oats or barley. As a legume, the clover will enrich the ground with extra nitrogen that it extracts from the air. And the vivid crimson flower heads, sitting atop stalks like lolliopops, will look nice.
Crimson clover

OF COMPOST, MICROWAVES, AND BLUEBERRIES

Manure Unnecessary

Manure or not, it’s compost time. I like to make enough compost through summer so that it can get cooking before autumn’s cold weather sets in. Come spring, I give the pile one turn and by the midsummer the black gold is ready to slather onto vegetable beds or beneath choice trees and shrubs.

I haven’t gotten around to getting some manure for awhile so I just went ahead this morning and started building a new pile without manure. It’s true: You do not need manure to make compost. Any pile of organic materials will decompose into compost given enough time.
Compost bins
My piles are a little more deliberate than mere heaps of organic materials. For one thing, everything goes into square bins each about 4′ on a side and built up, along with the materials within, Lincoln-log style from notched 1 x 6 manufactured wood decking. Another nice feature of this system is that the compost is easy to pitchfork out of the pile as sidewalls are removed with the lowering compost.

My main compost ingredient is hay that I scythe from an adjoining field. As this material is layered and watered into the bin it also gets sprinkled regularly with some soil and limestone. Soil adds some bulk to the finished material. The limestone adds alkalinity to offset the naturally increasing acidity of many soils here in the Northeast. Into the pile also goes any and all garden and kitchen refuse whenever available.
Hay for composting
What manure adds to a compost pile is bedding, usually straw or wood shavings, and what comes out of the rear end of the animal. The latter is useful for providing nitrogen to balance out the high carbon content of older plant material in the compost, such as my hay.

But manure isn’t the only possible source of nitrogen. Young, green, lush plants are also high in nitrogen, as are kitchen trimmings, hair, and feathers. Soybean meal, or some other seed meal, is another convenient source.

Compost piles fed mostly kitchen trimmings or young plants benefit from high carbon materials. Otherwise, these piles become too aromatic, not positively.

As I wrote above, “Any pile of organic materials will decompose into compost given enough time.” Nitrogen speeds up decomposition of high carbon compost piles, enough to shoot temperatures in the innards of the pile to 150° or higher. All that heat isn’t absolutely necessary but does kill off most pests, including weed seeds, quicker than slow cooking compost piles.Smelling compost

Plus, it’s fun nurturing my compost pets, the microorganisms that enjoy life within a compost pile.

Novel Use for Microwave

I bought my first (and only) microwave oven a few years ago ($25 on craigslist) and have cooked up many batches of soil in it. You thought I was going to use it to cook food? Nah.

Usually, I don’t cook my potting soils, which I make by mixing equal parts sifted compost, garden soil, peat moss, and perlite, with a little soybean meal for some extra nitrogen. I avoid disease problems, such as damping off of seedlings, with careful watering and good light and air circulation rather than by sterilizing my potting soils.

Peat, perlite, soil, and compost

Peat, perlite, soil, and compost

Recently, however, too many weeds have been sprouting in my potting soil. Because my compost generally gets hot enough to snuff out weed seeds and because peat and perlite are naturally weed-free, these ingredients aren’t causing the problem. Garden soil in the mix is the major source of weeds.

So I cook up batches of garden soil, using the hi setting of the microwave oven for 20 minutes. My goal is to get the temperature up to about 180 degrees F., which does NOT sterilize the soil, but does pasteurize it. Overheating soil leads to release of ammonia and manganese, either of which can be toxic to plants. Sterilizing it also would leave a clean slate on which any microorganism, good or bad, could have a field day. Pasteurizing the soil, rather than sterilizing it, leaves some good guys around to fend off nefarious invaders.

After the soil cools, I add it to the other ingredients, mix everything up thoroughly, and shake and rub it through ½ inch hardware cloth mounted in a frame of two-by-fours. This mix provides a good home for the roots of all my plants, everything from my lettuce seedlings to large potted fig trees.

Blueberry Webinar

Blueberries, as usual, are bearing heavily this year, with over 60 quarts already  in the freezer and almost half that amount in our bellies. After years of growing this native fruit, it has never failed me, despite some seasons of too little rain, some of too much rain, late frost, or other traumas suffered by fruit crops generally.

All of which leads up to my invitation to you to come (virtually) to my upcoming Blueberry Workshop webinar. This webinar will cover everything from choosing plants to planting to the two important keys to success with blueberries, pests, harvest, and preservation. And, of course, there will be opportunity for questions. For more and updated information, keep and eye on www.leereich.com/workshops, the “workshops” page of my website.
Bunch of blueberries

“SPARROWGRASS” RENOVATION

The Season Ends

Asparagus season has ended here now, after more than two months of harvest. From now till they yellow in autumn, the green fronds will gather sunlight which, along with nutrients and water, will pack away energy into the roots, energy that will fuel next year’s harvest.
Weeding asparagus in past years
In addition to dealing with the weather, the plants have to contend with weeds. I have to admit, despite being the author of the book Weedless Gardening, that my asparagus bed each year is overrun with weeds, mostly two species(!) of oxalis, creeping Charlie, and various grasses. Also weeds parading as asparagus, self-sown plants. This, even though I planted all male varieties. Any batch of male plants typically has a certain, low percentage of female plants. (Still, my garden is weed-less even if it’s not weedless.)

I always wondered about the recommendation to plant asparagus crowns in deep trenches that are gradually filled in with soil as the new plants grow. I read that one reason is that crowns deep in the soil results in thicker, albeit fewer and later, spears. But as if to decide for themselves, research also shows that , over time, shallowly planted crowns naturally settle deeper into the ground, and deeply planted crowns inch upwards.
Weedy asparagus bed
Another reason for deep planting is, perhaps, to protect the crown from tiller blades or hoes. I don’t till and, since the plants anyway take the matters in their own hands, I set my asparagus, years ago when I planted them, just deep enough to get the crowns under the ground.

Weed Control(?) for Next Year

But back to the weeds in my asparagus bed . . .  This year I’m determined to get more of the upper hand with weeds. To whit: Yesterday I cut everything — weeds and asparagus — in the bed as low as possible. A bush scythe, which is a scythe with a short, heavy duty blade, does this job easily and quickly; a weed whacker might also work. One year a battery powered hedge trimmer got the job done. For me, the scythe works best.

In years past, I would cut everything to the ground, as I did this year, and then I’d top the bed with a couple of inches of wood chips.

This year, to get better weed-less-ness and to offer the asparagus plants a treat as thanks for the many spears that went into cold soup, hot vegetable dishes, and the freezer, I offered them compost. Although I make lots of compost, that compost is generally reserved for beds within the vegetable garden proper and potting mixes as well as, this year, my newly planted grape vines, and pear and apple trees.
Asparagus bed with compost
Asparagus is worth it, so I dug into my most finished compost bin, filled up two garden carts, and slathered a one-inch layer of compost over the whole bed. That inch of dense, dark compost should go a long way to smothering small weeds, which have little reserve energy. The compost then got topped with a couple of inches  of wood chips. Asparagus bed with compost and chips
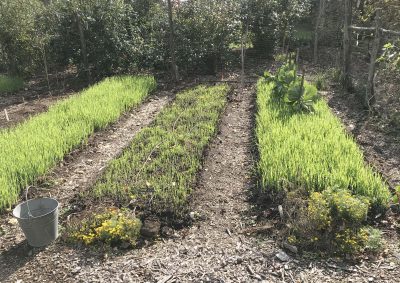
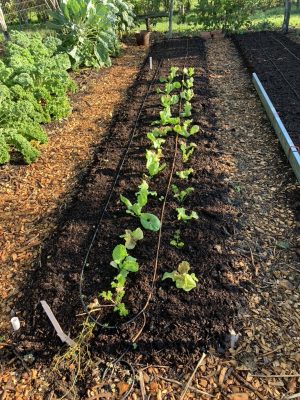
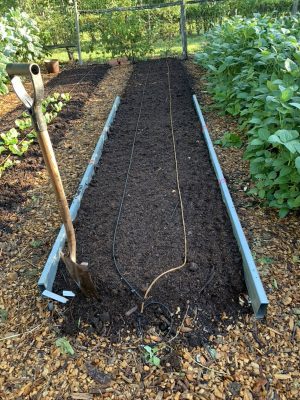
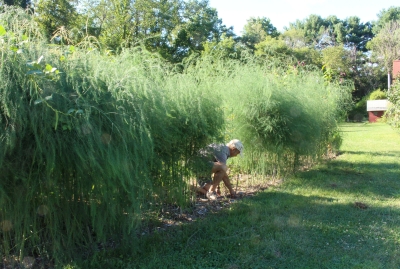
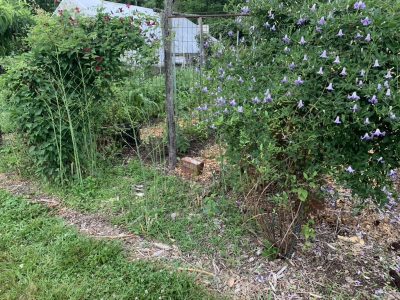
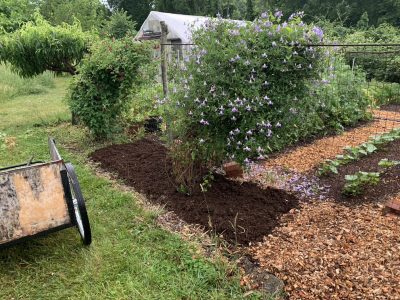
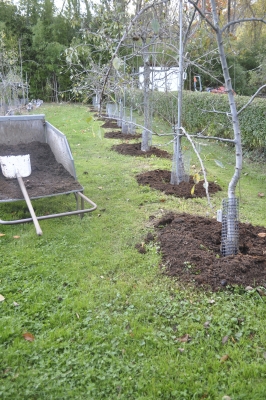
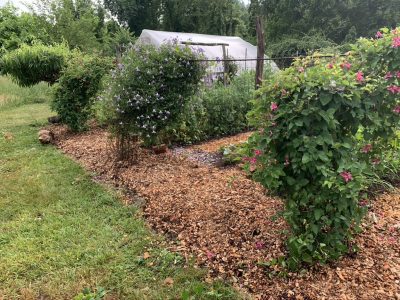
The compost will nourish the asparagus . . . and the weeds, most of which I hope will be sufficiently young or weakened to not push up through the compost and the wood chips to light.

Compost Needed

That was a lot of compost to part with. No problem, because I’ve also been making lots of compost. Plus, a few bins I built last year, each with about one-and-half cubic yards of compost, are ready to use or will be so in the coming weeks.

The bins themselves are made from 1×6 boards of composite wood (a mixture of waste wood, recycled and new plastic, and some type of binding agent), such as used for decking, notched to stack together Lincoln-log style. It keeps moisture and heat in, and scavengers and weeds more or less out, and doesn’t degrade, as did my previous wood bins.

I feed my compost pets — earthworms, fungi, bacteria, and other organisms — hay from my small field, manure from a nearby horse farm, kitchen waste, old garden plants, and anything else biodegradable. The latter category has included old leather shoes and garden gloves, jeans, and, as an experiment, biodegradable(?) plastic spoons.

The compost also gets occasional sprinklings of soil, to add bulk, and ground limestone. Periodic liming is generally needed to counteract the acidity of most soils of northeastern U.S.; my soil gets limed indirectly, via the compost.
Feeding compost
Water is commonly the most limiting ingredient in home composts. Lots of water is necessary to percolate down into a pile. Rather than getting bored with a hose wand, after finishing an extended composting session, I set up a small sprinkler on the pile, whose spread is as wide as the pile, to gently water for about 20 minutes.

Of course, the devil is in the details: how much of each ingredient to add. Not to worry, though. Any pile of organic materials will eventually turn to compost.

For my piles, I check moisture with a REOTEMP long stem moisture meter and monitor progress with a long stem compost thermometer. This time of year temperatures of the piles soar to 150°F within a few days.

My asparagus bed is worth all this.

Keep on Composting

One Problem in Cold Weather

I don’t let cold weather put the brakes on my composting, at least my role in it. For the bacteria, fungi, and other workers in my compost pile, it’s another story. Come cold temperatures, and their work come screeching to a halt or near halt (which depends on the degree of cold, the size of the pile, the mix of ingredients, and moisture).

But that’s no reason for me to abandon composting.

The main problem, as I see it, with composting in winter is not the workers not working. Pile up food scraps another organic materials winter, and composting will re-convene when warm weather arrives again in spring. The problem is that those food scraps offer a smorgasbord of tasty, easy calories for rodents. Which is not good.

(Lest you’re feeling fuzzy and warm to these furry creatures, a short list of what they could bring along to you would include hantavirus, leptospirosis, lymphocytic chorio-meningitis, rat-bite fever, salmonellosis, and tularemia, all of which are as bad as they sound. And that’s only a partial list.)

I take a multi-pronged approach, then, to keeping rodents at bay yet carrying on with my role in composting.

Population Control

My first line of defense is to keep rodent populations in check.

The top layer of the compost pile is not the only place where rodents might find a meal. In autumn, I clean up any rodent treats that might be lying around such as ears of corn, old squash and tomato fruits, and baskets of filberts or black walnuts. As appropriate, they go either onto the compost pile or into animal-proof storage.
Compost with fresh materials
Sammy, Daisy, and Gracie also help out. They are, respectively, a dog and a dog and a spayed cat, who spend most of their time outdoors. (I know, I know about the problem with cats and birds. But I’m trying to strike a balance. A few less birds weighed against soaring rodent populations seems reasonable. And anyway, Darwinian selection may be going on here for birds that are increasingly learning to avoid Gracie. At least, not to get too graphic, judging from the “gifts” Gracie brings back to show off.)

Dogs on porch

Dogs at “work”

I support the work of Sammy, Daisy, and Gracie by doing some trapping on my own, mostly of rabbits and squirrels because they can damage or kill plants, and pilfer my food. Black rat snakes, which sometimes go so far as to lay their eggs in my compost pile, also help out.

Mouse damage

Mouse damage

Rabbit damage to branches

Rabbit damage to branches

Exclusion

My second line of defense is to keep rodents out of my compost pile. A number of heavy-duty plastic or metal, animal-resistant compost bins are available for sale, and all work pretty well — as they should, since any pile of organic materials will eventually turn to compost. Their usual limitation is that they many lack sufficient volume for a critical mass if you want to make hot compost.

I made my own compost bin, actually bins. Having two or more allows compost to mellow in one bin while the other one or ones are still cooking. My bins are rodent-proofish. They are so, first of all, by my setting them up in flat ground upon which I first lay down a large enough piece of 1/4 inch or 1/2 inch mesh hardware cloth to keep the critters from tunneling up from below.
Commpost bin board
The bin itself is made of notched, fake wood (such as used for decking). As the notched pieces slide together, the tolerances were designed to be close enough to deny rodents access. Ah, but “there’s many a slip ‘twixt the cup and the lip;” my carpentry skills fell a little short of making all those notches small enough, which would be less than 1/2 inch, to allow entry by even a mouse. Still, the bins work pretty well.

I detail the material I used and the construction of the bins at https://leereich.com/2019/06/my-compost-for-a-bin.html.

Scavenger Friends

Rodents are wily creatures, and I expect that they could somehow jump and climb their way up the bins to the top of the pile where the freshest delicacies have been most recently placed. Originally, I planned to make rodent-proof covers to the compost bins, but they never got out of the early planning stage.
Dog and chickens on compost pile
Turns out that my dogs are very good jumpers, and also very fond of kitchen scraps. My ducks are adequate fliers/climbers, and likewise show interest in this department. So the plan here is to deposit compostables from the kitchen onto the compost-pile-in-progress each morning, when ducks and dogs are out and about. They clean up all of the most desirable and calorie-laden stuff, leaving little or nothing for any rodents who, excepting squirrels, are mostly nocturnal.
Dogs on compost pile
Note: As I re-read what I’ve written I realize that I could be accused of not being pc for a number of details stated. Sorry. But composting itself is very pc, and reality often involves striking balances to get the most desirable results.

YOGI WAS RIGHT

To Do List

“It ain’t over ’til it’s over” said Yogi Berra, and so says I. Yes, the outdoor gardening season is drawing to a close around here, but I have a checklist (in my head) of things to do before finally closing the figurative and literal garden gate.

Trees, shrubs, and woody vines can be planted as long as the ground remains unfrozen. To whit, I lifted a few Belaruskaja black currant bushes from my nursery row and replanted them in the partial shade between pawpaw trees. A Wapanauka grape vine, also in the nursery row, is now where the Dutchess grape — berries too small and with ho-hum flavor — grew a couple of months ago. And today a couple of black tupelos are moving out from the nursery row to the edge of the woods, where their crimson leaves, the first to turn color, can welcome in autumn each year.

Kale, lettuce, endive, turnips, radishes, leeks, and celery still grow in the vegetable garden, but many beds are vacated for the season. Any remaining old plants will become food for the compost pile and the cleared off beds will then get a one-inch dressing of crumbly, brown compost from a pile put together last year.
Clearing bed of all weeds and plants in preparation for its layer of compost.
Freezing weather would burst the filter, pressure regulator, and timer for the drip irrigation system, so these components have been brought indoors. The rest of the system stays in place.

The drip system may now be out of commission but some watering may be needed. Occasional days with bright sunlight and warm mean hand watering. How primitive!

Planning Ahead, Soil-wise

Making compost for use next year, same time, same place, is also on my checklist. Especially today, so the compost creatures within the pile can take advantage of lingering warmth in the air to work overtime. A pile that gets hot cooks to death most weed seeds and pests that hitchhike into the pile on what I throw in. And I throw in everything, in spite of admonitions from “experts” to keep diseased or insect-ridden leaves, stems, or fruits out of compost piles.

So today, after loading horse manure, with wood shavings bedding, into my truck pitchforkful by pitchforkful, I drove home and unloaded everything pitchforkful by pitchforkful into my compost bins. Each bin got a lot more than a restricted diet of just the horse manure mix, though. I alternated layers of manure with mowings scythed from my small hayfield, wetting down each layer well and sprinkling occasional layers with soil, for bulk, and ground limestone, to counteract soil acidity.
Compost bins
Manure is not a necessity for good compost. The manure mostly is for nitrogen, one of the two main foods of compost microorganisms. Some of my piles get that nitrogen from soybean meal, an animal feed usually meant for creatures that you don’t need a microscope to see. Early in the season, young grasses and weeds, which are high in nitrogen, do the same. And truth be told, any pile of plant material, if left long enough, will turn to compost. The nitrogen helps the material chug along faster on its way to compost, and the faster the microbes work, the hotter it gets.

Winter Work for Microbes

I’ll be feeding my last compost pile of the season all winter long. Just a little at a time, mostly scraps and vegetable trimmings from the kitchen with occasional toppings of leftover hay. Adding stuff slowly to a compost pile doesn’t let enough critical mass build up for heat, and especially not in winter’s cold.
Dog and chickens on compost pile
No matter. I just let piles that don’t heat up sit longer before I use them. It’s the combination of time and temperature that does in all the bad guys that hitchhike into my compost piles. So 1 hour at 140° F. might have the same deadly effect as a week at 115° F. My hot piles sit for a year before I use them; the cold piles cook longer. It ain’t over ‘til it’s over.

Interesting and Fun

Interesting, But I Could Do Without It

Out doing stuff in the garden, I sometimes wonder: What’s fun about gardening? What’s interesting about gardening?

European hornets are interesting. My first encounter with them — large, intimidating looking hornets with fat, yellow and black striped bodies, was a few years ago when I saw it feeding on kitchen trimmings as I was about to add more to the compost pile.  
European hornet in compost pile
The thought of a sting from this brute seemed horrendous; I learned, though, that they’re not particularly aggressive and their sting belies their ferocious look. The menacing-looking brute that entered the schoolyard turned out to be a pretty nice guy.

My next significant encounter with European hornets was this week, as I was gazing up into the branches of my plum tree admiring the ripe, red plums, ready for harvest. Reaching up and picking a fruit left me in hand with hardly more than the shell of a fruit that had been eaten out from the inside via a large hole chewed on the far side. In another fruit, I saw the culprit — a European hornet — at work. Lots of plums were being destroyed, as well as near-ripe apples.
Apple being damaged by European hornet
How interesting (and unfortunate). Now, what to do. Deb immediately suggested bagging the remaining fruits. I had a stock of “Japanese fruit bags” purchased many years ago and within the hour, all remaining apples a plums were harvested, if sufficiently ripe, or bagged.
Apples in Japanese bags
As for next year, perhaps European hornets will, as in past years, no longer be troublesome. Perhaps I’ll try trapping them; a research paper showed that they were attracted to funnel traps baited with a mix of equal parts glacial acetic acid and isobutanol. I’ll watch and wait.

Interesting, and Good

Also interesting (and this time fortunate) was the activity of local squirrels this year. Squirrels are particularly fond of peaches and plums, especially early in the season when fruits are dime-size. Not ever here, though. Good. But they are also particularly fond of my hazelnuts. Left to their own devices, they will strip the plants clean.

Over the years I’ve developed a multipronged approach to keeping squirrels at bay, usually, but not always, with success. This year, the hazelnuts were totally spared. Why? Was it my deterrents?

Now that I think of it, birds also acted out of character here this year. They usually strip every fruit from the Illinois Everbearing mulberry tree and the gumi bush. (My blueberry bushes sit within the Blueberry Temple, protected by bird netting.) This year birds again got most of the mulberries but left plenty of gumis for me.

The only time birds left all the gumis and mulberries for me was the back in 2013, the summer of the 17-year cicadas.  Birds evidently relish cicadas more than my fruits. 

Compost Fun

So what is predictably fun about gardening? Yesterday’s spreading of compost, that’s what. 

The first of four beds of sweet corn had been harvested so I prepared the bed for an autumn harvest of “greens.” For starters, I chopped corn stalks off a couple of feet above ground level, then chopped them into smaller pieces in the garden cart. Digging around the base of each hill of plants was enough to sever the largest roots and allow the stalks to be tugged out of the ground and then also to the cart. I lightly raked off any remaining debris from the bed, pulled weeds, and then they went to  . . . guess where? All this was added to a bin containing a growing compost pile.

Near that bin was another bin, a “finished” bin of dark, crumbly, and sweet-smelling (well, not sweet, but pleasantly fragrant) compost. Into the cleaned out cart it went.

Back in the garden, I demarcated the edges of the old corn bed with a line of limestone and laid a metal 2 by 4 along each edge as a guide. Into the bed went enough compost for a leveled 1-inch depth. That amount of compost, in addition to smothering small weeds, letting rainfall percolate gently into the soil, maintaining moisture in the soil, and providing food and lodging for beneficial soil life, will provide all the nourishment vegetables in that bed will need for a whole year hence.
Corn bed, composted
I firmed the compost by patting it with the back of my 6-pronged pitchfork creating what I, at least, thought was a nice pattern on the surface, perhaps inspired by a photo I’ve seen of a zen monk raking the gravel garden at the Ryōan-ji monastery in Japan. Final dressing on the bed was lettuce transplants, started about a month ago and ready to pop into the compost-dressed ground.
Corn bed composted and planted

Toad in new bed

The toad liked my bed also.

Finally, I stood back and admired my work. What fun, and that bed is (to me) a thing of beauty.

Of Corn and Compost

Bed Transformation

In an hour and a half this morning, a 20’ long by 3’ wide bed of spired, aging corn stalks morphed into a bed of succulent, young greenery in the form of endive and Chinese cabbage transplants.

Before beginning this job I harvested what ears were still ripe on the stalks. The yield from this first corn planting was small, both in quantity and size of ears. Old fashioned Golden Bantam, as told by its name, normally yields small ears — but not usually as small as the 3 to 5 inch long ears I harvested. Golden Bantam sweet corn, non-hybrid
Planting in “hills” (clusters of 4 plants) usually provides for adequate pollination, but poor weather at a critical developmental stage might have thrown pollination awry.

At any rate, with ears harvested, I lopped each stalk in half with my Hori-Hori knife, then dug straight down right around the base of each hill to sever the main roots so I could jerk the cluster of stalks up out of the ground. I also cleared away from the bed any weeds, and then carted everything over to a compost pile.

For the return trip from the compost pile, I loaded the cart with finished compost from another pile. An inch depth of compost slathered on top of the old corn bed had it ready to receive the endive and Chinese cabbage transplants I had waiting in the wings. The 40 transplants had grown up during the month of July in a seedling flat and were just ready to outgrow their individual cells. Each went into a quickly made hole jabbed into the ground, the holes 15” apart in each of the two rows running down that bed.

The refurbished bed will provide good eating beginning in early October and, with some covering for protection, on into December.

Compost Discoveries

Besides merely compost, the compost pile often yields some interesting and forgotten objects. (Some annoying things as well, such as those fruit labels glued to the skin of almost every piece of commercial fruit.)

For years now I’ve had trouble bringing myself to tossing anything compostable into the garbage for eventual burial in a landfill. It seems so wasteful of materials and disrespectful to the soil to use it as a dumping ground for cast-offs. Soil is a limited resource so eventually there will be no more acreage to bury trash.

Much of my clothing is cotton, wool, or leather — natural products that would eventually decompose to enrich a finished compost. So I sometimes compost such garments, forgetting that I did so until an uncomposted piece of the garment makes an appearance as I turn the compost pile or shovel out the finished material.

Partially composted Levi jeans

Partially composted Levi jeans

The distinctive zipper and fly snap from my Levi jeans, for example. After three compost cycles, except for the zipper and fly snap, those jeans are surprisingly intact but look more like sheer polyester slacks than Levi’s jeans. In contrast, my daughter’s non-Levi jeans were threadbare after merely one cycle.

Composted (almost) non-Levi jeans

Composted (almost) non-Levi jeans

I came upon a not immediately identifiable object today as I shoveled out finished compost for spreading on the endive/Chinese cabbage bed. It was about a half inch thick, almost flat except for some bends, and spongy. What could it be? Aha! The cushioning from my sheep skin booties. Most of the leather portion had decomposed.

My guess is that the bootie was transformed as far as it would go in the near future so I’m not returning it to the new pile for another cycle.

Worms in My Ears (Some of Them)

My ears, now, are relatively large. Corn ears, that is.

Since writing about the diminutive ears from my first planting of sweet corn, I’ve harvested a few ears from my second planting. That second planting went in 2 weeks after the first planting but is ripening close on its heels. Warmer weather earlier in the season compressed those ripening dates.

Just about every ear in this second batch of ears is large (for the variety Golden Bantam) and well filled with kernels. I occasionally find a corn earworm feasting on some of the kernels at the tip of the ear. Corn earworm
That’s the nice thing about home-grown sweet corn — it’s not nice having the earworms but it is nice not being bothered by them. Corn farmers don’t have that luxury. I just break off the tip with the worm and enjoy the rest of the ear.

The earworms got inside the husks by eating their way down the corn silks. Spraying the corn with the benign biological pesticide Bacillus thurengiensis (sold under such friendlier names as Thuricide), or cutting off or squirting some of mineral oil into the silks right after pollination is complete (3 to 7 days after silks appear) could control this pest. But why bother for an occasional pest that is so easily ignored or removed?