TRANSPLANT GROWING, A BETTER WAY

Snicker if You Will

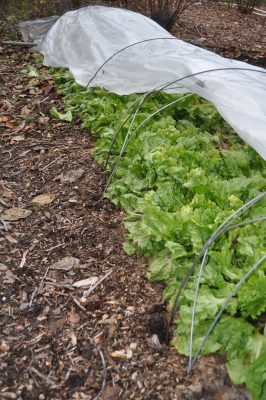
I don’t know about your propagation space, but mine is getting overcrowded. Yes, now with a greenhouse, I’ve got more room than in the the past when I grew seedlings in windowsills or in my basement under lights. But my greenhouse is small, and with greenhouse beds home to fig trees and early spring lettuce, arugula, and other greenery, seedlings are relegated to a 12 by 2 foot shelf along the north wall.

I make the most of that shelf by “pricking out.” Snicker if you will at this Britishism, but pricking out is a way to get a lot of bang for your buck space-wise, whether in a greenhouse, on a windowsill, or beneath lights. It also makes more economical use of seeds.
Seedlings in spring, greenhouse
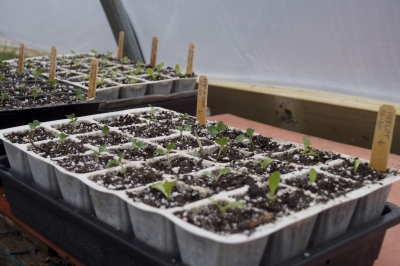
The process begins, for me, with either 4 by 6 inch or 6 by 8 inch seed flats, which are plastic pans a couple of inches deep with drainage hole drilled in their bottoms. I fill one of these with potting soil, firm it, and then treat it like a miniature farm field, making 4 or 5 furrows along the short length. I press these furrows into the potting soil with a board that fits the flat to the underside of which I attached dowels where I wanted the furrows.
Seed flats and furrowmaker
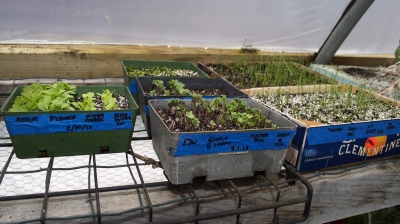
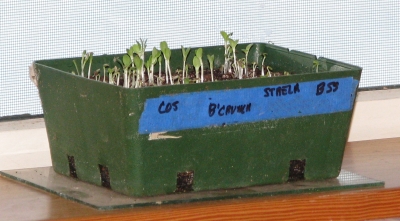
The first cool thing about this whole process is that each furrow can be sown to a different variety. I generally sow the flat to different varieties of the same kind of plant so that germination of the whole flat is fairly uniform. Looking over at one of my larger flats, I see newly emerged sprouts of Nepal, Belgian Giant, Paul Robeson, Amish Paste, and Blue Beech tomatoes. All taking up a mere 48 square inches!
Sowing lettuce seeds in flats
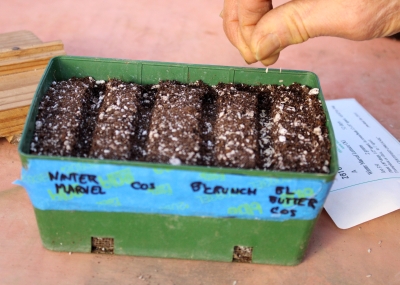
Flats of tomato seed were planted April 1st, watered, and kept warm, and those sprouts emerged today, the 6th. No light is needed until sprouts emerge. After a week , now with good light, those cotyledons (seed leaves) will darken and true leaves will appear. That’s when it’s time to actually “prick out.” Mind you, for two weeks, all those potential tomato plants have been getting started in a mere 48 square inches, the first week of which they didn’t even need light!
Lettuce seedlings
Other kinds of seeds take longer to germinate. Or shorter. And temperature also figures in. Tables of optimum germination temperatures for various kinds of seeds are available on the web and in some seed catalogs.

The Process

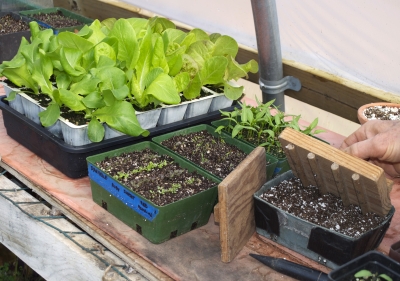
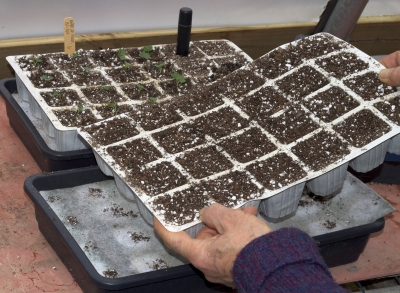
Pricking out is transferring the still tiny seedlings from the seed flat to individual cells to “grow on,” another Britishism. For these containers I’ve used saved cell-packs from plants I’ve bought in the past; now I mostly use Growease Seed Starters automatic watering  system from gardeners.com. Depending on how many plants you’ll be growing and what you’ve got, small yogurt containers, even jumbo egg cartons could also fill the bill.
Pricking out containers
To start, I take a dibble, for this use, a pointed plastic cylinder about 3/4 inch across, and make a hole in one potting-mix-filled cell. (Etymologically, “dibble” originally was, or is, Manchester British slang for a police officer, from a character in a cartoon. How did that become the name for the black plastic thing I’m holding?)

Back to the seed flat . . .  time to lift individual seedlings out of their seed flat and into their newly dibbled hole. Those seedlings are very delicate and will die if the stem is injured. So I take a knife or a spatula and scoop up underneath a clump of seedlings to loosen the potting soil around their roots, and then take gentle hold of one of their leaves to lift the plantlet free.
Pricking out lettuce
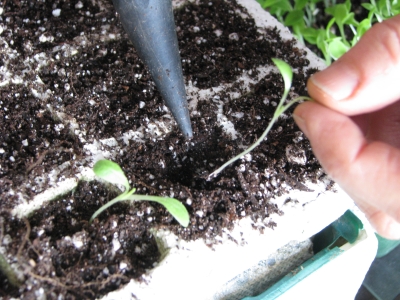
After lowering one plant’s roots into its waiting hole, I firm the potting soil around the roots. No, not pressing against the stem, which could injure it, but pressing down into the potting soil. And not too hard. Just enough to firm it around the roots. One advantage of pricking out is that you can set the little seedling deep in the hole, up to its true leaves, so that the leaves are no longer supported by the weak, young stem.

Water is needed right away, either from below by sitting the container in a pan of water for awhile, or with a gentle shower from above. The newly planted seedlings are not turgid for a few hours so water from above often accumulates on the leaves to weigh down the plant. The wet leaves, flopped down on wet potting soil, are apt to rot, so with my finger I go plant by plant flicking off the water, and then the plants stand up straight.

After about 5 more weeks of growth with bright light and slightly cooler temperatures, the plants will be sturdy and the season will be ripe for tomato planting. Sometimes I caress my plants to encourage stocky growth, raking my hand gently over their tops, ideally once a day. The effect, called thigmotropism, is the same as that which causes dwarf, stocky growth of pine trees on wind mountain outcroppings.
Pricked out seedlings
Not all seedlings follow tomato’s schedule. Celery, for instance, might take 3 weeks to germinate and then another 9 weeks to grow to transplant size. (For details on when to sow, based on the average date of the last spring frost where you garden, see the vegetable section of my book Weedless Gardening.)

Followup on Previous Weeks’ Blogs

My first batch of birch syrup from a couple of weeks ago was, according to a friend who boiled it down for me, awful. “Worst thing I ever tasted,” says he.

But some of that syrup was cloudy from microbial activity during the warm weather. That could have caused that distinctive flavor.

Colder weather followed, and I tried again, discarding any cloudy sap. Boiled into a syrup, the flavor was still distinctive, not awful, but also not really good. Something reminiscent of cough syrup or molasses. The sap is high in fructose, which burns at a lower temperature than sucrose, the primary sugar in maple sap. It more easily takes on a scorched flavor, which my syrup definitely has, in excess.

Perhaps a species other than river birch would have been better, even good. The syrup is usually made from paper birch. All I grow here is river birch, though. They are, at least, beautiful trees.

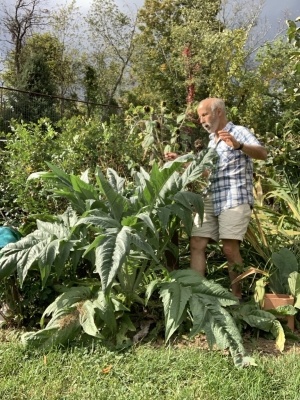
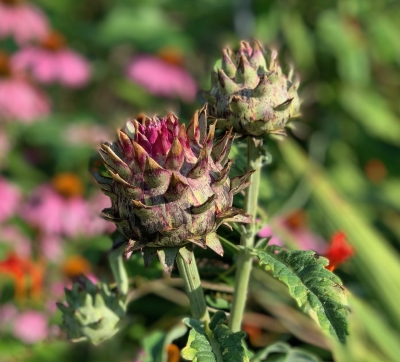
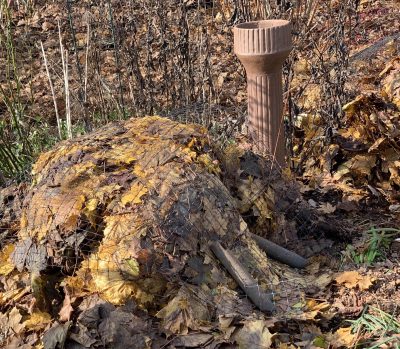
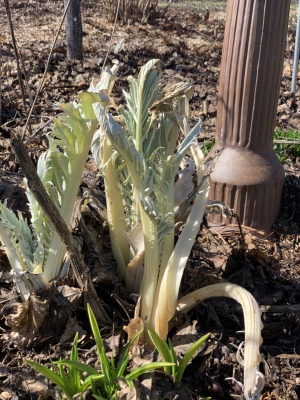
And a followup on my overwintered artichoke plants. Or, I should write, my non-overwintered artichoke plants. Perhaps something will eventually emerge. No sign of anything yet, and I’m not hopeful.

SOUTHERN FRANCE, IN SCENT AND SIGHT

Heaven Scent Flower

I trace the origin of my present obsession with growing carnations – big, fat, fragrant carnations (Dianthus caryophyllus) – to the movie, Jean de Florette, that I saw back in 1986. Not that I aspire to labor under the weight of hauling water long distances to care for my plants, as did Ugolin. And not that I’m hoping to get good money selling the cut flowers at a local market.

Actually, my only memories of the film are of the charming countryside of Provence, of Ugolin crouching over the plants and lavishing them with care, and of the pretty pink flowers. Come to think of it, I’m not sure Ugolin’s carnations even got as far as the flowering stage. Anyway, in my mind’s eye I see those pink blossoms and smell their spicy perfume.
Carnation, fragrant and pretty
With good soil and ample water, my carnations have an easier time of it that did Ugolin’s. Too easy, perhaps. Carnations don’t need or like overly rich or wet soil. When it came time to plant out my seedlings, I recalled those scenes in Jean de Florette. The ledge of soil held up by a stone retaining wall along the south side of my house provide the good soil drainage and sunlight that suits carnations. Lavender, another Mediterranean plant growing on a wall nearby, will help make the carnations feel right at home.

  The biggest threat to my carnations is winter cold and wetness. And even then, these carnations, although technically perennials, are typically short-live perennials that peter out after a couple of years. Luckily, they are easy to grow from seed or root from cuttings.

Like Ugolin, I’ll soon be carefully nurturing some new seedlings. Whether planting, picking, taking cuttings, or preparing them for winter, I’ll also be hunched over my carnations and lavishing them with care, in the months ahead. It’s worth it, for the pastel flowers, and especially for the flowers’ heavenly scent.

And Some Things for the Other Senses

What’s the attraction of southern Europe? The climate there is so different from here in the Wallkill River valley, yet I am attracted to and keep trying to grow Mediterranean plants such as carnations, figs, pomegranates, lavender, black mulberry, and rosemary. All these plants thrive in dry summers and cool, not frigid, winters; minus 20°F is not an uncommon low winter temperature here.

Large cardoon plant

Cardoon, last year

Add to the roster here artichoke and cardoon, two more Mediterranean plants that I set out last spring, for the artichoke, the spring before for the cardoon. (The very mild temperatures of the previous winter let the cardoons survive their first winter outdoors.) That was after sowing each plant in later summer and having it winter in the very cool temperatures of my greenhouse, which provided the vernalization the plants need to flower their first season outdoors.

Both cardoon and artichoke grow as a whorl of spiny leaves from the center of which rises a main flower stalk with smaller flower stalks branching off lower down. Like carnations, they are short-lived perennials. Like carnations, they are easily propagated, in this case by seed or by offshoots that grow at the base of the plant

Cardoon in bud

Cardoon in bud

Like carnations, the biggest threat to artichokes and cardoons around here is winter wetness and, especially, cold. Winter cold will assuredly kill them unless they are protected in some way. To that end, late last fall, I cut down the plants and covered each with a large, inverted flowerpot in which and on which piled leaves for insulation. 

Cardoon  & artichoke protected for winter

Cardoon & artichoke protected for winter

During the warm spell a week or so ago, I pulled back the leaves and uncovered the plants. Cardoon leaves had sprouted more than a foot high within their winter home! Without light, the leafy stalks were ghostly white.


Cardoon, after winter

Cardoon, after winter

That’s okay; cardoon is sometimes purposely blanched to make its flavor more mild. A few days of light will green them up. That’s okay too; I’m growing cardoon for its bold visual presence — last year the plants leaves formed a 3-foot-high, blue-green, mound of spiny leaves up the center of which rose flower stalks at the top of which opened blue flowers resembling enormous thistles.

Cardoon flower

Cardoon flower

As for the artichokes: Not a sign of life. Perhaps winter cold or moisture did them in. Perhaps mice lunched on the roots. Perhaps there’s life beneath the ground, still to awaken. I’ll keep my fingers crossed.

PEST PLANS

My Sweet, Corn

Spring is here this week, weatherwise, at least. Not to bring back bad memories, but with real spring just around the corner, now is a good time to revisit two or three of last year’s worst pest problems, and plan some sort of counteraction. Not that those memories are really that bad; the interaction of pests, plants, the environment, and my hopefully green thumb is always interesting.

Golden Bantam sweet corn, non-hybrid
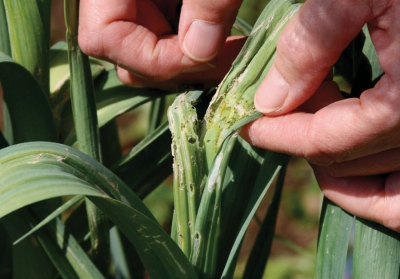
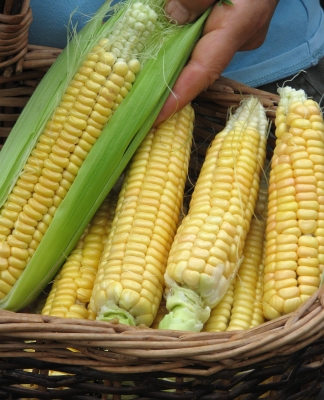
The most serious pest problem last year, most serious because it affected one of my favorite vegetables, was a disease that devastated my later plantings of corn. Looking at the symptoms —  yellow streaks on leaves that turned to tan, dead areas — my diagnosis was the bacterial disease, Stewart’s wilt. Some plant pathologists pointed out that Stewart’s wilt is very rare around here, and that the problem was probably the fungal disease, northern corn leaf blight.

Disease development

Disease development on leaves

I’m not 100% convinced it’s the blight but, more important is what to do in either case. I like my sweet corn. (Popcorn and polenta corn were unaffected.) Stewart’s wilt can be avoided by growing resistant varieties. But not only do I like my sweet corn; I like specifically Golden Bantam sweet corn.

A hundred years ago, Golden Bantam corn was bred into a number of hybrid varieties, some of which are resistant to Stewart’s wilt. Golden Cross Bantam, for example. As I said, though, I like my Golden Bantam. I’ve grown Golden Cross Bantam and its flavor fell short of Golden Bantam.

Northern Corn Leaf Blight

Northern Corn Leaf Blight

As a nonhybrid variety, Golden Bantam turns up in a number of strains. My seed came from a few sources, and it’s possible that some strains are more resistant than others. My two earlier ripening beds had no disease. Last year I didn’t keep records of which beds got seed from which sources. This year I’ll record it.


Northern corn leaf blight can also be controlled with resistant varieties. As I wrote, though, Golden Bantam is the variety for me, so other varieties are not an option, for now at least.

Plus, there are other options for dealing with northern corn leaf blight. Thorough cleanup at season’s end removes spores that would overwinter. Done. Not planting corn in the same bed for one to two years to starve out the disease. Done. Good air circulation and humidity control by keeping weeds in check. Not so done each year. Colder, damper air descends readily into the Wallkilll River Valley here and, while weeds are under control, I do a lot of interplanting, which has the same effect, humidity-wise, as weeds.

Who knows? Another season, different conditions. The problem, whichever it is, never showed up before; perhaps it won’t ever again.

An Unwelcome Newcomer

The other significant pest problems last year were with my onions and leeks. As usual, I started onions from seed indoors in February and planted them out in early May. Another batch got direct seeded right out in the garden in April. Both plantings — I’m ashamed to admit — yielded stunted bulbs, many no bigger than a nickel. Leeks likewise were stunted, or deformed.

Also embarrassing is that I didn’t take the trouble to examine the plants closely for clues. This would have been relatively easy since the probable culprits were leek moth or thrips, both now common, around here, at least.  Plus, I’ve previously had a problem with leek moth.

Leek moth, a European native, is a relative newcomer on this side of the Atlantic, first showing up in northern New York state in 2009. Temperatures above 50°F in late winter awaken papae or adults overwintering in debris, and Ms. Leek Moth soon starts laying eggs, lots of them. In less than a month, new adults start feeding on leaves. Subsequent generations follow suit, feeding on leaves, weakening the plant, and also the parts — stalks and bulbs — that we want to eat.
Leek moth damage
Early signs of impending damage are the eggs, tiny and transluscent and laid on the undersides of the leaves. Or, later, the caterpillars, slender, yellow and also small, less than one-half inch long. The important thing is to take action at the first signs of damage — holes in leaves and caterpillars. To see the caterpillars, leaves of garlic and leeks need to be unfolded; hollow leaves of onions need to be opened for an inside look.

Leek moth damage, later

Leek moth damage, later

Preemptive action would be to use a lightweight floating row cover beginning early in the season to keep Ms. Leek Moth from laying eggs on plants. 

Once damage or caterpillars is found, spraying, my least favorite garden activity, is needed. Organic sprays include Pyganic, which is effective for a couple of days, or, more lasting, Entrust, a natural substance made by a soil bacterium. In either case sprays need to be applied strictly according to label directions, both for effectiveness and for legality

Thrip, Thrip, Thrip – No, Not a Frog

Thrips, the other possible, or additional, culprits are very small, but their damage is telling: silver lines and/or small white patches on leaves and tip dieback. To see the culprits themselves, you’ve got to look closely between the leaf folds, zeroing in on the youngest leaves, for light yellow nymphs and darker adults. Hot, dry weather suits them best, which were the conditions here last summer.

Thrip damage

Thrip damage

Because thrips overwinter in debris, thorough cleanup helps. Straw mulch has potential, although one study showed that while it reduced the number of thrips, it didn’t affect yield. It did increase the number of jumbo onions, though. Go figure. 

Certain kinds of onions are more resistant to thrips than others. In general, red onions (which I anyway don’t grow) are very susceptible, yellow ones (which I do grow) less so, and Sweet Spanish onions (which I have grown in the past) are relatively resistant.  I’ll no longer grow the variety Candy, which is listed as susceptible.

Certain plants, on which thrips do little damage, can draw thrips away from the onions. Carrots, tomatoes, cabbage and its kin, carnations, and chrysanthemums, as examples.

And, of course, there are organic sprays, a last resort for me. Beauvaria, a naturally-occuring insect killer, for one. Also the relatively benign insecticidal soap paired with Neem. And again, Entrust.

As I said, I’m not bemoaning these insect and disease pests. It’s reassuring for me to stop and think how few or no pest problems vegetables typically affect my kale, tomatoes, peppers, okra, and most other vegetables grow. They all grow well with little more than yearly additions of compost to the beds, and timely planting and watering.

Prune Fearlessly

A reminder that I’ll be holding a FEARLESS PRUNING webinar on March 29, 2021 from 7-8:30pm EST. This webinar will take the mystery out of pruning, so that you can prune your lilac and rose bushes, apple trees,  blueberry shrubs — all trees and shrubs, in fact — to look their best and be in vibrant health. Fearlessly. For more information and to register, go to www.leereich.com/workshops.

ALMOST LIKE SUMMER

Fresh Veggies

When I was a child, it seemed that winter vegetables were mostly peas and diced carrots, conveniently poured frozen out of plastic bags into pots of boiling water. Yuk! Winter notwithstanding, my backyard garden still offers plenty of fresh winter vegetables. Let’s have a look. Kale, of course, looks unfazed by snow and plummeting temperatures. Not only does it look unfazed; it also tastes very delicious.

More surprising is the endive that I planted back in August, then covered beneath a “tunnel” of clear plastic and slightly insulating row cover held aloft by metal hoops in late October. Temperatures about a week ago went as low as -8° Fahrenheit! Thanks to the additional insulation from almost a foot of snow, now melted, the endive is still lush and tasty.

The rest of winter’s fresh garden vegetables are not in the garden. Most are in plywood boxes in cold storage, first in my mudroom, then moved out to my cooler. vegetables of winter(The cooler is an insulated room cooled with an air conditioner that has been tricked, with a device called CoolBot, into bringing the temperature down just below 40° F.) One box houses Hakurei turnips, Watermelon radishes, and Daikon radishes picked around the middle of December.

The same day I pulled the turnips and radishes, I also dug up leeks, now nestled into another box. With snow cover, both leeks and turnips probably would survive winter out in the garden, but reaching into a box is easier than chopping through ice and snow out in the garden to get at these vegetables.

Yet another box has a few heads of cabbage, also harvested that day in December. Lopping off the outer leaves, which anyway were looking ragged and slug-eaten, cuts water loss from the tight heads and keeps them fresh. One more box is packed full of napa type Chinese cabbages, good for “Asian slaw” or stir fry.

Most years I would have braids of onions also. Not this year. Crop failure. All the onions, both direct-seeded and grown from my transplants, didn’t grow large enough to bother storing. The problem was a clog, too long undetected, in the water line to the seasonal irrigation pump at, evidently, a critical time in onion bulb development.

(I also have a 400 square foot greenhouse packed full of fresh, growing lettuce, mustard greens, arugula, celery, claytonia, kale, chard, and mâche, with a little fresh dill, cilantro, and parsley. But that’s a whole other story.)

Summer Berries

I may be addicted to blueberries. I now eat them pretty much every morning year ‘round. That’s fresh blueberries beginning at the end of June, and frozen ones from mid-September on. I pace myself. The frozen blueberry season opens with about 70 bags (each bag about 5 cups) in the freezer, enough to keep us “berry happy” on into June.
Blueberries, frozen and defrosted
I highly recommend planting blueberries. They are easy to grow organically, the plants are beautiful, and the berries are very healthful and taste great. They’re also easy to freeze: Just spread them on a tray until frozen, then pack them into bags. Their two main requirements are suitable soil, easily made so, and protection from birds, with netting. Each bush will net you 8 pounds, or more, of berries.

Thawed in the refrigerator, the berries taste as good as fresh ones. Or maybe I believe that only because in late December it’s been so long since I’ve had a fresh blueberry.

Olfactory Romance

Man cannot, of course, live by bread alone. I could use some fragrance, some olfactory hint of spring — or summer, or fall. Years ago, I grew “many-flowered jasmine” (Jasminium polyantha). A misnomer for my plant. Its fragrance was heavenly but it only coughed up a few blossoms each winter, despite my subjecting it to a period of temperatures below 60 degrees F. and some drought to give it a rest before it (was supposed to) burst  into flowering abundance.

Gardenia was another one of my plants for winter fragrance. It did bloom in winter, late winter, and its fragrance was heavenly. But it proved to be a magnet for scale insects, one of the most difficult house plant pests to control organically. Both plants have long ago been composted.

I’m now eagerly awaiting blossoms on my Meyer lemon plant. The plant is easy to bring into bloom, and there’s the added bonus of delicious lemons. Being a hybrid of lemon and sweet orange, Meyer lemon has a slightly different flavor from that of lemons.
Meyer lemon tree in pot
The other plant to — reliably, I hope — blossom now, in early winter is sweet osmanthus (Osmanthus fragrans), specifically the variety Goshiki. Why Goshiki? Because it has variegated leaves, green and white with splashes of pink, spiny like those of holly. Sweet osmanthus
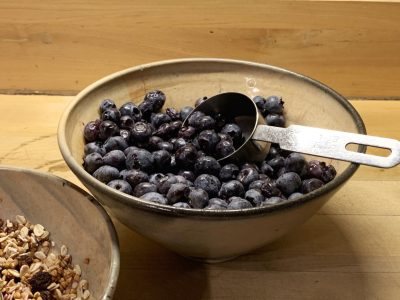
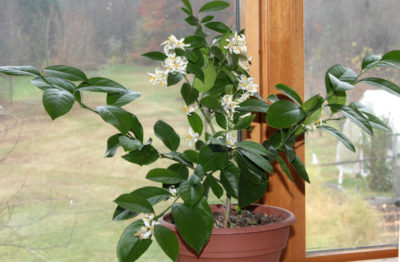
It’s cold-hardy to Zone 6. My plan is to grow it in a pot to bring indoors to a cool sunny window in late fall to spend the winter.

This is all a pipe dream so far because all I have is a spindly stem I cut to root from a plant beckoning me from a sidewalk near Philadelphia. The cutting doesn’t look hopeful. The quest begins.

CLOSING “SHOP”

Chips, Not Hay, In This Case

“Make hay while the sun shines.” Good advice, literally in agriculture and figuratively in life. And I’m following it these days, in agriculture. Not making hay of course, because that sunshine is only effective in summer and fall, partnered with heat.

The “hay that I’m making” is actually mulch that I’m spreading. A few weeks ago I put my “WOOD CHIPS WANTED” sign out along the road in front of my house. In a short time, an arborist was kind enough deposit a truckload of chips. Wood chips
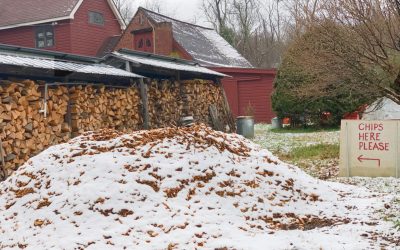
I figured I could spread it on the ground beneath some of my trees and shrubs, especially the youngest ones. There, next summer, the mulch would keep weeds at bay, slow evaporation of water from the ground, and feed soil life, in so doing enriching the soil with nutrients and organic matter.

Usually, by this time of year, my piles of wood chips have frozen solid or are white mounds beneath snowy blankets. Not so this year.

So I’ve been loading up garden cart after garden cart with chips to haul over to the garden. (Once the ground disappears beneath a heavy, white layer of snow, moving heavy cartloads becomes nearly impossible.) 

Since the most important trees and shrubs had already been mulched earlier in autumn, I decided it was a good time to add a layer of chips to the paths in the vegetable garden.Mulching chestnut trees 
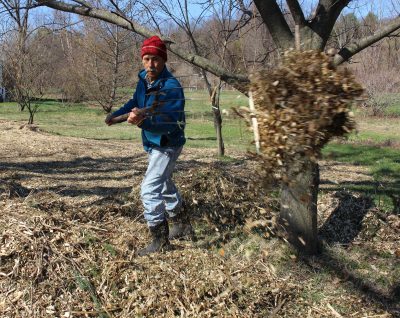
Chips there are mostly to suppress weeds which thrived with last season’s unusually abundant rainfall and to soften, by spreading out, the impact of footfall on the paths. I generally “chip the paths” every couple of years at a minimum if for nothing more so that the height of the paths keeps up with the rising height of the vegetable beds which get — and already got, at the end of this season — a one-inch deep blanket of compost annually. (Besides the usual benefits of mulches, the compost provides enough nutrients for the intensively planted vegetables for the whole season. No fertilizer per se is needed.)

After decades of my adding an inch or more of wood chips to the paths and compost to the beds, you might suppose that the whole vegetable garden has risen a few feet above the surrounding area like a giant stage. Nope. The goodness of organic materials, such as the compost and wood chips, comes from soil organisms chewing them up and breaking them down. As decomposition takes place, the bulk of these materials, which are mostly carbon, hydrogen, and oxygen, is released into the air as carbon dioxide and water. The minerals that remain feed the plants.

Pine Berries?

One bed in the vegetable garden is home to strawberries. That bed also needs mulching, for different reasons and with different materials than the other beds, and needs it every year about now.

A strawberry plant is mostly nothing more than a stem, a stem whose distance from leaf to leaf has been telescoped down to create a stubby plant. Drawing of strawberry plantLike the stems of any other plant, a strawberry stem each year grows longer from its tip and also grows side shoots. So a strawberry stem rises ever so slowly higher up out of the soil each year.

Strawberry stems are not super cold-hardy. As a stem slowly rises higher in the ground, it’s exposed to more and more cold, and more apt to dry out.

What’s needed is to protect the stems with an insulating blanket of some loose organic material. Straw is traditional — and one possible root of the name “strawberry” — but good straw reliably free of weed seeds is hard to find. Instead of straw, I often use wood shavings, conveniently available in bagged bales. This year I decided that the giant pine tree here could spare a few pine needles, raked up to share with the strawberries.

The goal of mulching strawberries isn’t to keep cold out, just to moderate the bitterest cold. Strawberry bed mulched with pine needles
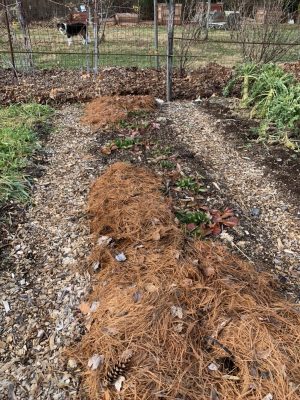
Mulching too early might cause the stems to rot. I typically wait until the ground has frozen about an inch deep which usually occurs towards the end of December here, and then cover the plants with about an inch depth of wood shavings.

Come spring, the mulch needs to be pulled back before the plants start growing. Tucking the mulch in among the plants provides the usual benefits of mulch, especially important for strawberries because of their shallow roots, and provides a nice, clean bed on which the ripening berries can lie.

(More about growing strawberries can be found in my book GROW FRUIT NATURALLY.)

Hey, Good Looking

I admire the look of my vegetable gardens this time of year. With the chipped paths and compost lathered beds, some also with a tan cover of winter-killed oat plants, they look very tidy and ready to welcome new seeds and transplants in the months ahead. The look doesn’t compare with the lush greenery and colorful fruits of the summer garden, all of which is nothing more than a memory.
View of garden

FINAL HARVESTS

Compressed Gardening Experience

People are so ready to sit at the feet of any long-time gardener to glean words of wisdom. I roll my eyes. Someone who has gardened for ten, twenty, even more years might make the same mistakes every year for that number of years. I, for instance, swung a scythe wrong for 20 years; I may have it right now. Even a wizened gardener who has evaluated and corrected their mistakes has garnered experience only on their own plot of land; these experience may not apply to the differing soils, climates, and resources of other sites.
Lineup of my books
When I began gardening, my agricultural knowledge and experience was nil, zip, niets, rien, nada. But — and this is important — I had easy access to a whole university library devoted solely to agriculture. Hungry to learn, I read a lot. (I also was taking classes in agriculture.) In one year I was able to garner years of, if not actual experience, much of the knowledge that comes with that experience. And my garden showed it.

I’ve now gardened many decades and still gobble up the written word.

All of which is to say that reading reputable sources about gardening can make anyone a much better gardener and do so quicker than by gardening alone. “Reputable” is a key word in the previous sentence. So here’s the, to use the phrase of Magliozzi brothers on the radio show Cartalk, Shameless Commerce Division of this blog: a plug for my books. I stand firmly by anything I’ve written and am open to criticism.

Here’s the book list, all available from the usual sources or, signed, from me through this website (good gift idea, also):

A Northeast Gardener’s Year: A month by month romp through all things garden-wise, what to do, how to do it, and when to do it.
The Pruning Book: Plant responses, pruning tools, how to prune just about every plant (indoor, outdoor), and final sections on specialized pruning techniques, such as scything and espalier.
Weedless Gardening: A four-part system, emulating Mother Nature and based on current agricultural research, that makes for less weeds and healthier plants, along with other benefits such as more efficient use of water and conservation of humus.
Landscaping with Fruit: Following introductory chapters about designing your landscape is a listing of the best fruits to use for “luscious landscaping” in various regions and how to grow each of these fruiting trees, shrubs, vines, and groundcovers.
Grow Fruit Naturally: Describes multi-faceted approaches to growing fruits without resorting to toxic sprays, starting with selecting kinds of fruits and varieties and moving on to encouraging natural predators, beefing up the soil, and more.
The Ever Curious Gardener: Using a Little Natural Science for a Much Better Garden: Knowing some of the science behind what’s going on in the garden can make you an even better gardener; here’s how.

Vegetable Finale

And now, on to some gardening . . .

I’ve said it before and Yogi Berra said it before me, “It ain’t over till it’s over.” Last night’s temperature plummeting to 18°F was still not enough to put the brakes on the vegetable garden. Beneath their covered “tunnels,” arugula, mustard, endive, and napa Chinese cabbage still thrive. Along with mâche and kale, which aren’t under cover, all these greens are looking as perky as ever and, most important, taste better than ever.

Interestingly, temperatures I’ve measured within the tunnels are not that different — actually, not different at all — from temperatures I’ve measured outdoors. But something’s different. The increased humidity under the tunnels is probably at least partially responsible for the fresh tastes and appearances.
Endive in tunnel
It’s a wonder that these tender, succulent leaves tolerate such temperatures. You’d think the liquid in their cells would freeze and burst the contents to smithereens. That would have been the case if the 18°F had come on suddenly, without any precedents. 

Plants aren’t passive players in the garden. Increasingly cold weather and shortening days acclimated these plants to cold. (A month ago, temperatures dropped one night to 16°F.) Plants move water in and out of their cells, as needed, to avoid freezing injury. And increasing concentrations of dissolved minerals and sugars in the cells make the water freeze at lower temperatures. Perhaps that’s one reason why these vegetables taste so good. The tunnels also slow down swings in temperature, giving plants time to move water in and out of their cells and whatever else they do preparing for and recovering from cold.

Too many people, even gardeners(!), consider endive as nothing more than a bitter, green leaf best used as garnish. Reconsider. Given close spacing so that inner leaves of each head blanche from low light along with cool and cold temperatures, and endive takes on a wonderful, rich flavor. Blanched interior of endive
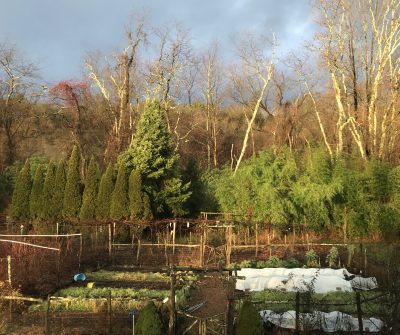
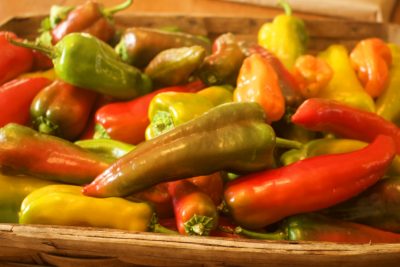
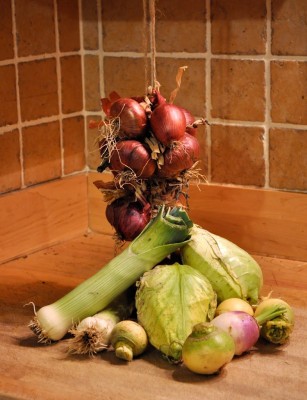
Only the slightest hint of bitterness remains, enough to make the taste more lively — delicious in salads, soups, and sandwiches.

Fruit Finale

The last fruits of the season, Szukis American persimmon, were harvested last week after over a month of eating them. Definitely the easiest fruit I grow. No pruning, no pest control. And definitely one of the tastiest: imagine a dried apricot soaked in water, dipped in honey, then given a dash of spice.
Persimmons on tree in December
Fruits were very mushy for the final harvests — perfect for a jam. Squeezing a bunch of the fruits in a mesh bag (such as used for women’s “delicates” in a washing machine) pushed out Making persimmon jam
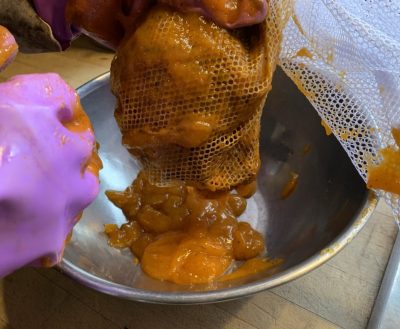
the pulp without seeds. No sweetener needed. Just jar it up and refrigerate (keeps about 2 weeks) or freeze. Delicious.


GARDEN ESSENTIALS, FOR PEGGY

Compost, of Course, and More

Very soon I plan to drive a truckload of compost to my sister Peggy’s house. Like many people, she’s caught the gardening bug, and this compost, along with a wheelbarrow I fished out of my town’s metal recycling, is a gift. It includes my help spreading it.
Compost in garden cart
What else would be a good gift for any beginning gardener? (Okay, Peggy has been dipping her toes in the gardening waters for years, but only recently got more serious about growing vegetables.)

For starters, indispensable, would be a trowel or a hori-hori knife, the latter being something of a hybrid of a garden knife and a trowel, not as good as either parent but great for all-around use. No need to labor over the worth of a high-end, stainless steel, oak-handled trowel; either will work well and last long if stored out of the elements.

A pair of hand shears would come in handy for clipping tomato suckers or cutting down pepper or eggplant plants at season’s end. They’e admittedly not indispensable for vegetable gardening but very useful if any shrubs or trees are also in the picture. ARS pruning shears
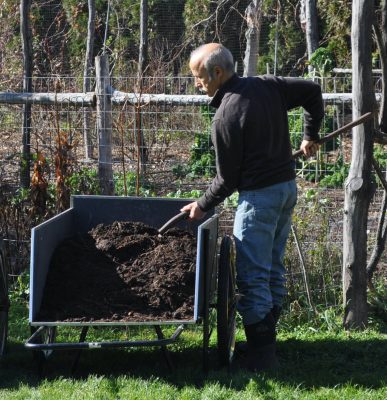
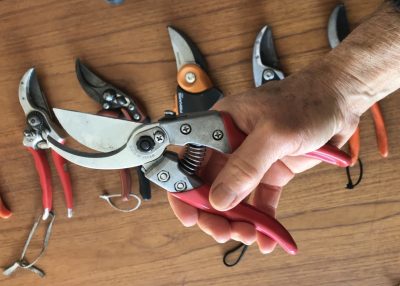
For a hand shears, quality counts. Blades of the best hand shears, as in their name, shear past each other like those of scissors. They’re called “bypass pruners.” My favorite is the ARS hand shears. Shears with anvil blades — “anvil pruners” — sport a sharp blade that comes down on a narrow, flat surface; the flat surface limits how close you can make a cut and the shear works poorly if any nick or waviness develops on the sharp blade.

For anyone venturing into growing their own seedlings, which greatly widens the choices of varieties to grow, I recommend one of the many “self watering seed starters.” Cells housing plants sit on a capillary mat that dips into a water reservoir just below. Seed propagatorSoil in the cells sucks up moisture from below through capillary action to remain consistently moist, and the reservoir requires replenishment infrequently.

And finally, gloves, although these are very personal and it’s hard to pick out a pair suited to anyone else besides yourself. How about money for gloves? And some people like to get their hands in the dirt. As a professional pianist and piano teacher, probably not Peggy (check her out at www.peggyreich.com).

Reading Can Substitute for Years of Gardening

Okay, moving on to a most important “tool” for beginning, even intermediate and advanced, gardeners alike: books and the web. That is, if the information offered is sound — not always the case. One way to get solid information off the web is to follow any search term(s) with “site:edu” or “site:gov”, which brings you to university or government sites, respectively.

Not that those are the only reputable sites, but then judge whether other sites are reputable based on the author(s), possible agendas for financial gain, and comparing other information on the site with that you know for sure is either correct or false. 

As an example, someone recently told me that black walnut plants are high in iodine, as evidenced by the brown stain from the hulls and the first of many hits if you enter “iodine” and “black walnut” into a search engine. This didn’t ring true to me so I looked up analyses of iodine concentrations in black walnut on a number of reputable sites. No, black walnut plants do not contain iodine, despite all the sites touting the myth that they do.

(Everything you read on my site is, of course, reputable. Ha, ha.)

On to books . . . if I may be so bold as to begin by recommending my own. Weedless Gardening Weedless Gardening, cover
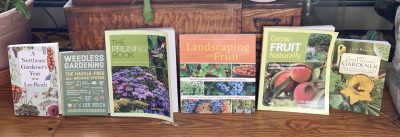
tells how to prepare and manage the soil, when to sow and transplant vegetables, what to use for mulch, how to make compost, the ins and outs of drip irrigation, and more. A Northeast Gardener’s Year A Northeast Gardener's Year covertakes you on a timely jog through the year with all things gardening: soil, flowers, houseplants, naming plants, etc., depending on what needs doing gardenwise indoors and out. I’ve written more books (all are listed on this site), but these two are more essential.

Plenty of other reputable gardening books are around if you seek them out. For an all around gardening book, check out Barbara Damrosch’s The Garden Primer. Specifically, for vegetables, there’s E. C. Smith’s The Vegetable Gardener’s Bible or some oldies, or, if you can get them, A. C. Burrage’s Burrage on Vegetables or Gardening: The Complete Guide to Growing America’s Favorite Fruits & Vegetables from the National Gardening Association.

Quality Compost?

Back to that truckload of compost for Peggy. A truckload of compost is more than I can spare of my own black gold, so I’m purchasing it in bulk.

I picked up the phone, dialed some numbers, and asked some prospective compost merchants about their products to make sure the compost would be of good quality. What went into the compost, for instance? A greater the variety of raw materials results in a better variety of nutrients in the end product as long as those raw materials don’t include industrial wastes that might contain heavy metals, or, in dry regions, feedlot manures, because of excess salts.

What about the acidity or pH? Ideally the pH lies between 6 and 7. 

How rocky or stony is the compost? No need to pay for rocks rather than compost. Similarly, is the material pure compost (desired), or compost diluted with a large portion of soil?

How about weeds or weed seeds? Time, temperature, and pile turning all have bearing on the number of viable weed seeds in a finished compost. A carefully built compost pile easily reaches a high enough temperatures to kill most weed seeds. But even when weed-free initially, composts that sit around too long (especially if uncovered) will pick up weed seeds carried in by wind and animals.

Good gardening, and especially organic gardening, involves moving bulky organic materials such as hay, straw, wood chips, wood shavings, leaf mold, and compost. These organic materials are what feed the friendly soil microbes which, in turn, feed the plants, as well as beef up the soil ecosystem in many biological and physical ways.

So two other items that come to mind, after the trowel, pruning shears, seed starting flats, and books, are a wheelbarrow or garden cart, and pitchfork or shovel. As I wrote, I’ll leave the wheelbarrow with her and can also leave of the many pitchforks I’ve accumulated over the years. Have I forgotten to mention any other gardening essentials?Garden cart

ONE OF THANKSGIVING’S UNSUNG HEROES

Years ago I wrote about one of the unsung heroes of Thanksgiving, the groundnut (Apios americanum). This plant, which helped nourish the Pilgrims through their first winters, never achieved the reknown of corn, pumpkins, cranberries, and other foods of the season.
Groundnut
When I first wrote about groundnuts, I had just planted them. I pointed out that there was renewed interest in the plant, though specifics as to how to grow it were wanting and selection of superior clones was just beginning. Now that I have grown groundnut for a few (thirty plus!) years, I am ready to share my experiences.

It Looks Like . . . And Acts Like . . .

As you might guess from the name, the plant makes edible tubers, usually the size of golfballs and strung together on a thinner, ropelike root. The swollen roots on one of my plants are more the size of tennis balls than golf balls. Not as obvious, below ground, at least, is that the plant is a legume; as such, it can “fix” atmospheric nitrogen, that is, put it in a plant-available form.

The plant also has shown some virtues aboveground. Chocolatey brown flowers dangle like jewelry from the twining stems. The flowers are pretty enough to have accorded groundnut a place in flower gardens in France a hundred years ago. On some plants, the flowers also have a strong and delicious aroma – vanilla, instead of chocolate, though.
Groundnut flower
I started some of my plants from seed; others I purchased growing in pots. I trained each vine up and down and around a tomato cage. The plants were and still are in full sun and rich soil, with a thick mulch of wood chips. The ground is so fluffy that I can harvest by just grabbing one end of a root, then pulling it up and out of the soil.

Soon after I planted groundnut, I discovered that it is weedy. I was soon finding plants, first sneaking across the ground a couple of feet from mother plants, and then further and further.

Aboveground, the twining stems reached around and insinuated themselves amongst the branches of a nearby bush cherries and other plants.
Groundut vine
To further unsettle me, I was startled at the reappearance, with vigor, of one young plant which I thought I had destroyed as I dug looking for edible roots. (I since learned that harvest must be delayed until the second season.) I hope groundnut will not prove to be as unruly and as hard to remove as the horseradish I once foolishly planted in the garden!

Is It Good To Eat?

Now for the important question: What does groundnut taste like? Thomas Hariot, in A briefe and true report of the new found land of Virginia (1590) may have been the first to write of groundnut, and his opinion was “boiled or sodden they are very good meate.” In 1602, a correspondent from New England wrote to Sir Walter Raleigh that groundnuts were “as good as potatoes.”

Dr. E. Lewis Sturtevant (Sturtevant’s Notes on Edible Plants, 1919) reported an eighteenth century horticulturalist writing that the “Swedes ate them for want of bread, and that in 1749 some of the English ate them instead of potatoes.” He also quotes a nineteenth century writer, who wrote that the Pilgrims “were enforced to live on ground nuts.”

Moving up to the twentieth century, wild food forager Euell Gibbons, who enjoyed everything from cattails to milkweed pods, was reserved in his praise of groundnuts.

I have harvested groundnuts and, because they should not be consumed raw, boiled some and baked some. They taste almost as good as potatoes, though less distinctive. The texture was dry and mealy. Like Euell, I am reserved in my praise of the roots, though other groundnut plants might have better or worse roots. (After all, not all potatoes taste the same.)

I do think that groundnut, even in its present primitive state, is a native, perennial, permaculture friendly vegetable (I have been accused by some of being a permaculturalist)  good enough to deserve a place at the Thanksgiving table. That is, it deserves a place in the garden and on the Thanksgiving table as long as it’s planted where its growth and spread can be reined in.

How about calling it one of its Indian names – nu nu, perhaps – and making nu nu stuffing standard Thanksgiving fare? Happy Thanksgiving!

GHOST OF A NOVEMBER PAST

A Vine or a Bush?

Here’s a blast from the past, from my November 20, 2009 blog post, with current commentaries  on how things have changed — and not changed — over the past 11 years.

Dateline: New Paltz, NY, November 20, 2009, 5:30 am. New models of plants, like cars, are deemed necessary to keep consumers interested and spending money. My cars (actually trucks . . . you know, manure and all that) stay with me for as long as they keep rolling along, so it was with equal skepticism I looked upon a new “model” of mandevilla, called Crimson, that arrived at my doorstep early last summer.

I was first attracted and introduced to mandevilla about 20 years ago. The glossy leaves and the bright red, funnel shaped flowers, were part of the attraction. The Crimson Mandevilla
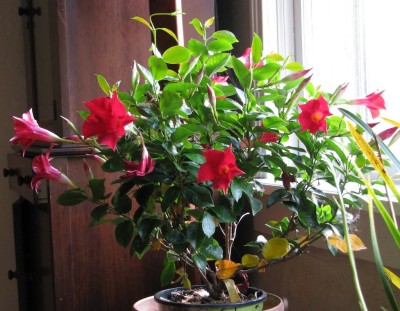
vining habit was also a big part of the draw, making the plant a stand-in for morning glory, but with prettier leaves and brighter flowers. Mandevilla is a perennial, tropical vine, so must winter indoors rather than be seeded outdoors each spring like morning glory. My vine’s leaves yellowed so much in winter that I tired of looking at it; one winter day I walked it over to the compost pile.

The variety Crimson is a new kind of mandevilla whose main selling point is its bushy growth habit. So yes, it is different and new, but wasn’t that vining habit one of the things I always liked about mandevilla?

Still, I have grown very fond of Crimson. It flowered continuously all summer and, since coming indoors in September, continues to do so, with new buds on the way (at every third leaf bud, according to the “manufacturer.”) I’m going to think of Crimson mandevilla as a very pretty, long blooming, bushy plant. Yes, it’s a worthy new model.

Dateline: New Paltz, NY, November 19, 2020: Well, Crimson evidently was not that worthy; it’s no longer with me. As I remember, that sickly look that eventually came on in winter didn’t justify its tenancy here.

With that said, someday I may still grow mandevilla again. But not Crimson or any other bushy variety. As I wrote 11 years ago, that vining habit was one of its main attractions. If I do grow it again, I’ll put it in the basement or somewhere where I’ll hardly see it, for it to sit out winter.

Are They Really Sickly?

(2009) Sickly-looking leaves of houseplants – such as my mandevilla of yore – can be traced to a number of causes. Already I’m seeing this yellow transformation creeping up on my gardenia, which just finished one of its many fragrant shows.
Yellowing leaves of gardenia
Both mandevilla and gardenia need soils that are quite acidic (pH 4-5.5) in order to thrive. Not enough acidity makes it hard for the plant to imbibe iron, resulting in iron deficiency and yellow leaves.

But wait! It’s not time yet for the “iron pills.” Looking more closely at my gardenia, I see that it is the OLDEST leaves that are yellowing. Hunger for iron causes the YOUNGEST leaves to yellow (and for their veins to remain green). Yellowing of older leaves most commonly means that the plant isn’t getting enough nitrogen. The nitrogen is being robbed from older leaves (which turn yellow because nitrogen is an important component of green chlorophyll) to feed the younger leaves.

The prescription? Add some soluble nitrogen fertilizer and pay more attention to watering. Too much water drives air out of the soil, and roots gasping for air have trouble doing their work to take up sufficient nutrients.

(2020) I mostly agree with my past diagnosis of and cure for yellowing leaves. But two other considerations are worthy of attention. 

First, temperatures in my home are on the cool side and roots are less functional as temperatures cool, especially the roots of warm climate plants. So roots might not be able to make efficient use of nitrogen even if it’s added to the soil.

And second, even evergreen plants go through periods of shedding their oldest leaves. Before these leaves drop, they lose their chlorophyll and turn yellow.

So under natural and under less than perfect conditions, mandevilla and gardenia are unavoidably going to look sickly in late fall and early winter.

Oh, the gardenia is also no longer a resident here. Too prone to scale insects.

Asparagus’ Leaves, Their Work Finished

(2009) Yellowing leaves are not always a bad thing. (Think of birch leaves a few weeks ago, or aspen leaves.) I’m happy that my asparagus’ leaves have yellowed. The plants have been growing vigorously all season, feeding their roots to fuel next year’s growth of the delicious young spears that I’ll be snapping off at ground level from late April to early July.

With this year’s work finished, the shoots and leaves, left to grow unfettered since early July, are yellowing and dying back. My short-bladed brush scythe was the perfect tool to make quick work of the plants, a fluffy addition to the compost pile.

With the asparagus shoots and leaves cleared away, I could get into that bed and weed it. The bed was pretty much weed-free until July, but then wet summer weather kept Weeding asparagus in past years
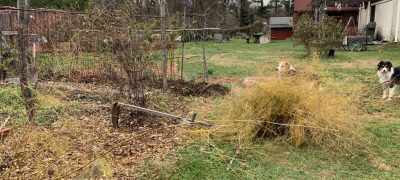
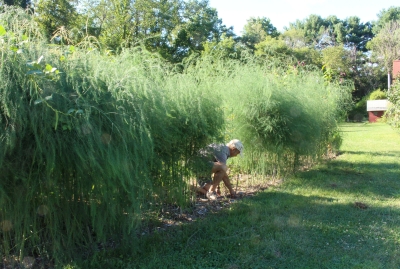
weeds germinating and growing, and hard to reach among the 6-foot-high forest of feathery stalks. The bed is now weeded and soon to be fertilized (2#/100 square feet of soybean meal) and mulched (wood chips 2 inches deep).

(2020) Wow! Right on schedule, on the same date as 11 years ago, asparagus leaves have yellowed. They’ve pumped nutrients and fuel down to their roots to provide for next spring’s growth, and are no longer functional and could harbor pests. So, like 11 years ago, I’m going to cut them down and add them to the compost pile.
Asparagus cut with scythe
This year I did treat the ground differently from the past 11+ years. Right after this year’s harvest, at the end of June, when the whole bed was cut to the ground, I did a little weeding. And then, instead of soybean meal as a fertilizer, I spread an inch of compost. Compost adds organic matter to the soil, and supplies a wider slew of nutrients and is more sustainable than soybean meal, among other benefits. The compost would also smother some weeds that would try to emerge.

Then, just to further smother weeds, I topped the compost with a one inch layer of wood chips.

I’m proud to report that the asparagus bed has never been so weed-free. No doubt, the very dry summer weather also played a part in keeping weeds at bay. 
Asparagus, growing thru compost + chips
At any rate, I’m getting out the scythe now to cut down the stalks. And I look forward to a good crop of asparagus beginning at the end of April. I highly recommend growing asparagus: it’s perennial and is one of those vegetable whose flavor is markedly different, and much, much better, when eaten fresh-picked.
Asparagus spear

ABOUT PEPPERS

Better Late than Never

Cold has finally gotten the better of my pepper plants. Two below freezing nights a month ago started their demise, and two more during the last few nights finally finished them off for the season. Not the fruits, though, plenty of which are piled and spread out in trays and baskets in the kitchen.
Peppers in various stages of ripening
Outdoors, fruits weathered the below freezing temperatures well. They’ve been shielded from the full brunt of cold by their canopies of increasingly floppy leaves. Also, fruits of plants are higher in sugars than are the leaves. Thinking back to high school chemistry, I recall that any solute, such as sugar, lowers the freezing point of the solution. So pepper fruit cells can tolerate more cold than pepper leaves.

Even with the plants dead outside, the pepper season isn’t over here. The season has been greatly extended by harvesting and bringing indoors sound, green peppers showing any bit of red — or yellow if that’s the pepper’s ripe color. Sitting in trays and baskets in the kitchen, these mostly green peppers have been ripening, depending on when they were harvested and how long they’ve sat, to fully red or yellow color, when they are most flavorful (to me).
Peppers in trays and baskets
For some reason, perhaps the heat interfering with pollination, peppers started ripening later in the season than usual. The present and the past few week’s abundance of them makes up for the late start.

Thank You C2H4

For the peppers’ morphing from green to red or yellow, I have to thank, in large part, a simple gas made up of just two atoms of carbon and four atoms of hydrogen. It’s ethylene, a plant hormone. Most plant and animal hormones are much more complex molecules.
Ethylene diagram
Ethylene is produced naturally in ripening fruits, and its very presence — even at concentrations as low as 0.001 percent — stimulates further ripening. The ethylene given off by ripe apples can be used to hurry along ripening of tomatoes, by placing an apple in a closed bag with the tomatoes.

Banana, apple, tomato, and avocado are among so-called climacteric fruits, which undergo a burst of respiration and ethylene production as ripening begins. These fruits, if picked sufficiently mature, can ripen following harvest.

Peppers, along with “figs, strawberries, and raspberries are examples of non- climacteric fruits, whose ripening proceeds more calmly. Non-climacteric fruits will not ripen after they’ve been harvested. They might soften and sweeten as complex carbohydrates break down into simple sugars, but such changes might be more indicative of incipient rot rather than ripening or flavor enhancement.” Or so they say. And, I admit, I’ve said; that quote is from my book The Ever Curious Gardener. (The rest of the section about ethylene in my book is correct.) They and I were wrong.

So, I’ve learned two things. First of all, pepper do ripen well after harvest, not only to a bright color but also to a delicious flavor. And second, further reading has revealed that hot peppers, but not sweet peppers, are, in fact, climacteric fruits.

What about semi-hot peppers? Or non-hot hot peppers? (Read on.)

Hot and Not

I did also grow some semi-hot peppers this season. Roulette is a variety billed as resembling “a traditional habanero pepper in every way (fruit shape, size and color, and plant type) with one exception – No Heat!” Roulette had an interesting flavor that I both liked and didn’t like (mostly liked), and occasional ones did have some heat to them, but that might have been due to their proximity to . . . 

Red Ember is billed as an early ripening hot pepper with “just enough pungency for interest.” It definitely caught my attention when I bit into one! Call me a wimp, but I thought it was fiery hot.

Peppers, Red Ember and Roulette

Peppers, Red Ember and Roulette

In my previously mentioned book, The Ever Curious Gardener, I also explored flavor in fruits and vegetables and, briefly, hotness in hot peppers. “Studies have been done with peppers, focusing specifically on their hotness, which, to muddy the waters, stems from not one, but from a whole group of compounds, capsaicinoids, mostly capsaicin and dihydrocapsain. Hotness in peppers was found to depend on the variety, the environment, and the interaction between variety and environment, with smaller fruited peppers less influenced by vagaries of the environment. Usually, but not always, a pepper will have more bite if plants are grown with warmer nights, with colder days, with just a little too much or too little water, or with fertility imbalances; increased elevation elicits the fiercest bite. Basically, with any sort of stress.”

Uncommonly hot temperatures this summer may very well have turned up the heat in Red Ember and put some heat in Roulette.