LOOK BEYOND POINSETTIA GLITZ

A Harem of Males

Phew, what a year 2020 was! Well, it’s over and, at least at this writing, things look hopeful for the future, at least from my perspective. Except if you live in a tropical or subtropical climate, there’s not much distraction from anything gardenwise, for now, so let’s take a close look at a plant no doubt sitting on many coffee tables and windowsills. Poinsettia. I’m not a big fan of their appearance, but I do like them as botanical curiosities.

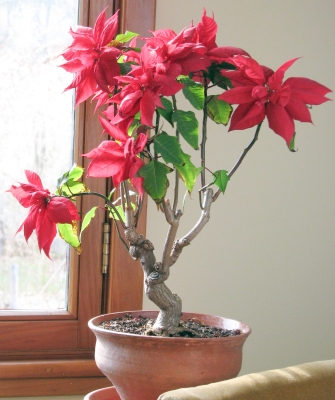
Let’s share some botanical lore of this plant by setting your holiday poinsettia on a table in good light for a close look at its flowers. I say “close  ” because the flowers are not those large, red, leaf-like structures. The large, red, leaf-like structures are just that — leaves, albeit modified leaves called bracts. The bracts attract pollinating insects to the plant.

The actual flowers of the poinsettia, which are not very showy at all, originate within the small, greenish, cup-shaped structures you see above the bracts. These cup-shaped structures are “cyathiums.”
poinsettia cyathiums
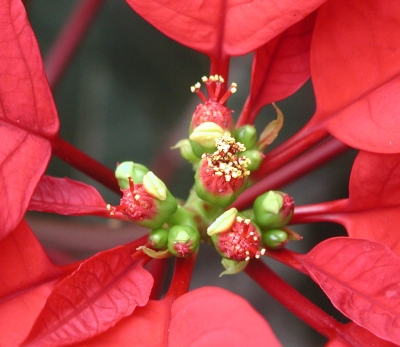
Each cyathium contains a single female flower surrounded by a harem of males. Pluck a cyathium from the plant, take a sharp knife or razor, and slice it in half from top to bottom. A magnifying glass helps now. You’ll see that the inner wall of the cyathium is lined with numerous tiny flowers which, when the flower is mature, protrude up through the opening of the cup. These are all male flowers.

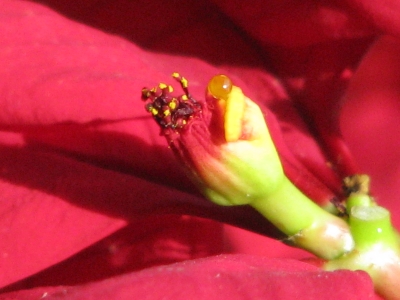
Look very carefully and you’ll also see a stalk attached to the very bottom of the cyathium, protruding up through the cup opening, and capped by what looks like a turban. That is the single, female flower, which, to promote cross- rather than self-pollination, emerges from the cyathium after male flowers begin to shrivel. Cross-pollination promotes genetic diversity for healthier plants. 

In addition to the male and female flowers, on the outside of the cyanthium is a single yellow gland that looks like the mouth of a fish poised to ingest food.
Cyathium close up
Next time a friend comments on the beauty of your poinsettia flower, take out a magnifying glass and closely examine a few cyathiums before looking up and agreeing nonchalantly.

Fool the Plant

Have you ever wondered how stores always manage to have blooming poinsettias for the holiday season? 

Poinsettia, along with chrysanthemums and most strawberry varieties, is a “short-day” plant. Short-days induce “short-day” plants to form flower buds. (In reality, plants are responding to long nights, but the phenomenon was originally thought to be daylength dependent, and the term “short-day” plants has stuck with us.) Poinsettia can be fooled into blooming at any time of the year merely by exposing it to artificially shortened days. 

To secure blooming plants for this past holiday season, poinsettias grown in large commercial greenhouse ranges were covered with a shade cloth so that they experienced 14 hours of darkness each “night” beginning around September. After 8 weeks of this treatment, they formed flower buds which became fully developed just before the holiday season.

You Do It

You can do this at home to make this year’s poinsettias bloom again whenever you want. Your poinsettias first will need a rest period. Loss of leaves and fading flowers indicate that your plants are entering dormancy. (Even tropical plants, such as poinsettia, do take a short, mild annual rest.) When the plants become dormant, move them to where it is cool. Water them infrequently, just enough to keep their stems from shriveling.

About April, the plants will be ready to start growing again. Cut the stems back to a few strong shoots, each about 6 inches long. Give the plants sun, warmth, and water. New shoots will push forth from dormant buds. When warm weather has settled, you can put the plants outside.

As temperatures cool in late summer, bring the plants indoors to a sunny window. Keep them away from cold drafts, which would cause their leaves to drop.

Now for the photoperiod treatment. Beginning three months before you would like the plants to bloom, make sure the plants get 14 hours of darkness each night. Moving them into a dark closet or covering them with a paper bag are convenient ways to do this.

The dark period each night must be uninterrupted. Even peek at them with a flashlight at midnight will have them acting as if they had a short night, instead of the needed long night.

After 8 weeks of the above treatment, move the plants back to their sunny window. Flower buds should be evident, and you should have blooming poinsettias within a month. If you want bloom for the holiday season next year, start the photoperiod treatment about the middle of September.

Poisonous?

Poinsettia, Euphorbia pulcherrima, is a member of the Euphorbiaceae family, commonly called the Spurge family. A common characteristic of plants in this family — which includes Hevea braziliensis, tapped commercially to make rubber — is the milky sap they exude when cut. The sap has often been considered poisonous and was sometimes used medicinally as a purge (hence “spurge,” from the French word espugier, meaning to purge). But, as Philippus Aureolus Theophrastus Bombastus von Hohenheim, more commonly known as Paracelsus, wrote in the 15th century, “All things are poisons, for there is nothing without poisonous qualities. It is only the dose which makes a thing poison.”

In fact, the sap is only mildly poisonous to humans and other animals. It can cause a rash on the skin or mouth, and stomach upset. So go ahead and nick the stem of your poinsettia and see the milky sap exude. No need to touch it.

ALMOST LIKE SUMMER

Fresh Veggies

When I was a child, it seemed that winter vegetables were mostly peas and diced carrots, conveniently poured frozen out of plastic bags into pots of boiling water. Yuk! Winter notwithstanding, my backyard garden still offers plenty of fresh winter vegetables. Let’s have a look. Kale, of course, looks unfazed by snow and plummeting temperatures. Not only does it look unfazed; it also tastes very delicious.

More surprising is the endive that I planted back in August, then covered beneath a “tunnel” of clear plastic and slightly insulating row cover held aloft by metal hoops in late October. Temperatures about a week ago went as low as -8° Fahrenheit! Thanks to the additional insulation from almost a foot of snow, now melted, the endive is still lush and tasty.

The rest of winter’s fresh garden vegetables are not in the garden. Most are in plywood boxes in cold storage, first in my mudroom, then moved out to my cooler. vegetables of winter(The cooler is an insulated room cooled with an air conditioner that has been tricked, with a device called CoolBot, into bringing the temperature down just below 40° F.) One box houses Hakurei turnips, Watermelon radishes, and Daikon radishes picked around the middle of December.

The same day I pulled the turnips and radishes, I also dug up leeks, now nestled into another box. With snow cover, both leeks and turnips probably would survive winter out in the garden, but reaching into a box is easier than chopping through ice and snow out in the garden to get at these vegetables.

Yet another box has a few heads of cabbage, also harvested that day in December. Lopping off the outer leaves, which anyway were looking ragged and slug-eaten, cuts water loss from the tight heads and keeps them fresh. One more box is packed full of napa type Chinese cabbages, good for “Asian slaw” or stir fry.

Most years I would have braids of onions also. Not this year. Crop failure. All the onions, both direct-seeded and grown from my transplants, didn’t grow large enough to bother storing. The problem was a clog, too long undetected, in the water line to the seasonal irrigation pump at, evidently, a critical time in onion bulb development.

(I also have a 400 square foot greenhouse packed full of fresh, growing lettuce, mustard greens, arugula, celery, claytonia, kale, chard, and mâche, with a little fresh dill, cilantro, and parsley. But that’s a whole other story.)

Summer Berries

I may be addicted to blueberries. I now eat them pretty much every morning year ‘round. That’s fresh blueberries beginning at the end of June, and frozen ones from mid-September on. I pace myself. The frozen blueberry season opens with about 70 bags (each bag about 5 cups) in the freezer, enough to keep us “berry happy” on into June.
Blueberries, frozen and defrosted
I highly recommend planting blueberries. They are easy to grow organically, the plants are beautiful, and the berries are very healthful and taste great. They’re also easy to freeze: Just spread them on a tray until frozen, then pack them into bags. Their two main requirements are suitable soil, easily made so, and protection from birds, with netting. Each bush will net you 8 pounds, or more, of berries.

Thawed in the refrigerator, the berries taste as good as fresh ones. Or maybe I believe that only because in late December it’s been so long since I’ve had a fresh blueberry.

Olfactory Romance

Man cannot, of course, live by bread alone. I could use some fragrance, some olfactory hint of spring — or summer, or fall. Years ago, I grew “many-flowered jasmine” (Jasminium polyantha). A misnomer for my plant. Its fragrance was heavenly but it only coughed up a few blossoms each winter, despite my subjecting it to a period of temperatures below 60 degrees F. and some drought to give it a rest before it (was supposed to) burst  into flowering abundance.

Gardenia was another one of my plants for winter fragrance. It did bloom in winter, late winter, and its fragrance was heavenly. But it proved to be a magnet for scale insects, one of the most difficult house plant pests to control organically. Both plants have long ago been composted.

I’m now eagerly awaiting blossoms on my Meyer lemon plant. The plant is easy to bring into bloom, and there’s the added bonus of delicious lemons. Being a hybrid of lemon and sweet orange, Meyer lemon has a slightly different flavor from that of lemons.
Meyer lemon tree in pot
The other plant to — reliably, I hope — blossom now, in early winter is sweet osmanthus (Osmanthus fragrans), specifically the variety Goshiki. Why Goshiki? Because it has variegated leaves, green and white with splashes of pink, spiny like those of holly. Sweet osmanthus
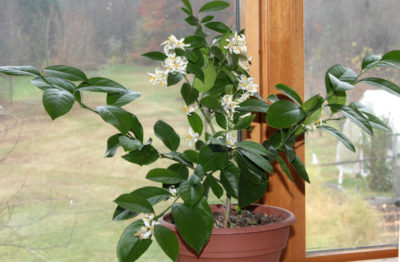
It’s cold-hardy to Zone 6. My plan is to grow it in a pot to bring indoors to a cool sunny window in late fall to spend the winter.

This is all a pipe dream so far because all I have is a spindly stem I cut to root from a plant beckoning me from a sidewalk near Philadelphia. The cutting doesn’t look hopeful. The quest begins.

GHOST OF A NOVEMBER PAST

A Vine or a Bush?

Here’s a blast from the past, from my November 20, 2009 blog post, with current commentaries  on how things have changed — and not changed — over the past 11 years.

Dateline: New Paltz, NY, November 20, 2009, 5:30 am. New models of plants, like cars, are deemed necessary to keep consumers interested and spending money. My cars (actually trucks . . . you know, manure and all that) stay with me for as long as they keep rolling along, so it was with equal skepticism I looked upon a new “model” of mandevilla, called Crimson, that arrived at my doorstep early last summer.

I was first attracted and introduced to mandevilla about 20 years ago. The glossy leaves and the bright red, funnel shaped flowers, were part of the attraction. The Crimson Mandevilla
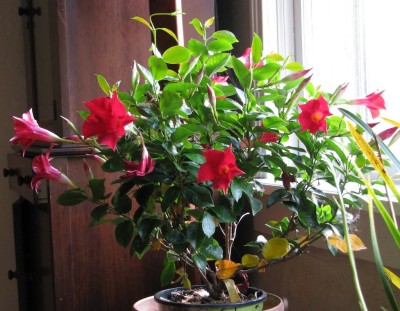
vining habit was also a big part of the draw, making the plant a stand-in for morning glory, but with prettier leaves and brighter flowers. Mandevilla is a perennial, tropical vine, so must winter indoors rather than be seeded outdoors each spring like morning glory. My vine’s leaves yellowed so much in winter that I tired of looking at it; one winter day I walked it over to the compost pile.

The variety Crimson is a new kind of mandevilla whose main selling point is its bushy growth habit. So yes, it is different and new, but wasn’t that vining habit one of the things I always liked about mandevilla?

Still, I have grown very fond of Crimson. It flowered continuously all summer and, since coming indoors in September, continues to do so, with new buds on the way (at every third leaf bud, according to the “manufacturer.”) I’m going to think of Crimson mandevilla as a very pretty, long blooming, bushy plant. Yes, it’s a worthy new model.

Dateline: New Paltz, NY, November 19, 2020: Well, Crimson evidently was not that worthy; it’s no longer with me. As I remember, that sickly look that eventually came on in winter didn’t justify its tenancy here.

With that said, someday I may still grow mandevilla again. But not Crimson or any other bushy variety. As I wrote 11 years ago, that vining habit was one of its main attractions. If I do grow it again, I’ll put it in the basement or somewhere where I’ll hardly see it, for it to sit out winter.

Are They Really Sickly?

(2009) Sickly-looking leaves of houseplants – such as my mandevilla of yore – can be traced to a number of causes. Already I’m seeing this yellow transformation creeping up on my gardenia, which just finished one of its many fragrant shows.
Yellowing leaves of gardenia
Both mandevilla and gardenia need soils that are quite acidic (pH 4-5.5) in order to thrive. Not enough acidity makes it hard for the plant to imbibe iron, resulting in iron deficiency and yellow leaves.

But wait! It’s not time yet for the “iron pills.” Looking more closely at my gardenia, I see that it is the OLDEST leaves that are yellowing. Hunger for iron causes the YOUNGEST leaves to yellow (and for their veins to remain green). Yellowing of older leaves most commonly means that the plant isn’t getting enough nitrogen. The nitrogen is being robbed from older leaves (which turn yellow because nitrogen is an important component of green chlorophyll) to feed the younger leaves.

The prescription? Add some soluble nitrogen fertilizer and pay more attention to watering. Too much water drives air out of the soil, and roots gasping for air have trouble doing their work to take up sufficient nutrients.

(2020) I mostly agree with my past diagnosis of and cure for yellowing leaves. But two other considerations are worthy of attention. 

First, temperatures in my home are on the cool side and roots are less functional as temperatures cool, especially the roots of warm climate plants. So roots might not be able to make efficient use of nitrogen even if it’s added to the soil.

And second, even evergreen plants go through periods of shedding their oldest leaves. Before these leaves drop, they lose their chlorophyll and turn yellow.

So under natural and under less than perfect conditions, mandevilla and gardenia are unavoidably going to look sickly in late fall and early winter.

Oh, the gardenia is also no longer a resident here. Too prone to scale insects.

Asparagus’ Leaves, Their Work Finished

(2009) Yellowing leaves are not always a bad thing. (Think of birch leaves a few weeks ago, or aspen leaves.) I’m happy that my asparagus’ leaves have yellowed. The plants have been growing vigorously all season, feeding their roots to fuel next year’s growth of the delicious young spears that I’ll be snapping off at ground level from late April to early July.

With this year’s work finished, the shoots and leaves, left to grow unfettered since early July, are yellowing and dying back. My short-bladed brush scythe was the perfect tool to make quick work of the plants, a fluffy addition to the compost pile.

With the asparagus shoots and leaves cleared away, I could get into that bed and weed it. The bed was pretty much weed-free until July, but then wet summer weather kept Weeding asparagus in past years
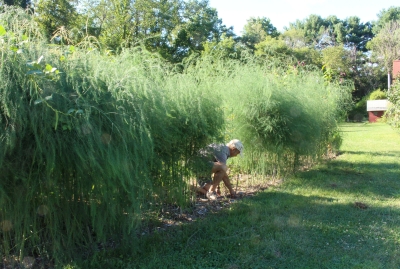
weeds germinating and growing, and hard to reach among the 6-foot-high forest of feathery stalks. The bed is now weeded and soon to be fertilized (2#/100 square feet of soybean meal) and mulched (wood chips 2 inches deep).

(2020) Wow! Right on schedule, on the same date as 11 years ago, asparagus leaves have yellowed. They’ve pumped nutrients and fuel down to their roots to provide for next spring’s growth, and are no longer functional and could harbor pests. So, like 11 years ago, I’m going to cut them down and add them to the compost pile.
Asparagus cut with scythe
This year I did treat the ground differently from the past 11+ years. Right after this year’s harvest, at the end of June, when the whole bed was cut to the ground, I did a little weeding. And then, instead of soybean meal as a fertilizer, I spread an inch of compost. Compost adds organic matter to the soil, and supplies a wider slew of nutrients and is more sustainable than soybean meal, among other benefits. The compost would also smother some weeds that would try to emerge.

Then, just to further smother weeds, I topped the compost with a one inch layer of wood chips.

I’m proud to report that the asparagus bed has never been so weed-free. No doubt, the very dry summer weather also played a part in keeping weeds at bay. 
Asparagus, growing thru compost + chips
At any rate, I’m getting out the scythe now to cut down the stalks. And I look forward to a good crop of asparagus beginning at the end of April. I highly recommend growing asparagus: it’s perennial and is one of those vegetable whose flavor is markedly different, and much, much better, when eaten fresh-picked.
Asparagus spear

WINTER READINESS

For anyone who missed my recent 90 minute webinar on GOURMET COMPOST, the webinar has been recorded and is available for $35 on-demand from Oct. 1st, 2020 until Oct. 8th for $35. The webinar covers options for compost bins, feeding your compost “pets, monitoring progress, what can go wrong and how to right it, when is compost “finished,” and making the best use of your compost. Click below to pay almost by any of a number of ways. Thank you.

Putting Summer in Jars

I’m hunkering down for winter, which includes capturing what I can of summer’s bounty in jars and dried and frozen garden produce. With this year’s hot, sunny weather, tomato plants yielded plenty of fruit — until cut short with a few nights of freezing temperatures about a week ago. Still, I have over two dozen shiny quart jars lined up on a shelf in the basement.

This year, San Marzano, which I (and most of Italy, where San Marzano canned tomatoes are labeled as such) consider to be the best-tasting canned tomato, got segregated into a number of jars all by itself. Other pluses for San Marzano is that it’s an heirloom variety, so I can save my own seed from ripe fruits, and it bears heavily over a long season on healthy, stocky vines.

A past neighbor of mine used to begin his process of canning tomatoes by alternating layers of tomatoes with salt in tall, half-bushel baskets. Other gardeners begin by peeling, perhaps seeding, their tomatoes.

Me? I opt for the quickest method possible, which is: Cut off any bad spots and drop the tomatoes into a large pot with just a half inch of water in the bottom. After being brought to a boil, the tomatoes get simmered until the volume is reduced by one-half, with less reduction for San Marzano’s because of their low water content. Then, a thorough blending with an immersion blender.

New guidelines call for keeping the acidity of canned tomatoes below pH 4.6 to prevent growth of Clostridium botulinum, aka botulis bacteria, by adding 2 tablespoons of lemon juice or 1/2 teaspoon of citric acid per quart. This is because of lower acidity of some modern tomatoes. I do so just to make sure even though my tomatoes’ acidity measured below 4.6. Finally, the canning jars go into the pressure canner for processing for 10 minutes at 15 pounds pressure.

I figure that I can chop up and sprinkle in any flavorings for sauces or soups later, in winter, when I have more time and I know the jar’s end use.

(House) Plants on the Move

I’m a little late this year in readying my houseplants for winter. I know from seasons past that when they come indoors, so do occasional pests. The pests that are most troublesome, the only ones about which I need to do something, are scale insects.

Scale insects aren’t always in evidence now but I know they are there on my citrus, bay laurel, orchid, and staghorn fern plants. By early winter, the pest becomes more obvious as occasional, small brown nodules on stems and leaves. That’s the protective “scale,” beneath which the scale insect is happily sucking away plant sap. 

Scale insects have never killed my plants but do weaken them and – perhaps worse – exude a sugary “honeydew” as they suck sap. This sticky honeydew gets all over floors, furniture, or whatever is beneath the plant. And then a fungus arrives to feed on that honeydew, giving leaves a dark, smoky, haze.

Hard-shell scale on staghorn fern

Hard-shell scale on staghorn fern

My tack for scale insects is to line susceptible plants up in my driveway, then spray them with some relatively benign insecticide such as Ced-o-flora, horticultural oil, neem oil, or pyganic. I’ve been doing that for the past few weeks in an effort to get the young scales before they find shelter beneath their protective shells.

With the last spray finished, in come all my houseplants. Windows are still open at least some days so indoor air is not too different from outdoor air, easing the environmental transition for the plants.

Squirreling Away

Black walnuts are one of my favorite nuts and they’re conveniently abundant and free for the picking, at least around here. Perhaps too abundant. Once there are a couple trees, they beget more and more as squirrels start “planting” them everywhere. My vegetable garden, with it’s soft, rich soil is a favorite spot.

Admittedly, the nuts aren’s so convenient to eat. Their messy husks need to be removed. Then the nuts have to be cured in a dry, cool or cold, squirrel-proof space until around New Year’s Day, And finally, the very tough nuts need cracking. I recommend the ‘Master Nut Cracker’, in my opinion the best nut cracker for those tough shells.

Last year black walnuts were raining down all over the place here and in town. This year, probably because of last year’s overabundance, the crop is light everywhere. How are the walnuts doing where you are?

I’m lucky. One tree here on the farmden that provided most of our nuts in years past, is bearing heavily. Up to a few years ago it was useless, bearing nuts whose innards were almost always spoiled or shriveled. That  might have been because of hurricane Irene back in 2011, when the nearby Wallkill River flooded its banks to wash over here and rise about four feet up that tree’s trunk.
black walnuts in jar
I cracked a few of the nuts this year to see how the nutmeats look. They’re well-filled and a nice, white color inside. But not edible, as I wrote, until they’re cured. Until January, we can enjoy what’s left of last year’s nuts.

Inside and Outside

Houseplant Envy

I wonder why my houseplants look so unattractive, at least compared to some other people’s houseplants. I was recently awed by the lushness and beauty of a friend’s orchid cactii, begonias, and ferns. I also grow orchid cactii and ferns, so what’s with mine?Houseplants at bedroom window

Perhaps the difference is that other’s houseplants have a cozy, overgrown look. Mine don’t. Most of my houseplants get repotted and pruned, as needed, for best growth. Every year, every two years at most, they get tipped out of their pots, their roots hacked back, then put back into their pots with new potting soil packed around their roots. In anticipation of lush growth, stems also get pruned to keep the plants from growing topheavy.

Rather than being scattered willy-nilly throughout the house or clustered cozily in corners, as in friends’ homes, my houseplants get carefully sited. For best growth, plants, especially flowering and fruiting plants, need abundant light, something that’s at a premium this time of year. So my houseplants huddle near south-facing windows like baby chicks near a heat lamp. And then in summer, when light, even indoors, becomes more adequate and the plants could move a bit back from the windows, I move them all outside so that summer sunlight, rain, and breezes can really get them growing.

What can I say? I’m too focussed on good growth, and that’s not necessarily what makes for the prettiest houseplant. It’s the difference between a lush plant packed into and overflowing its pot, along with elbow to elbow neighbors, versus one that’s had its soil refreshed frequently, its stems thinned out and pruned back, always with younger stems raring to grow. I can’t help myself.Houseplants, office window

Choice of houseplants also comes into play. Houseplants that are prettiest for the longest period of time — and need less light — are those valued for the shapes and colors of their leaves. I gravitate to houseplants with fragrant flowers or fruits, or — even better — fragrant flowers and fruits. Pumping out lots of flowers and, especially, fruits demands much more energy from a plant than just growing leaves. And that energy comes from sunlight and young leaves that are efficient at working with that light. Hence the repotting and clustering near sunny windows of my houseplants.Houseplants at living room window

Perhaps it’s also a matter of the “grass is greener,” to me, in someone else’s house. I’ll start looking at my houseplants more with the eye of an appreciative visitor.

Winter Cold: The Good and the Bad

The temperature was 9° and we were on our way to go cross-country skiing when a friend asked if there was any benefit to the cold weather. Plantwise, that is. We knew the weather was good for skiing. Interesting question, and the answer is “yes.”Vegetable garden in winter

The first benefit that comes to mind is the effect of cold on diseases, certain diseases, at least. The cold kills them. Peach leaf curl, for instance, is a disease that overwinters in peach buds, resulting in leaves that unfold thickened and twisted and eventually yellow and fall so fruiting and growth suffer. Except in cold winters. My winters are usually cold enough so this disease is rarely a problem.

A number of summers ago late blight disease of tomato went on the rampage here and throughout the Northeast. That disease can’t spend the winter this far north because it’s too cold. In that past summer and some other summers, the disease hitchhikes north on infected plants brought here or, when winds and humidity are just right, hopscotches along north from one infected field to the next.

Insect pests that overwinter in the soil are more damaged the colder the soil gets, and bare soil gets colder than mulched soil, all of which highlights the balancing acts necessary in gardening.

Pests notwithstanding, bare ground isn’t good for plants and soil. Plant roots are more likely to be damaged by the increased exposure and, especially evergreens, are more apt to dry out because more water will evaporate from bare ground and because roots have a hard time drinking in water from frozen ground. Bare ground is also subject to erosion and nitrogen loss.

On the other side of the coin, bare soil goes through more cycles of freezing and thawing, which breaks up and moves around soil particles, in effect tilling the soil. Back to the previous side of the coin, that freezing and thawing can move soil around enough to heave plants, especially small or newly rooted plants, up and out of the ground.

So, I like cold weather for my plants. But I mulch heavily. And I especially like it, as do the plants — and, admittedly, some pests — when there’s an additional blanket of snow over the ground. It also makes for good skiing.South field, winter view

Watering — in the Rain?

Why Are Pots Thirsty?

With recent rains of more than 3 inches over the last couple of days, you’d think that the last thing on my mind would be having to water anything. But you’d be wrong. Plants in pots — and I have plenty of them, some ornamental and some tropical and subtropical fruits — don’t get the full benefit of all that water.

Potting soils are, and should be, more porous than any garden soil to maintain good aeration within the confines of a pot. About a one inch depth of water is needed if you’re going to thoroughly wet a 12 inch high column of potting soil. If a flower pot is, for example, only 6 inches high, only 1/2 inch depth of water would be needed; and so on.

A lot of my potted plants didn’t drink in that 3 inches of rain that fell over the past couple of days. Some of the plants are shielded from the sky by overhanging house eaves. And the leaves of other plants — excepting amaryllis and calla lily which have strappy, upright leaves — deflect water that could have fallen into the pot.

If you don’t believe me, tip a potted plant out of its pot following a heavy rain, and check how dry the soil is down deep within the pot. Even easier, purchase an inexpensive moisture meter whose metal probe, when slid into the soil, reports moisture deep down.

(Sort of) High Tech Solution

When I first started gardening, I knew I would eventually move from the cottage I was renting. My mini-orchard was in pots and travel-ready. I kept that “orchard” watered by hand, which wasn’t so bad. The problem was that in the heat of summer, some plants needed their thirst quenched twice a day, which kept me from leaving my home for more than a few hours.

These days, technology has come to the rescue.

The first techno-solution has been drip irrigation. A simple, battery-operated timer at a spigot sends out water on a twice daily schedule to banks of potted plants. Also at the spigot, following the water line right after the timer, are a filter and a pressure reducer. automatic watering, pots
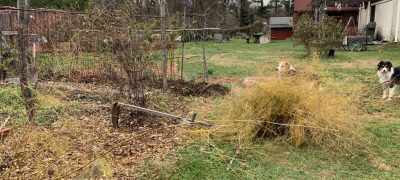
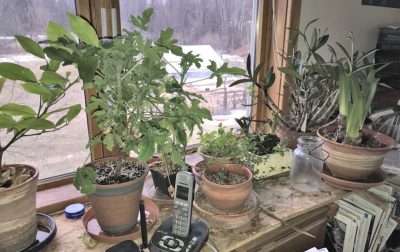
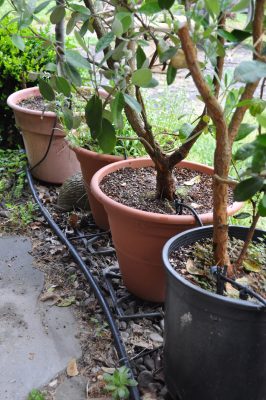
The fittings for wending water through tubes around corners and up into pots are low pressure fittings; the pressure lowers water pressure to a mere 20 psi.

Once the 1/2 inch main line makes its way to a group of potted plants, a 1/4 inch plastic line, plugged into the main line with, of course, a low pressure fitting, carries the water up to the ground surface of each pot.

If the water merely exited at this point, pots closer to the water source would be under higher pressure and so get more water than those more distant. And pots that were shorter or at lower elevation would likewise get more water. So I slid an emitter, that reliably puts out 1/2 gallon of water per hour, no matter what the incoming water pressure, on the end of each 1/4 inch line.

Capillarity to the Rescue

I have a number of lowbush blueberry, lingonberry, hollyhock, carnation, and blazing star plants growing in pots 4-inches and smaller. I’ll eventually plant them out in the garden. Until then, the plants need regular watering Snaking 1/4 inch tubes to all these pots would create a tangled nightmare.

Enter capillary mat watering. All these smaller pots sit on a mat of absorbent fabric spread over a tray held a couple of inches above a pan of water. Irrigation, capillary mat
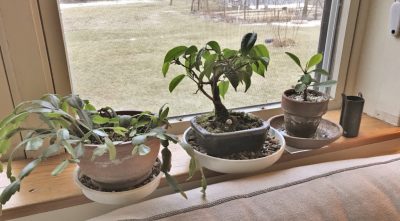
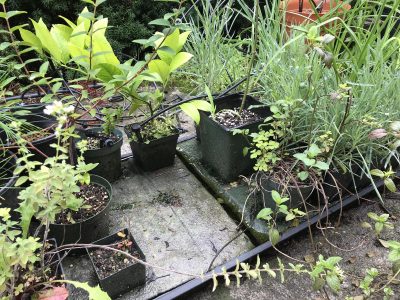
Part of the capillary mat dips into the reservoir of water, which gets sucked up into the mat and then sucked up into the potting soil through the drainage holes in each flat-bottomed plant pot.

I periodically have to remember to add water to the reservoirs. Or, rather, “had to” because I ran a few of those drip tubes into the reservoirs, enough to keep them topped up with water to keep pace with plant use.

And a Presentation of Interest

I’ll be doing a presentation on August 18th on THE SCIENCE, ART, FUN, AND TASTY FRUIT OF ESPALIER in Copake Falls, NY. The presentation will explore the theory and the practice behind the pruning and orienting of branches to create an espalier. This decorative, usually 2-dimensional form, offers high yields of high quality fruit on a plant or plants that can be free-standing, decorating a wall or fence, or even creating the fence itself! I’ll go over which fruit plants work best and the branch pruning and orienting techniques that create and maintain espaliers that look good and yield especially delectable fruit. For more information, go to https://awaytogarden.com/8-18-open-day-plant-sale-lee-reich-espalier-talk-drip-irrigation-workshop/Asian pear espalier flowering

Spring Inspires

Even Bob Got the Bug

As I write, daily high temperatures are in the 30s and snow is predicted. Nonetheless, just a few warm, sunny days and almost everyone is going to be inspired to garden. Or at least do something plantwise. Even my friend Bob.

Bob’s non-interest in gardening was demonstrated decades ago as I was starting my first very own garden at a house I was renting. Bob was there as I pushed my shovel into the clay soil of the lawn to turn over spadeful after spadeful. Bob watched peacefully lying beyond the proposed plot with his head propped up on his hands. (Not so another friend, Hans, who grabbed another shovel, and dug. Now that I think of it, perhaps I owned only two shovels.)

Crown of thorns

A crown of thorns (not Bob’s)

Bob’s current interest centers around one plant, a potted crown of thorns plant (Euphorbia milii). Crown of thorns is very easy to grow because it’s a succulent. Like other succulents, crown of thorns can store water, in this case in both its thick stems and its fleshy leaves.

The stems, armed with stout thorns, are what give crown of thorns its common name. Legend has it that this plant was woven into the crown of thorns worn by Jesus. Although the plant is native to Madagascar, it had made its way to the Middle East by the time of Christ. But it probably was not the plant that made his crown of thorns.

I once had a crown of thorns plant, and, unlike Bob, with his plant, pretty much ignored it as far as care. Mine flowered occasionally, which was enough because I had a lot of other plants to entertain me. Bob, on the other hand, is becoming a crown of thorns maven, tweaking conditions to try to eke the most and best blooms from his one plant. We go back and forth on how much light they need (the more the better) and how frequently to water (I suggest infrequent but deep watering). The final word has not been said.

Differences of opinion may be traced to differences of plants. Crown of thorns became a popular plant in the 1970s and new varieties were being offered, among them hybrids between E. milii and E. lophogona. The latter species have long, leathery leaves and flower more freely than the former. Some varieties of these hybrids had stouter stems and thinner leaves; others had thinner stems and thicker leaves. Flower sizes increased and a range of shades, from white to pink to red, became available.

Not all hybrid crown of thorns plants enjoy the same growing conditions. Some of the hybrids prefer their soil consistently moist rather than cycling between bone dry and wet. More light is generally better for more flowers although some plants need long nights without any light at all for best flowering.

In a few weeks Bob is going to prune his plant so I’ll get a few cuttings to make plants of my own. The cuttings root in a month or two if their cut ends are dipped in cold water to prevent excess loss of the white sap, slid into a well drained mix, such as peat and perlite, and kept slightly moist.

Horticultural Evolution

So Bob has horticulturally evolved to lavish care on his one plant. He’s busy repotting it this time of year.

I’ve also horticulturally evolved. I would no longer begin a garden by turning over shovelful after shovelful of soil. Nowadays my method is to smother lawn grass beneath wetted paper topped with compost for planting areas and wood chips for paths, which avoids two problems with that first planting: having to wait a couple of weeks before planting, and then having to deal with the sea of quack grass and other weeds that result from turning over the soil.  More details on this in my book Weedless Gardening.

Here Kitty, Kitty


To a Cat’s Delight

How does your cat like your houseplants? I don’t mean how they look. I mean for nibbling, a bad habit of some cats. Bad for them and bad for you because eating certain houseplants could sicken a cat, or worse, and, at the very least, leave the houseplant ragged.

One way to woo a feline away from houseplants would be to provide a better alternative. Now what could that be? Duh! Catnip, Nepeta cataria, a member of the mint family, admittedly not the prettiest of houseplants but, hey, you’re growing this for your cat, not yourself. (Other Nepeta species, such as N. x faasssennii and N. racemes, are less enticing to cats even if they are more attractive to us.)Catgrass and cat

Catnip is very easy to grow outdoors, and can be grown indoors through winter. The main ingredient that could be lacking in winter is light; six or more hours of sunlight beaming down on the plant through a window would be ideal. Other than that, needs are the same as most other plants: regular potting soil coupled with a watering regime that keeps said soil neither sodden nor bone dry, just moist.

Catnip plants are not hard to find. Growing from seed is easy, except the plants won’t be cat-ready for weeks and weeks.

Established plants are quick and easy to multiply so if you’ve got a friend with a potted plant, preferably overgrown so that you both benefit, you can make new plants by slicing the root ball into two or more new sections along with their above ground stems, and then repotting each of them. Or clip off stems each a few inches long, strip leaves from their bottom portions, and poke them into moist potting soil to root. Help these shocked plants or plant parts recover by keeping them in bright but indirect light for a couple of weeks — and protected from any cats!

Which brings me to perhaps the worst potential pest of your new catnip plant: cats! They’ll roll in it, releasing the strong aroma that drives them crazy, and nibble it to experience its narcotic effect. Outdoor plants tolerate such rambunctious playing; indoor plants, with less than perfect growing conditions, are more frail. You might want to limit playtimes to weekly visits.

Limiting playtimes might also keep the plant more enticing. Cats can habituate to catnip. And even then, only about fifty percent of cats fall under the spell of catnip, none of them as kittens.

—————————————

No reason to limit your cat’s botanical garden to catnip. Cats also like to nibble on grasses, which can be very pretty houseplants and lack the not very popular aroma (to most humans) of catnip.

It’s not clear why cats, which are carnivores, like that nibble. Perhaps, some say, to induce vomiting to get rid of undigested animal parts. Perhaps, others say, for vitamins and minerals.

“Grasses” is a term I use quite liberally, to mean not necessarily lawn grass but any plant in the grass family. Most convenient is to just mosey over to the local health food store and purchase some whole grain such as wheat (sold as “wheat berries) or rye. Soak a batch of these seeds in water for a few hours and then sow them in potting soil in a decorative container. Depending on the temperature, green sprouts should soon appear against the dark backdrop of soil. Grasses grow quickly, given light, warmth, and sufficient, but not too much, water.

The aforementioned grasses are annuals and at some point in their growth, what with cat nibbling and aging, will start looking ragged. Have another pot ready with already sprouting grass. And so on.

The grass serves well for us humans as well as our cats to enjoy. They’re very spring-like in their appearance even if confined to only a small pot, a microcosm of what’s to come.

Happy Birthday Ficus


Another Year, Another Pruning and Re-potting

I’d like to say it was the birthday of my baby ficus except I don’t know when it was actually born. And since it was propagated by a cutting, not by me, and not from a seed, I’m not sure what “born” would actually mean. No matter, I’m having its biannual celebration marking its age and its growth.

Just for reference, baby ficus is a weeping fig tree (Ficus benjamina), a tree that with age and tropical growing conditions rapidly soars to similar majestic proportions as our sugar maples. That is, if unrestrained in its development.

Baby ficus (FIGH-kus) began life here as one of three small plants rooted together in a 3 inch pot and purchased from a discount store. (Weeping figs are common houseplants because of their beauty and ability to tolerate dry air and low light indoors.) Eight years later, it’s about 4 inches tall with a wizened trunk and side branches that belie its youth. Bonsai, Ficus, at 8 years
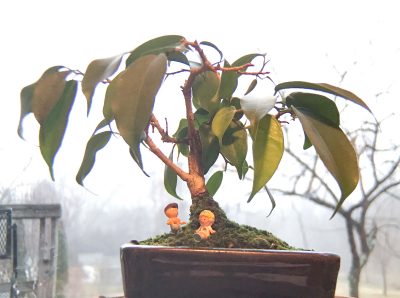
Moss carpeting the soil beneath it and creeping up the trunk complete the picture. I’ve made and am making baby ficus into a bonsai.

The biannual celebration begins with my clipping all the leaves from the plant. Baby ficus’ diminutive proportions keep this job from being tedious.Lear pruning 
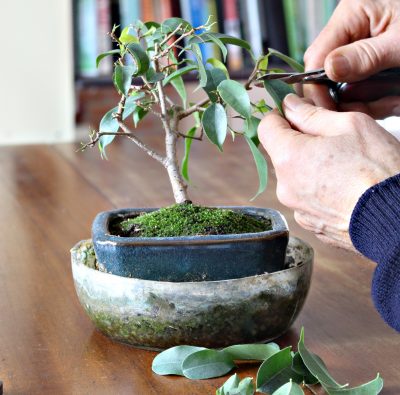
Clipping the leaves accomplishes two goals. First, plants lose water through their leaves so removing leaves reduces water loss (important in consideration of the next celebratory step).

And second, clipping the leaves reduces the size of leaves in the next flush of growth, keeping the in proportion to the size of the plant. Leaves on an unrestrained weeping fig grow anywhere from 2 to 5 inches long, which would look top heavy on a plant 4 inches tall.

The next step is to tip the plant out of its pot so I can get to work on its roots. The pot is only an inch deep and 4 inches long by 3 inches wide, so obviously can’t hold much soil. Bonsai root pruningBaby ficus gets all water and its nourishment from this amount of soil. Within 6 months or so, roots thoroughly fill the pot of soil and have extracted much of the nourishment contained within.

So the roots need new soil to explore, and space has to be made for that new soil. That space is made by cutting back the roots. (Less roots means less water up into the plant, which is why I began by reducing water loss by clipping off all the leaves). I tease old soil out from between the roots and with a scissors shear some of them back.

Next, I put new potting mix into the bottom of the pot, just enough so the plant can sit at the same height as it did previously. Any space near the edges of the pot gets soil packed in place with a blunt stick. Throughout this repotting, I manage to preserve more or less intact the moss growing at the base of the plant.

Now the plant needs its stems pruned. After all, I don’t want the plant growing larger each year, just more decorative as the trunk and stems thicken and age. Pruning involves some melding of art and science. As far as art, I’m aiming for the look of a mature, picturesque tree. Bonsai stem pruning
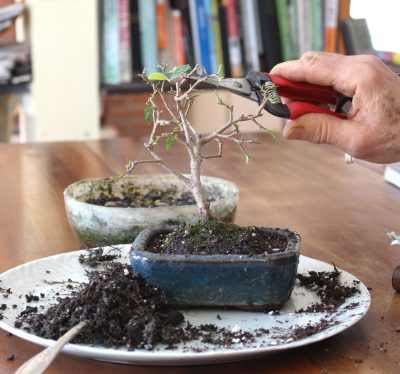
As far as science, I shorten stems where I want branching, usually just below the cut. Where I don’t want branching but want to decongest stems, I remove a stem or stems right to their base. I also remove any broken, dead, or crossing branches unless, of course, leaving them would be picturesque.

Finally, a thorough watering settles the plant into its refurbished home. Until new leaves unfold and new roots begin to explore new ground, water needs for baby ficus are minimal.

Oh, one more step. I stand back and take an admiringly look at baby ficus in its eighth year.Bonsai ready for another year

Orchid Intimidation

Fear Not

I used to find orchids intimidating to grow. Their dust-sized seeds are fairly unique in not having any food reserves so — in the wild, at least — need the help of a fungus partner to get growing. And some orchids (epiphytes) spend their lives nestled in trees so need a special potting mix when grown in a pot. Orchids have above-ground structures called pseudobulbs. And many, especially those that call humid, tropical forests their homes, demand exacting environmental conditions that are very different from that found in most homes. Whew!

So I steered clear of growing any orchid for many years — until a local orchid enthusiast gave me a plant. After a couple of years, that plant, around this time of year, sent up a slender stalk which was soon punctuated with eight waxy, white flowers, each an inch across. For two months, those flowers greeted me each morning with their beauty and their delicious fragrance. Every year since, that plant has greeted me for weeks in midwinter.

Odontogl . . . a Mouthful

My orchid has no common name so needs to be referred to by its botanical mouthful, Odontoglossum pulchellum. (Even orchid names are intimidating, especially so because different genera have often been hybridized, and the resulting hybrid combines the generic names of the parents. So a hybrid with Brassavola, Laelia, and Cattleya in its parentage would have the name Brassolaeliocattleya. Now that’s a mouthful!)

Name notwithstanding, my Odontoglossum pulchellum has been easy to grow and get to flower. Odontoglossum pulchellum orchid
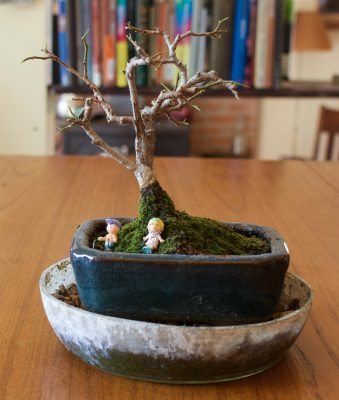
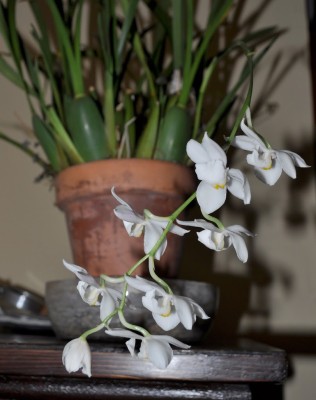
The plant spends summers outdoors in semi-shade near the north wall of my house, and winters indoors on a sunny windowsill. I water it perhaps twice a week, unless I forget.

Sounds like your run-of-the-mill houseplant, doesn’t it? So much for orchids being difficult.

The only special treatment my plant gets is a special potting mix. Odontoglossum pulchellum is an epiphytic orchard. Commercial potting mixes are available for epiphytic orchards but I make my own by mixing equal parts of my standard (home made) potting mix with equal parts wood chips. Nothing special about the chips; I just scoop them up from the pile that I use mostly for mulch that an arborist kindly dumps next to my woodshed every year.

Every spring I divide my orchid plant into 2 or 3 new plants, potting each new plant into its own pot with fresh potting mix.

More Orchids?

Odontoglossum pulchellum is an orchid that tolerates being treated like your average houseplant. And this is one of the most important points in growing orchids in a house: choose a sort that thrives in such an environment. Other orchids that will grow in the average home include phalaenopsis, paphiopedilums, and mini-catts, which are dwarf hybrids involving Cattleya (the corsage orchid).

Ideally, for flowering at least, certain conditions must be met. Most orchids enjoy bright light, which means setting the plant at an east, west, or south windowsill. From spring through autumn, light from a south window is too intense and may scorch foliage, so plants need to be protected with a thin gauze curtain, or moved to other windows or semi-shade outdoors.

Most orchids — again, for flowering — enjoy a ten to fifteen degree temperature difference from day to night, which is no problem in winter if you heat with a wood stove or already turn the thermostat down at night to conserve fuel. In the summer, the plant needs to be outdoors or else in a room that is not air-conditioned.

Even those orchids adapted to a home environment benefit from increased humidity. I raise the humidity around my plants by perching the flowerpot above a water-filled tray. Clustering plants together is another way to raise the humidity near plants, and also creates a visual lushness.

Once correctly sited, many orchids do not require inordinate amounts of care. Water requirements vary, but species with thickened pseudobulbs (bulbous stems), such as my Odontoglossum, get by with the least frequent watering. Orchid roots are susceptible to fertilizer burn, so the rule in feeding is to do it frequently and lightly. As with other houseplants, some orchid species take an annual rest, and at such times watering and feeding should commensurately diminish.

Since “mastering” the growing of one orchid, I have acquired another kind.Pink rock orchid This orchid is Dendrobium kingianum, which does go under the more user-friendly common name of pink rock orchid. I have also gotten this one to flower — but not every year.