OF MAPLES AND REDS

Where’d the Red Go?

Sugar maples (Acer saccharum) are now doing just what I expected of them. But not exactly what I want them to do. Here in New York’s mid-Hudson Valley, at least, this autumn’s leaf show is not quite up to snuff. And it’s also later than in the past. It used to peak here in the middle of October; nowadays, with climate change, the peak has been pushed forward to about now.Autmn view of the 'Gunks mountains

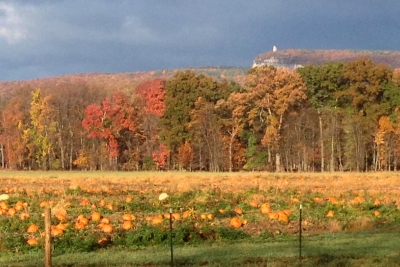
Back to the color: This year the local sugar maples are mostly only yellow, lacking the oranges and the reds that, along with some yellow, really ramp up the blaze of landscapes and forests. Let’s blame that more subdued show on the weather. To know why, let’s backtrack to summer when, quoting from a section in my recent book The Ever Curious Gardener, Using a Little Natural Science for a Much Better Garden:

Green is from chlorophyll, most welcome in spring and through summer, but not what interests me in fall. Chlorophyll must be continually synthesized for a leaf to stay green. The shorter days and lowering sun of waning summer are what trigger leaves to stop producing it, unmasking other pigments lurking there.

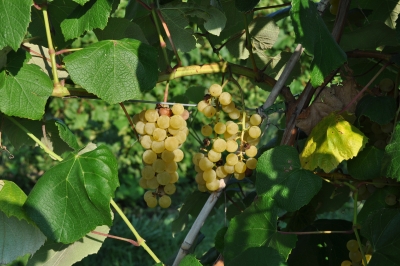
Leaves’ yellow and orange colors are aways present, thanks to carotenoid pigments, which help chlorophyll do its job of harvesting sunlight to convert into plant energy. I offer thanks to carotenoids for the warm, yellow glow they give to gingko, aspen, hickory, and birch leaves.

Sugar maple

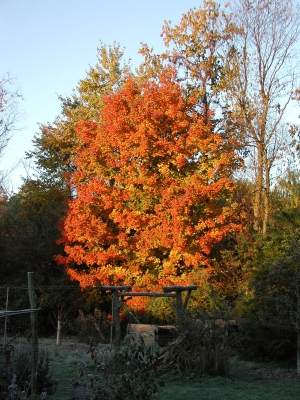
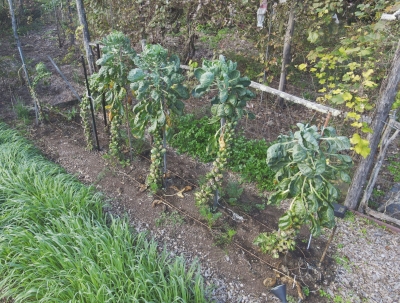
Sugar maple (not this year)

Tannins are another pigment, actually metabolic wastes, that, all summer, are hidden by chlorophyll. Their contribution to the fall palette are the season’s subdued browns, notable in some oaks and enriching the yellow of beeches.

Because leaves harbor carotenoids and tannins all summer long, nothing particular about autumn weather should either intensify or subdue their autumn show. The only glitch could be an early, hard freeze that occurs while leaves are still chock full of chlorophyll. In that case, cell workings come abruptly to a halt and all we’re left with is frozen, green leaves that eventually drop without any fanfare.

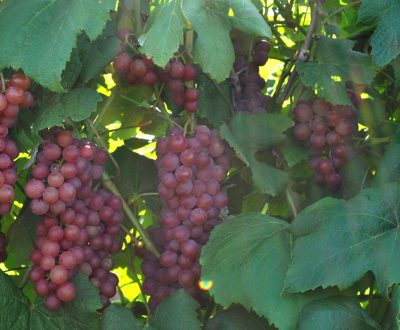
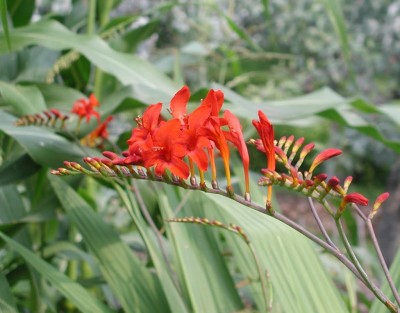
Autumn color also spills out reds and purples, most evident in red maples and some sugar maples, scarlet oak, sourwood, blueberry, and winged euonymous. Those reds and purples come from yet another pigment, anthocyanins. Except for trees like ‘Purple Fountain’ beech and ‘Royal Purple’ smokebush, whose leaves unfold dusky red right from the get go in spring, and remain so all season long, in most leaves anthocyanins do not begin to develop until autumn.Japanese maple

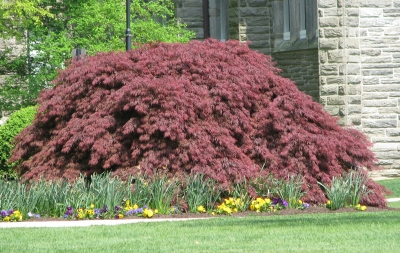
Anthocyanin formation requires sugars so anything that I or the weather does to promote sugar accumulation in autumn will increase anthocyanin levels in leaves. The weather’s role is to offer warm, sunny days to maximize photosynthesis, and cool, but not frigid, nights to minimize nighttime burning up of accumulated sugars. A cloudy, rainy autumn means less red because less anthocyanin is formed, and any that does form is diluted.

As I write this, it’s cloudy and rainy, as it has been so many days this autumn.

Other Reds

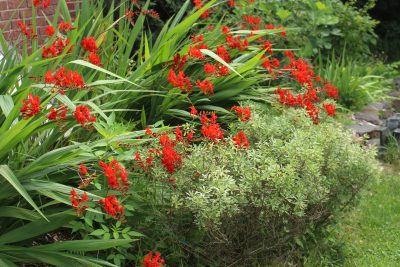
I was recently visiting my daughter in Pennsylvania. As we looked around her neighborhood I admired the rich, red, autumn color of the trees lining the streets. Red?! How can that be? What about what I wrote about this autumn’s weather and anthocyanin and red leaves in autumn?

Ah, but science takes care of that, too. Those trees in the Pennsylvania landscape weren’t sugar maples; they were a variety of Freeman maple (Acer × freemanii). Freeman maples are natural and deliberate hybrids of silver maples (Acer saccharinum) and red maples (Acer rubrum), the silver maple contributing fast growth to the hybrids and the red maples contributing strong branches and red leaf color in autumn. Freeman maple

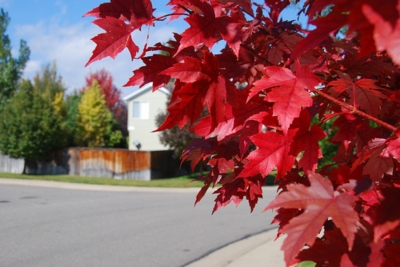
Trees vary, both as to species and locations, in the amounts of pigments found at various times in their leaves. Red maples, as the name implies, have significant amounts of anthocyanins. In these trees, this anthocyanin is present not only in autumn as the chlorophyll fades, but throughout the growing season. Depending on the amount and kind of anthocyanin, its redness would be more or less masked by chlorophyll during the growing season. Some varieties of red maple, and many varieties of Japanese maple, are red or purplish all summer long.

The million dollar question is why a tree would have anthocyanin in its leaves all season long. Various theories have been floated. Anthocyanins do offer protection against excess sunlight, which is why young leaves emerge reddish on some plants.
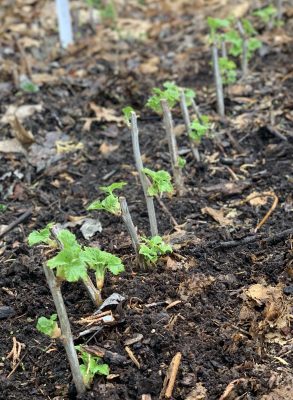
Seedling red maples

Seedling red maples

(This characteristic does not correlate with the degree of red in leaves in autumn.) It’s also possible that anthocyanins could ward off pests.

Whatever the reason, red or orange or yellow leaves, I’m not complaining. Autumn is still a beautiful season here in the Hudson Valley. 


HARDWOOD CUTTINGS: NOT HARD (TO DO SUCCESSFULLY)

Pros for Hardwood Cuttings

Years ago, I had just one plant of Belaruskaja black currant. Now I have about a dozen plants of this delicious variety, and plenty of black currants for eating. Do you have a favorite tree, shrub, or vine that you would like more of. 

Hardwood cuttings are a simple way to multiply plants. This type of cutting is nothing more than a woody shoot that is cut from a plant and stuck into the soil some time after the shoot has dropped its leaves in the fall, but before it grows a new set of leaves in the spring. In the weeks that follow planting, if all goes well, some roots may develop and, come spring, this apparently lifeless piece of stem grows shoots and more roots, and is well on its way to bona fide plantdom.

(Be very careful, though. Multiplying plants can become an addiction. I speak from experience.)

Hardwood cuttings, kiwi, blueberry, grape

Easy to root

Success with hardwood cuttings depends on both your skills and the plant chosen. Not every woody plant is amenable to increase by hardwood cuttings. You can expect close to one hundred percent “take” with plants such as grape, currant, gooseberry, privet, spiraea, mulberry, honeysuckle, and willow. But this method generally is unsuccessful in making new apple, pear, maple, or oak trees. 

Because they lack leaves, hardwood cuttings are less perishable than “softwood cuttings,” the leafy stem cuttings that are taken while plants are in active growth.Blackcurrant and plum cuttings

If you’re a novice and want to make your thumbs feel greener early on, try your hand with hardwood cuttings of willow, a plant I have seen take root from branches inadvertently left on top of the ground through the winter. Most other plants demand a little more finesse to ensure success with hardwood cuttings.

Gathering Wood

All right, so you have a woody plant you want to multiply by hardwood cuttings. Step back and look at the plant before you take wood for cuttings. Look for some young shoots, those  that grew this past season; snip them off for cuttings. The shoots most likely to root are those of moderate vigor, not too fat and not too thin for the particular species.

Black currant, 1 and 2-year old stems

Black currant, 1 and 2-year old stems

Plum, 2 and 1-year old wood

Plum, 2 and 1-year old wood

Once you have one or more shoots “of moderate vigor” in hand, cut them down to a manageable length of eight inches or so. Look for the nodes on each branch; these are the points where leaves were attached. Make the cut for the top of each cutting just above a node, and the cut for the bottom of each cutting just below a different node. 

Make sure the upper end of the cutting, which is the point that was furthest from the root, is planted pointing upwards. The plant “remembers” this orientation and responds accordingly, growing roots from the bottom and shoots from the top of each cutting. (Although it’s not impossible to root upside down cuttings, there’s just less chance of success.) Professional propagators cut the bottoms off squarely and the tops at an angle so that the ends don’t get mixed up during planting.

Success Comes With . . . 

Plant the cuttings in your garden where the soil is not sodden. Without good drainage the cuttings will rot, rather than root.  Make a slit with your shovel, slide in a cutting until only the top bud is exposed, then firm the soil. The rooted plants should be ready for transplanting to their permanent homes by next fall.

Cuttings can be set in the ground for rooting either immediately or stored through the winter for setting out in early spring. I’ve had better success with fall, rather than spring, planting. In the spring, the cuttings often are overanxious to begin growth and the top growth is well underway before the roots have begun. The shoots soon realize that there are no roots to sustain them, then flop over and die. 

With cuttings planted in the fall, roots have the opportunity to develop from now until the soil freezes. In the fall, soil temperatures drop more slowly than air temperatures so there’s still some time, depending on your location, before the soil freezes solid. New shoots, on the other hand, won’t grow until next spring, after they feel they have been exposed to a winter’s worth of cold. (This is a natural protection mechanism that prevents plants from resuming growth during a warm spell in January.) Come spring, the shoots that grow from the tops of the cuttings will already have at least the beginnings of roots to bring sustenance.

Blackcurrant cuttings in spring

Blackcurrant cuttings in spring

Mulch fall-planted cutting so that alternate freezing and thawing of the soil doesn’t heave them out of the ground.

Cuttings could even be planted in pots with a well-drained potting soil, as long as the pots are kept cool (30-45°F) long enough for the shoots to “feel” winter, so they can grow shoots in spring.

If you’d rather plant in the spring, the cuttings need to be kept cool and moist through the winter. The traditional method of storage is to bundle the cuttings together and bury them upside down in a well drained soil. Why upside down? Because the bottoms of the cuttings then will be first to feel the warming effects of spring sunlight beating upon the ground, while the shoot buds are held in check buried deeper in cold ground.

A refrigerator can substitute for the traditional burying. Seal the cuttings in a plastic bag, wrap the bag in a wet paper towel, and then seal the whole thing in yet another plastic bag. Plant as early in spring as soil conditions permit.

Pay attention to what works and what doesn’t, figure out why, and you’re on your way to propagation addiction. Next worry is what to do with all your plants.

WHAT I LEARNED ABOUT BRUSSELS SPROUTS

Sprout Success

Years ago, a friend referred to Brussels sprouts as “little green balls of death;” that never exactly increased the gustatory appeal of this vegetable for me. The same could be said for “a little boiled to death,” a too common way of preparing the vegetable, and perhaps that’s what the friend had actually said.

Still, I’m always up for a horticultural challenge, even if I had never had success with Brussels sprouts. What does “lack of success” mean with Brussels sprouts? Dime-size sprouts.

Sit tight. This season my Brussels sprouts are a roaring success, and I’m going to impart to you what I learned about growing this sometimes maligned vegetable. Or, at least, what I did differently this year, which was a few things, so I’m not sure whether one or more of them was responsible for my achievement. It could even have been the weather, which I had no hand in.Brussels sprouts on plant

Brussels sprouts is a very long season vegetable, so seeds need to be sown in spring for a fall harvest. Check. I planted mine back indoors in March for transplanting in May. They could have been sown a little later, at some sacrifice of yield.

A big difference in what I did this year was that the seeds that I sowed were those of a new variety, Catskill. Although a new variety for me, Catskill is actually an old variety, first introduced in 1941 by Arthur White, of Arkport, New York. It’s billed as yielding especially large sprouts (yes) on compact stalks (nope). In previous years I grew Gustus, Hestia, and Prince Marvel, and all were duds for me.

The Catskill mountains are only an hour’s drive away from my farmden, which perhaps explains my success with the same-named variety. But, as they often say (quietly) in advertising, “your results may differ.” My suggestion is to try a few varieties until you find one that does well wherever you garden or farmden.

Brussels sprouts requires a rich, near neutral soil high in organic matter. Check. My Brussels sprouts beds have always received, as do my other vegetable beds, an annual dressing of a one-inch depth of compost. Decomposition of compost enriches the soil with a variety of nutrients, including nitrogen.

Still, another big difference in what I did this year was to give my plants an extra oomph with, in addition to the compost, a sprinkling (1 pound per 100 square feet) of soybean meal, an organic source of nitrogen.

In anticipation or hope of large plants, each Brussels sprouts plant was afforded plenty of elbow room this year, with plants two-and-a-half feet apart down the middle of the three-foot-wide bed. They were flanked on each side by a single row of early carrots which, I figured, would be harvested and out of the way by the time the Brussels sprouts plants were spreading their wings (leaves).View of bed of Brussels sprouts

My previous efforts with Brussels sprouts always resulted in three-foot-high plants that, early in their youth, flopped to the ground. Only after a plant’s supine stem had created a firm base would the end of its growing stem curve more or less upward, according to original plan. That youthful waywardness wasted and muddied lowermost sprouts, with the sprawling plant demanding even more space, which was a problem in my intensively-planted garden.

This year each plant had the companionship of a sturdy metal pole right from the get-go. Loops of string around the stalks and the stakes kept up with the plants’ upward mobility.

Pest Alert

Finally, and very important, is pest control, specifically of any one of the few leaf-eating caterpillars, colloquially called cabbage worms, which are the offspring of of those cheery, white moths that flutter among the plants on sunny days. The caterpillars also attack broccoli, cabbage, and cauliflower, all relatives in the cabbage family (Brassicaceae).Cabbageworms

A very effective and nontoxic to most creatures (including to you and to me) control is spraying with Bacillus thuringienses, a naturally-occurring bacterium extracted from the soil. This material is more easily remembered under the name Bt, packaged up under such commercial names as Thuricide, Dipel, and Monterey B.t.

I checked the plants frequently through the growing season, at first just crushing any caterpillars I found and, only when the damage was getting severe, resorting to the spray. Cabbageworms, like any pest, can develop resistance to most pesticides, more likely the more that is used. 

GMO. No

As an aside, that potential resistance of a pest to Bt is a problem with crops developed as genetically modified organisms wit Bt toxins. Almost all commercial corn and cotton have been genetically engineered in this way; the genetic material has also been incorporated into cotton, potato, rice, eggplant, canola, tomato, broccoli, collards, chickpea, spinach, soybean, tobacco, and cauliflower.

The problem arises because a field of plants expressing the Bt toxins is akin to that whole field being sprayed with Bt all season long. There is evidence of the development of resistance to Bt by insect pests of the genetically modified crop plants.

FERTILIZING 101

Feed Sooner, Not later

Although shoot growth of woody plants ground to a halt weeks ago, root growth will continue until soil temperatures drop below about 40 degrees Fahrenheit. Root and shoot growth of woody plants and lawn grass are asynchronous, with root growth at a maximum in early spring and fall, and shoot growth at a maximum in summer. So roots aren’t just barely growing this time of year; they’re growing more vigorously than in midsummer. 

Compost mulch on pears
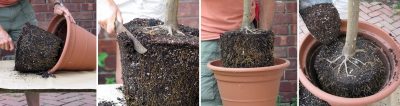
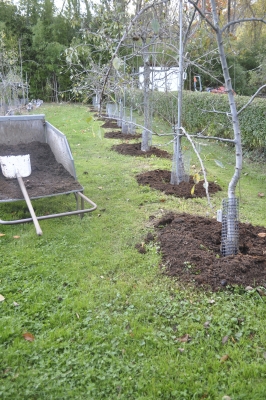
Remember the song lyrics: “House built on a weak foundation will not stand, no, no”? Well, the same goes for plants. (Plant with a weak root system will not be healthy, no, no.) Fertilization in the fall, rather than in winter, spring, or summer, promotes strong root systems in plants.

By the time a fertilizer applied in late winter or early spring gets into a plant, shoots are building up steam and need to be fed. Fertilization in summer forces succulent shoot growth late in the season, and this type of growth is susceptible to damage from ensuing cold.

They Hunger For . . . 

The nutrient plants are most hungry for is nitrogen. But nitrogen is also the most evanescent of nutrients in the soil, subject to leaching down through the soil by rainwater or floating off into the air as a gas. The goal is to apply nitrogen so that it can be taken up by plants in the fall, with some left over to remain in the soil through winter and be in place for plant use next spring. 

Two conditions foster nitrogen loss as gas. The first is a waterlogged soil. If you’re growing most cultivated plants — yellow flag iris, marsh marigold, rice, and cranberry are some exceptions — your soil should not be waterlogged, aside from considerations about nitrogen. (Roots need to breathe in order to function.) Nitrogen also evaporates from manure that is left exposed to sun and wind on top of the soil. Manure either should be dug into the soil right after spreading, or composted, after which it can be spread on top of the soil, or dug in.

Leaching of nitrogen fertilizer is a more common and serious problem, especially on sandy soils. The way to prevent leaching is to apply a form of nitrogen that either is not readily soluble, or that clings to the soil particles. Most chemical fertilizers — whether from a bag of 10-10-10, 5-10-10, or any other formulation — are soluble, although a few are specially formulated to release nitrogen slowly.

Fertilizer label
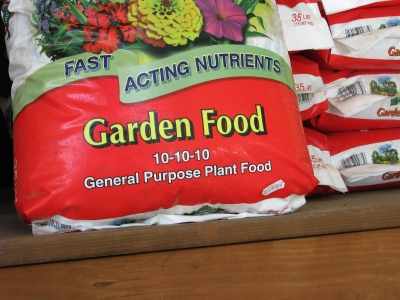
The two major forms of soluble nitrogen that plants can “eat” are nitrate nitrogen and ammonium nitrogen. Nitrate nitrogen will wash right through the soil; ammonium nitrogen, because it has a positive charge, can be grabbed and held onto negatively charged soil particles. Therefore, if you’re going to purchase a chemical fertilizer to apply in the fall, always buy a type that is high in ammonium nitrogen. The forms of nitrogen in a fertilizer bag are spelled out right on its label.

Go Organic

Rather than wade through the chemical jargon, nitrogen loss through the winter can be averted by using an organic nitrogen fertilizer. Nitrogen in such fertilizers, with the exception of blood meal, is locked up and held in an insoluble form. As soil microbes solubilize the nitrogen locked up in organic fertilizers, it is released first as ammonium nitrogen. So by using an organic nitrogen source, the nitrogen is not soluble to begin with, and when it becomes soluble through the action of microbes, it’s in a form that clings to the soil particles and not wash out of the soil.Organic fertilizers

(Except in very acidic soils, other soil microbes then go on to convert ammonium nitrogen to nitrate nitrogen. This reaction screeches almost to a standstill at temperatures below 50 degrees Fahrenheit, so the ammonium nitrogen can just sit there, clinging to soil particles, until roots reawaken in late winter or early spring.)

Common sources of organic nitrogen include soybean meal, cottonseed meal, fish meal, and manure. Hoof and horn meal, leather dust, feather dust, and hair are esoteric sources, though plants will make use of them as if they were just ordinary, organic fertilizers. Even organic mulches, such as wood chips, straw, and leaves, will nourish the ground as they decompose over time.Fertilizer application Woor chip mulching

The Cadillac of fertilizers is compost. Compost offers a slew of nutrients, in addition to nitrogen, released slowly into the soil as microbes work away on it. Compost — most organic fertilizers, in fact — are not the ticket for a starving plant that needs a quick fix of food.Compost bins

Every year I spread compost an inch deep beneath especially hungry plants like vegetables and young trees and shrubs to keep them well fed. Less hungry plants get one of the above-mentioned organic mulches. The benefits of these applications continue, trailing off, for a few years, so annual applications build up continual reserves of soil nutrients, doled out by soil microbes, that translate to healthy plants and soil.Composted garden beds
(More details about fertilization can be found in my book Weedless Gardening.)

A DELECTABLE PEACH

A Time Machine

A few days ago, a fuzzy orb that I held in my hand became a time machine. This time machine was a peach, and time travel took place immediately after I took a bite out of it. There I was, no longer eating the peach on my friend Wendy’s farm — Wendy is a botanical artist, https://drawbotanical.com — but in the backyard of my youth, biting into a peach from our backyard tree. (Our home “orchard” also consisted of two crabapple trees, whose fruit was morphed under the direction of a great aunt into jelly, and a pear tree that I remember bearing only one fruit that I watched daily only to find it, one day, gone, picked prematurely by my sister.)
Wendy's peaches
Back to the time machine peaches. These peaches would never sell at a supermarket, even a farmers’ market. Their skin was very fuzzy and a washed out yellow color, some with just a hint of a blush. I remember, when I worked for Cornell University Roger Way, the apple breeder at the time, bemoaning the fact that “Americans eat with their eyes.” Spots from peach scab disease on many of the fruits did nothing to increase their visual appeal.

“Would never sell,” that is, unless a taste was offered. Protected within that admittedly ugly skin was a meaty, golden yellow flesh. The flesh was sweet and, in contrast to most peaches these days, very rich-tasting, with a strong peachy flavor. It’s that peachy flavor that whisked me backwards in time.Wendy's peach, cut

I Make a New Peach Tree

Peach tree, hedged

Long gone peach

This year has been the best ever fruit year in decades around here, even right here on the farmden, where the low-lying site is not very fruit-friendly. Peaches always fail here; a few weeks ago I finally cut down my one tree. Twice over the past years I planted apricot trees, knowing that they are one of the fruits least likely to succeed around here. I was right; they are long gone.

Against my better judgement I am going to once again venture into peachdom. Perhaps Wendy’s peach is resistant to peach ills: brown rot, plum curculio, oriental fruit moth, bacterial spot, and peach scab. (Yes, her fruits were afflicted by scab, but not enough to diminish the pleasure of biting into them.)

Wendy isn’t sure of the variety name of her tree so I can’t order that one from a nursery. No matter.

Pits saved from some of the fruits can be grown into whole new trees. Seed-grown peach trees grow quickly and can take only three or four years before their branches are adorned by fruits. Plant a peach pit now, and it will not sprout until next spring, even if you keep it warm. Like other temperate-zone fruits, the seeds need to be stratified, that is, they must experience winter before they’ll sprout. If they sprouted now, the young, tender seedlings would succumb to winter cold.

Plant the pit outdoors, and it will be naturally stratified. I prefer to fool the pit by cracking the outer shell, soaking the seed in water for a few hours, then putting it in a plastic bag, along with moist potting soil, in the refrigerator. Refrigerator-stratified seeds sprout more quickly than outdoor planted seeds because once the outdoor-sown seeds have experienced enough cold, a total accumulation of about 1,000 hours of temperatures between 30 and 45 degrees Fahrenheit, they have to await spring warmth before they’ll grow. 

Seeds stratified in the refrigerator will often sprout in the bag within a couple of months, at which point they need to be planted. I plan to pot them up and let them grow in the greenhouse.

Seed-grown fruit trees generally don’t bear fruit identical to the fruits from which the seeds came. It depends on what variety pollinated the flower that became the fruit, and how the chromosomes got juggled around. Peach trees are self-pollinating, which reduces the variability from fruit parent to fruit child, so there’s a good chance that a seed grown peach tree will yield tasty fruit. In contrast, plant an apple seed and there’s about one in 10,000 chance that the fruit from the resulting chance will even be edible.

If I wanted an exact replica of Wendy’s peach, I could beg a branch from her tree and graft it onto a peach rootstock. What’s a peach rootstock? It could be any peach tree grown from seed.

And Almonds!

Despite apricot’s strong nomination for the tree crop least like to succeed around here and, actually, pretty much everywhere in eastern North America, it does not win the prize. Almond trees are less likely to succeed. With that said, in this best of all years for fruit, here in the Northeast, at least, Wendy managed to harvest her first (and perhaps her only) crop of almonds this year.

Almonds are closely related to peaches. Their common ancestor diverged six million years ago with the separation resulting by the lifting of the Himalayan massif. Both plants suffer from the same insect and disease problems. 

Two characteristics put almonds in the most likely to fail category. First, in humid climates, the nuts themselves are apt to spoil. And second, almonds have a very low chilling requirement. (Just as seeds have chilling requirements before they will sprout, flower and stem buds also have chilling requirements before they can sprout.) With a low chilling requirement, almonds would likely break dormancy and flower with the first hint of warm weather in spring, then succumb to likely subsequent frosts.

But not this year.

Needless to say, I will not be giving almonds a try on my farmden.

Almond Illustration, by Wendy

Almond illustration, by Wendy

FOXY GRAPES

A Bad Rap

The word foxy has not been complimentary to grapes. It refers to the dominant flavor in one of our native species, the fox grape (Vitis labrusca). Around 1880, the botanist William Bartram went so far as to suggest that the epithet foxy was applied to this grape because of the “strong, rancid smell of its ripe fruit, very like the effluvia from the body of a fox.” (Others more generously suggested the epithet came about because foxes ate the grapes, or because the leaves resembled fox tracks.)

Glenora and Vanessa seedless grapes

Glenora and Vanessa seedless grapes

Although native Americans ate this grape, early white settlers, well before the time of Bartram, had been unimpressed by the flavor. In 1672, John Josselyn wrote that fox grapes had “a taste of gunpowder.” Two Dutchmen visiting New York in 1679 recounted how they “went along the shore to Coney Island . . . and discovered on the roads several kinds of grapes still on the vines, called speck [fox] grapes, which are not always good, and these were not; although they were sweet in the mouth at first, they made it disagreeable and stinking.”

Fox grapes

Fox grapes

Wherever white settlers landed in America, they attempted to establish plantings of the grape with which they were familiar, the European wine or vinifera grape (V. vinifera), which was the grape cultivated in the Old World since biblical times. In America, vinifera culture began as long ago as 1619, when the best vines and skilled growers were brought from France to establish a vineyard in Virginia. That planting and virtually all subsequent plantings in the East failed because vinifera grapes can’t tolerate the cold winters or the insects and diseases to which our native grapes are accustomed.

What’s the Difference?

In spite of repeated, futile attempts at growing vinifera grapes in the East, few people considered growing our tougher, native grapes before the nineteenth century. Only then were superior varieties developed, beginning with Catawba about 1820.
Picking grapes
One reason for the delayed interest in fox grapes was because vinifera is the better fruit for wine, and it was not until the nineteenth century that fruits generally were appreciated for fresh eating. (“Wine” recalls another possible source for the epithet foxy; horticulturalist Liberty Hyde Bailey suggested in 1898 that the name arose due to “the lively foxing or intoxicating quality of the poor wine which was made from the wild grape.”)

As you might imagine, fruits of vinifera and fox grapes are quite different. You can pick out the difference from the grocer’s shelf today. The fox grape is represented by Concord: bite into a berry and the thick skin slips off the jelly-like meat, releasing a strong, aromatic, though not excessively sweet, flavor. The vinifera grape is represented by Thompson Seedless: eat the whole berry, tender skin and all; the fruit is sweet, with a neutral flavor. Vinifera berries are less apt to shake off the bunches, so ship better, which is one reason why Concord grapes usually show up in markets only near where they are grown.

Concord grape

Concord grape

I Like Foxiness

All this verbiage isn’t an academic exercise in grape history. If you grow grapes, as I do, survival of the vines and taste of the fruits is important. Vinifera are occasionally grown with success in the Northeast, but 300 years of mostly failure should teach something.

For those gardeners who strive for a grape akin to vinifera, there are hybrids between vinifera and fox grapes. Actually, most grape varieties these days are hybrids of vinifera, labrusca, and often some other species. Hybrids exhibit the full spectrum in flavor, hardiness, and pest tolerance, depending on which varieties were used as their parents. 

If you live in a environment inimical to vinifera grapes and you’re interested in growing grapes closer in flavor (or lack thereof, in my opinion) to Thompson Seedless, hybrids such as Himrod and Lakemont are fairly cold hardy and can be grown at favorable sites, preferably south facing slopes in full sun. A bit more foxy, unfortunately only fairly cold hardy, is Vanessa, a delectable small berry which is pale red, crisp, sweet and flavorful.

Vanessa grapes

Vanessa grapes

I have grown one vinifera variety, thus far in a large pot in my greenhouse. This one, Perle de Csaba, and I’m sure some other viniferas, does have a distinctive, delicate flavor, besides being sweet and seedless, and wrapped in a tender skin.

Notwithstanding the previous testimony against foxiness in grapes, I happen to like my grapes foxy. And I’m not alone: Ulysses P. Hedrick, who wrote The Grapes of New York early in the last century, conceded that many vinifera grapes “are without character of flavor” compared to American grapes, which are “more refreshing . . . do not cloy the appetite,” and make a better juice. My taste preference is fortunate, because in my farmden, here in the bottom of the bottom of a frost pocket, grapes are particularly prone to both cold injury and disease.

Edelweiss grape

Edelweiss grape

Despite my affection for foxy grapes, for many years my farmden lacked a good ol’ Concord vine. I finally planted one about 6 years  ago, ate the fruit for a couple of years, then decided the flavor didn’t warrant my growing it. Yesterday I tasted a friend’s Concord grapes and they were delicious. What’s up? Did my nursery source for my Concord vine mix up labels? Could the difference be due to terroir, a concept that takes into account almost everything: soil, climate, slope, sunlight, the geology and geography of a particular region, and as much more as needed to lend it a certain mystical quality? (I delve into terroir in depth in my book The Ever Curious Gardener.) I took a cutting to make a plant and in a few years will check out the flavor of that “Concord” here.

For the past few weeks, I have Elmer Swenson, a dairy farmer and grape breeder who lived near the Wisconsin-Minnesota border, to thank for the grapes I am eating. Some of my favorite varieties reflect his skill as a breeder. Swenson Red berries are medium sized, sweet, fairly foxy, and just slightly slipskin. I do wish that Edelweiss was not so vigorous, but the berries are deliciously sweet and foxy. Also delicious and foxy is Brianna. And for a variety leaning towards the vinifera end of the gustatory spectrum, there’s Somerset Seedless. Thanks Elmer.

Fruit bowl with fig, grape, persimmon, nashi

Fruit bowl with fig, grape, persimmon, nashi

HAVE SOME SYMPATHY

Soil That is Too Good?

 I don’t expect to elicit much sympathy from moaning about the problem with my soil here on the farmden; the problem is that it’s too good. Wait! Don’t roll your eyes or, worse, stop reading. Allow me to present my case.
Aerial view of farmden
The setting: A valley cut through with a small river (the Wallkill River) in New York’s Hudson Valley. River bottom soil, specifically young alluvial soil, rich in nutrients, a silty clay loam with perfect drainage. Also naturally rich in nutrients. No rocks.

So what’s the problem? One problem is too much growth from plants that I’m not cultivating — weeds, everything from stilt grass and garlic mustard to wild blackberries and poison ivy to ash and cherry trees. Every minute of every day they are making the most of this rich ground and trying to insinuate themselves into my plantings. They creep into the edges of the vegetable gardens, settling in especially well right at the bottom of any fencing, where they are hard to weed out. 

My land is backed by forest running up to hills, then mountains, with soil that’s pretty much the opposite of what I have down here in the valley. It feels like that forest is just waiting for me to let up weeding and mowing, ready to spring down here and engulf my plantings.

That feeling is pretty much borne out in the one-third of an acre meadow to the south. Once a year mowing keeps the meadow a meadow. Yet even in the few months of each growing season, joe-pye-weed and ragweed stand almost 9 feet high and goldenrod, monarda, and grasses grow densely.

Looking at the herbage more closely I see multiflora rose, staghorn sumac, grapevines, and other woody plants elbowing their ways in here and there. And cherry, red maple, red oak, and poplar trees keep trying to introduce their progeny into the meadow to morph it into forest. Which isn’t a bad thing except that I scythe parts of that meadow for harvesting the herbage, not woody plants, to feed my compost, and grow apples, kiwis, pawpaws, hazelnuts, and other fruits and nuts that I cultivate in and around the meadow.

Errant and Robust

Even some cultivated plants grow a bit too well here.

Crocosmia, for example.  Towards the end of summer, this South African, summer-flowering bulb sprouts a tall, thin flower shoot about four feet high. The shoot curves over and then fire-engine red flowers open sequentially along the upper portion of the curve.
Crocosmia up close
Many years ago I planted crocosmia here and, as directed, dug the corms up at the end of the season for winter storage, just as I would do for dahlias. Those first few seasons, the plants hardly bloomed before frost killed the tops.

Long story short is that the original planting, which has since grown to a clump of plants, now blooms reliably each August, and does so without my having to ever dig the corms up for winter. Good so far, except that the plant evidently also now ripens seeds, and these seeds find their way elsewhere on the property. That would not be so bad except that in this rich soil one little seedling soon multiplies into a clump of vigorous plants that can threaten the existence of other plants.
Crocosmia
My tack in reining in crocosmia is lopping off all spent flower heads wherever I spot them with a hedge shears, and digging out seedlings where they are not wanted.

This summer I even noticed a crocosmia seedling in the meadow. Hmmm. I recently saw, in a video documentary about color in the natural world (Life in Color with David Attenborough, highly recommended), a field of crocosmia in its native habitat, the flowers hovering over the field like a red mist. Do I want that in my meadow? Should I transplant some corms there? Would my rich soil and the apparent footloose habit of crocosmia create a future nightmare? If so, could I awaken from that nightmare with one whole season of mowing that portion of the field? Grasses are pretty much the only plants that tolerate repeated mowing.

Permaculture Ideals

All this is part of the reason I wince when I’m accused of practicing permaculture (although my agricultural perspective and much of what I do does happen to align with those of permies). Permaculture’s origins are in the poor soils and dry climate of Australia. Plant a tree there, give it water, nutrients, mulch, and you’re not inviting half the plant world in as too-close neighbors. But try this here on my farmden — or in any other place with hot summers and sufficient natural rainfall — and those “neighbors” will be at the door.

Even among cultivated plants grown cheek to jowl in the various “guilds,” growth eventually becomes so rampant that it’s a major job to keep growth among plants balanced so each plant gets what it needs in terms of light and air.

Most permaculture sites outside of climates such as Australia, our Southwest, and the Mediterranean, that I have seen mingle plants nicely on paper and look good when first planted. After a few years, though, they become a tangled mess of plants with low yields of poor-quality fruits and vegetables.

Permaculture seems to encompass a broad philosophy, broad enough so a well-known local permaculturalist once told me, contrary to my opinion, that I was practicing permaculture. I asked him, “Ok, then; what isn’t permaculture?” He replied, “Everything is permaculture! (Except commercial agriculture).”

All this is not to say that I don’t side with permaculturalists in certain key practices. Like them, I minimize soil disturbance. I also practice interplanting, such as the blackcurrants and pawpaws, favor pest resistant species, such as hardy kiwifruit and gooseberries, and let my ducks have almost free rein here. I also have my requisite shiitake logs, fire wood pile, and solar cells.

COMPOST, LOOKING AHEAD, LOOKING BACK

Spring Readiness

  I’m frantically getting ready for spring. A large portion of that readying means making compost. Compost piles assembled now, while temperatures are still relatively warm, have plenty of time to heat up right to their edges, quickly cooking and killing most resident weed seeds, pests, and diseases.
My compost bins
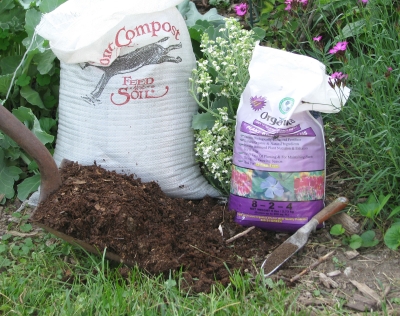
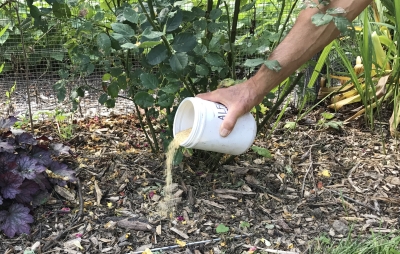
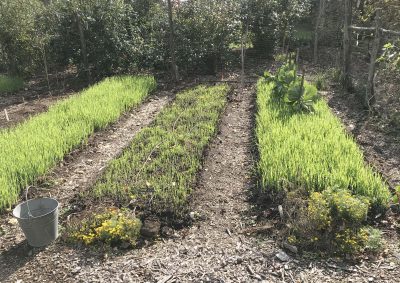
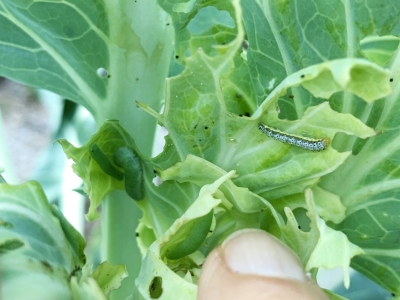
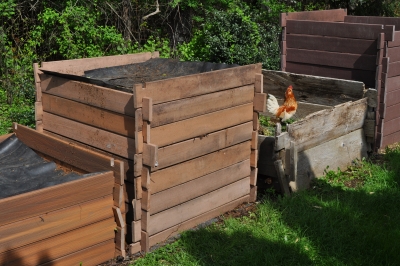
I like to think of my compost pile as a pet (really, many pets, the population of which changes over time as the compost ripens) that needs, as do our ducks, dogs and cat, food, water, and air. Today I’ll feeding my pet — my compost pet — corn stalks, lettuce plants that have gone to seed, rotten tomatoes and peppers, and other garden refuse. Plenty of organic materials are available to feed compost piles this time of year.

  In case you’re wondering, no, I’m not taking a close look at each leaf, stalk, and fruit to make sure it’s free of pests before getting tossed on the growing pile, as is suggested by some people. Look closely enough, and you’d find that just about everything would have some hostile organism on it. But given some combination of time and heat, a well-fed compost pile will take care of such potential problems.
Compost, in the making
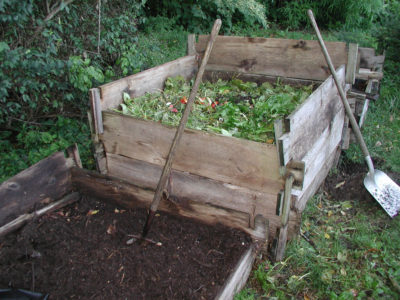
Joseph Jenkins, in his excellent (and fun-to-read) book, The Humanure Handbook, quotes research showing complete destruction of human pathogens in humanure composts that reach 145°F for one hour, 122°F for one day, or 109° F for one week. The same should be true for plant pathogens and pests. For decades, I’ve tossed everything and anything into my compost piles and never noticed any carry over of pest or disease problems.

  Heat and time also do in weed seeds. Survival depends on the kind of weed: Research shows that a couple of weeks at 114°F kills pigweed seeds, while only about a week at that temperature kills seeds of tomatoes, peppers and their other kin in the nightshade family. Generally temperatures of 131°F for a couple of weeks kills most weed seeds.

  Heat and time aren’t the only threats faced by pathogens, pests, and weed seeds in the innards of my compost piles. In addition to heat, various antagonistic organisms — including friendly (to us) bacteria, fungi, and nematodes — stand ready to inhibit their growth or gobble them up.
Compost thermometer
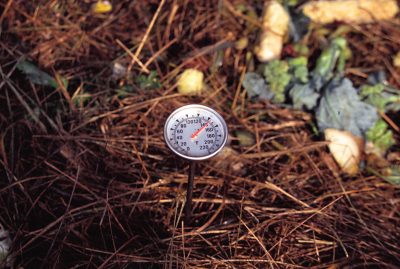
This time of year, my compost piles dial the heat up to around 140°F, and hold that temperature for a couple of weeks, or more, before slowly cooling down.

Weedy Revenge

  Speaking of weeds, they also make excellent food for my compost pet. What sweet revenge I get tossing mugwort, creeping Charlie, and woodsorrel onto a growing compost pile and then get them back transmuted as dark, rich compost.

  Other organic materials that go into my compost piles are a mix of goldenrod, bee balm, grasses, yarrow, and whatever else is growing in my south field. I cut parts of it with a scythe, let the scythings wilt for a day, then rake and pitchfork them up.
Haystacks and compost piles
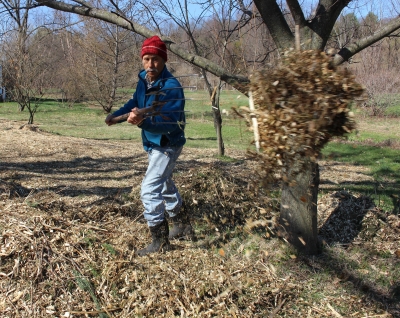
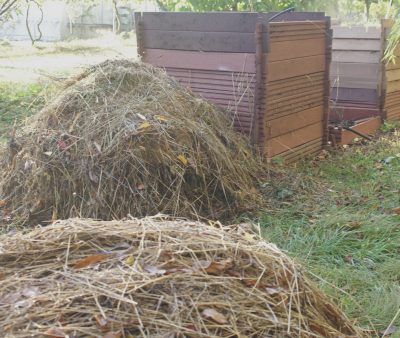
Also on the menu is some horse manure from a nearby stable, which I like mostly for the wood shavings that provide bedding for the horses. The manure itself furnishes nitrogen, which compost pets need for a balanced diet — 20 parts carbon to 1 part nitrogen but no need to be overly exacting because it all balances out in the finished compost. Lacking manure, soybean meal is another nitrogen-rich feed, as are grass clippings and kitchen waste.
Organic materials feed compost pile.
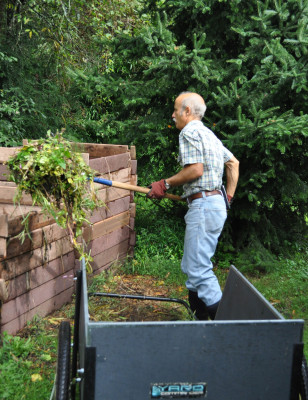
Feeding a variety of compost foods provides a smorgasbord of macro- and micronutrients to the composting organisms and, hence, to my plants. Every few inches I also sprinkle on some soil, to help absorb nutrients and odors, and some ground limestone, to lower acidity of our naturally increasingly acidic soils, and to improve the texture of the finished compost.

The Annual Cycle of Compost Here

  Compost made this time of year typically gets turned next spring, then, later in the growing season, pitchforked into the garden cart for spreading on vegetable beds. 

Turning compost

A one-inch depth of ripened compost supplies all that bed needs to grow intensively planted vegetables there for the whole growing season.Spreading compost
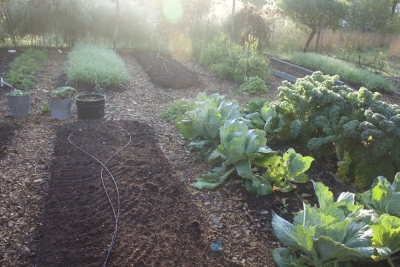
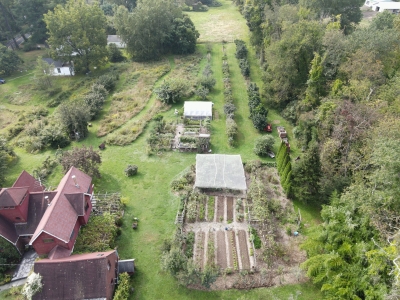
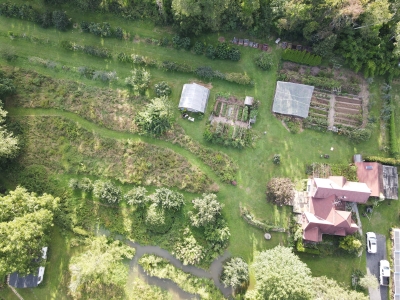
It was too late to plant a late vegetable crop in the bed I just cleared of old corn stalks, so I blanketed that bed an inch deep in compost. The same goes for a bed in which grew an early planting of zucchini.

  Any beds that get cleared before the end of this month will get, before I lay down that blanket of compost, a dense sprinkling of oat seeds. The seeds will germinate and the seedlings will thrive in the cool weather of autumn and early winter.

Cover crop, 3 beds with cabbage

This “cover crop,” as it is called, protects the soil surface from pounding rain and insulates the lower layers. The oat roots latch onto nutrients that might otherwise wash down through the soil. And as the roots grow, they nudge soil particles this way and that, giving the ground a nice, crumbly structure that garden plants like so well.

  Beds cleared after October 1st get only compost, no oats, which is almost as good. In all honesty, I’ve never noted any difference in the soil or in vegetable plant growth from using compost alone as opposed to compost plus a cover crop. That much compost, year after year, probably way overshadows the effect of a cover crop. The green cover does look nice going into winter, though.

(I deal more in-depth with composting, using compost, and cover crops in my book Weedless Gardening.)Oat cover crop

AN ANCIENT FRUIT, STILL POPULAR

You’ve caught me at a good time. I’m just now dipping my toes into figdom, and in the next few days expect to be swimming in a sea of fresh, ripe figs.
Some figs on a plate
You’ve never tasted a fresh, ripe fig? Don’t judge them by what you might buy in the market. Ripe figs are very perishable so for commercial purposes must be harvested slightly underripe. But figs don’t ripen at all after harvest, which is why market figs are but a shadow of the real thing.

Fresh, ripe figs are ubiquitous in California, Florida, and other mild winter regions, so perhaps are ho-hum to those living in those parts. Not here in New York’s Hudson Valley though, where winter temperatures dipping to minus 20 degrees Fahrenheit are no surprise!

Five Ways with Figs

I — and you —can grow figs in cold climates by one of five techniques I describe in my new book, hot off the press, Growing Figs in Cold Climates. The easiest way is to just plant the fig in a pot that can bask in sunlight outdoors in summer, and then be moved to a cold (ideally 30-45° F), but not frigid, location for winter. Figs are subtropical, not tropical plants, that actually enjoy this winter rest.
Potted fig tree
Fortunately, fig is a very adaptable plant. You can lop back its roots each winter, so you can pack new soil around its roots without having to move the plant to a bigger . . . and bigger . . . and bigger pot. You can prune stems more severely that most other fruit plants so it can be maneuvered through doorways for its winter rest. And no need for light in winter. And no pollination is necessary. And pest problems are rare.
Repotting a large plant
Of course, there’s lots of wrinkles to getting a fig plant to fruit well in a pot: What’s the best potting mix? How do you prune for best yields? When do you move the plant to its winter quarter, to its summer quarters? How do you hold back growth waiting for equable spring weather?

Another method that I describe in my book is planting a fig tree outdoors (yes, here, where winters are frigid) and training it as an espalier. Espalier is the training of a plant’s stems, often a fruit plant, to an orderly, usually two dimensional pattern. With fruit plants generally, and figs specifically, the result is more than just good looks; you get to pick lots of very high-quality fruit.
Espalier fig outdoors
I have trained my plant to the form of an upside down L, consisting of a foot-high, permanent trunk and one permanent, horizontal “arm.” (I’m starting another plant, this one trained to a low T, with horizontal arms running in opposite directions.) Each summer vigorous shoots grow from the topside of the arm and bear fruits. New figs are born along the ever elongating shoots, ripening over a long period beginning with the oldest ones, lower down, until shoot growth and fruit ripening is halted by cold weather and short days.

In late fall, I cut every shoot back to its origin on the horizontal arm. Then I insulate the plant beneath a blanket of autumn leaves topped with a tarp to shed water, then perhaps more leaves to hide the tarp from view. Come spring, the cycle of fruiting, pruning, and insulating begins again.

Devil’s Details

With any of the methods described in my book, the devil is in the details, matching, for instance a particular method of growing the plant to the pruning technique and a variety’s bearing habit.

Speaking of bearing habit, that’s another characteristic of figs that make them such adaptable plants, able to be grown for their fruit even far from their native hot, dry, mild winter home in southern Arabia. While a peach tree bears fruits on stems that grew the previous season, and an apple tree usually bears fruit on stems two, three, or more years old, a fig tree might bear fruit on new, growing shoots; on one-year-old stems; or on both, all depending on the variety. So there’s not necessarily a need to have stems survive winter in order to get a crop the following season.

Early figs on old part of stem, later figs developing on new shoot

Early figs on old part of stem, later figs developing on new shoot

A nice offshoot (sic) of this bearing habit, for fig lovers/growers everywhere, is that fig plants are very quick to come into bearing. I’ve had plants bear the season after I rooted them from cuttings!

And many fig varieties potentially bear two crops each year. First to ripen is the crop borne on one-year-old stems. Later, the so-called main crop is born on new, growing shoots; this is the crop that continues ripening as the shoot grows, until stopped by cold weather and short days.

Why We Lust for Figs

I am among the many people, all over the world, who have wanted to grow figs. Fig was the first fruit I planted many years ago when I began gardening. I was living in Madison, Wisconsin where winter temperatures regularly plummeted to minus 25 degrees Fahrenheit!

Why the lust for figs? Perhaps because fig originated in one of the cradles of civilization, and is one of the oldest of cultivated fruits. It is the most mentioned fruit in the Bible (remember when Adam and Eve “knew that they were naked; and they sewed fig leaves together, and made themselves aprons.” It’s also one of the two sacred fruits of Islam, and figures prominently in Greek mythology.
Adam and Eve
Flavor has to figure in: A fully ripe fig is soft and juicy, with a honey sweet, rich flavor. If you already grow figs, I’m hoping my book will help you grow better or more figs, or be able to manage them more easily. If you haven’t yet experienced the rewards of growing figs, you have a treat in store for you.
Me eating a fig