Colossal chestnut

FINDING THE RIGHT CURE

“Cure” is a funny sort of word. It means, on the one hand, to relieve from illness, and, on the other hand, to subject to some sort of preservative process. (And, on yet another hand, a few other things.)
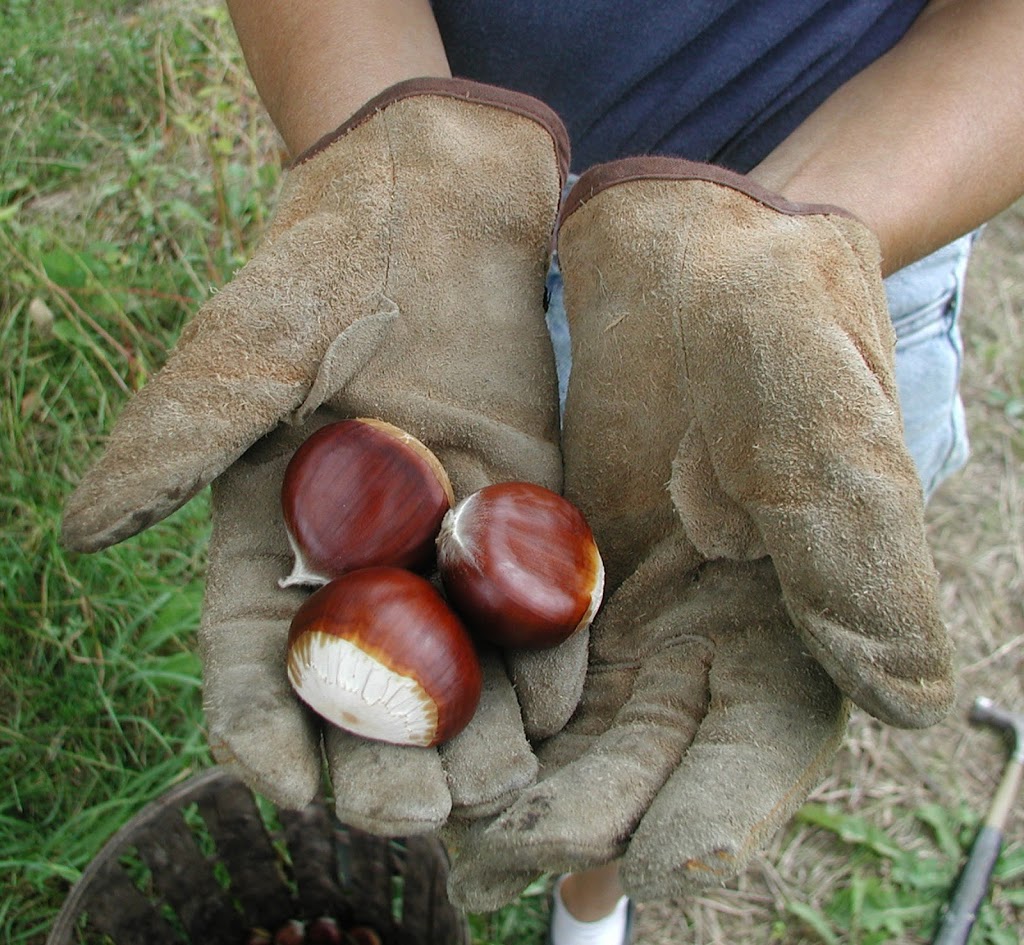
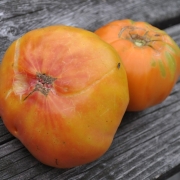
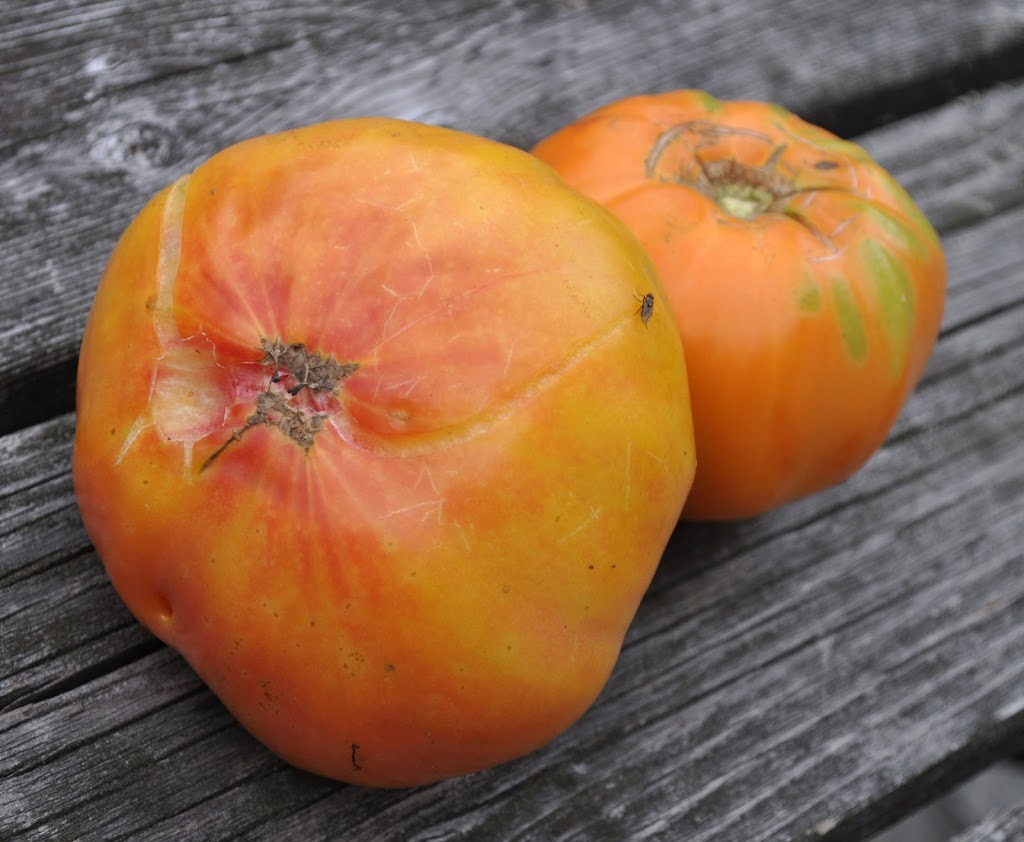
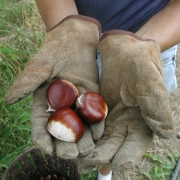
The chestnut variety ‘Colossal’
Which brings me to my chestnuts . . .  no, they’re not diseased, but they do need to be cured. We chestnut growers face two opposing goals with our harvested nuts: Good storage versus good eating. A freshly fallen chestnut is rich in starch and moisture and, because it is alive, it’s able to fight off mold and store well if kept near freezing temperatures. But it doesn’t taste good. For best eating, the nuts need to cure, a process whereby some moisture is lost and some of the starch changes to sugars, dramatically improving flavor. But cured nuts don’t keep well.
This story has one other wrinkle, the chestnut weevil. This bugger lays eggs in the nuts while they’re on the tree and, after nuts drop, eats some nutmeat and then crawls into the ground for winter. 
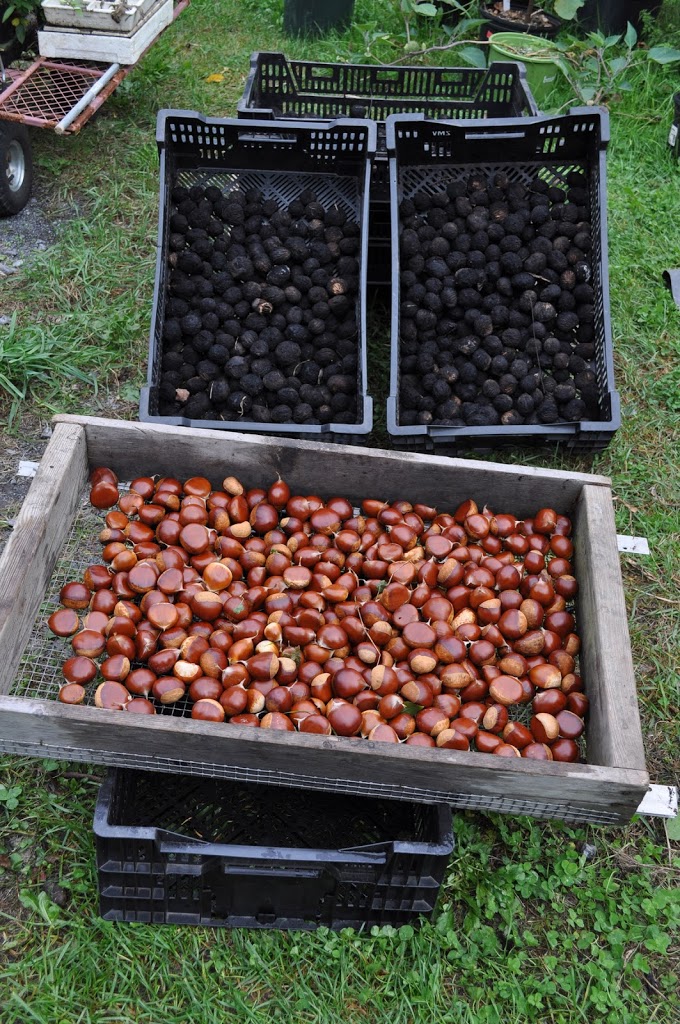
Chestnuts begin to lose moisture usually as soon as they touch ground. They start at about 50% moisture and once moisture drops below 35%, they’re dead and will rot unless eaten quickly or thoroughly dried (for chestnut flour, for instance). The way to store chestnuts, then, is to make sure they’re plumped up with water, and the way to do this is with a dunk in water for about a week. Soaking also kills weevils. The nuts may begin to ferment, so the flavor is ruined after the dunking — but they’re not supposed to be eaten yet. 
Another way to deal with hydration and weevils is with a 30 minute dunk in water heated to 120° F. The temperature and timing are exacting so I this week opted for the less exacting week-long soaking from my just-harvested nuts.
Kept plump with moisture and at temperatures near freezing, nuts subjected to either water treatment will store well until — since they are alive — they begin to sprout.
The way to get chestnuts ready for eating is to bring them to a drier and slightly warmer, but still cool, location. Depending on temperature and humidity, the transformation from foul to flavorful could take from 3 to 14 days. Cooler temperatures and moister air lengthen the curing time, but also offer better flavored chestnuts.
(Much of this information was gleaned from an article by Greg Miller in The Chestnut Grower, http://www.centerforagroforestry.org/pubs/chestnut/v8n3/v8n3.pdf. Greg is the owner of the Empire Chestnut Company, http://www.empirechestnut.com, which sells high-quality chestnuts, chestnut trees, and chestnut seeds.)
——————————————–
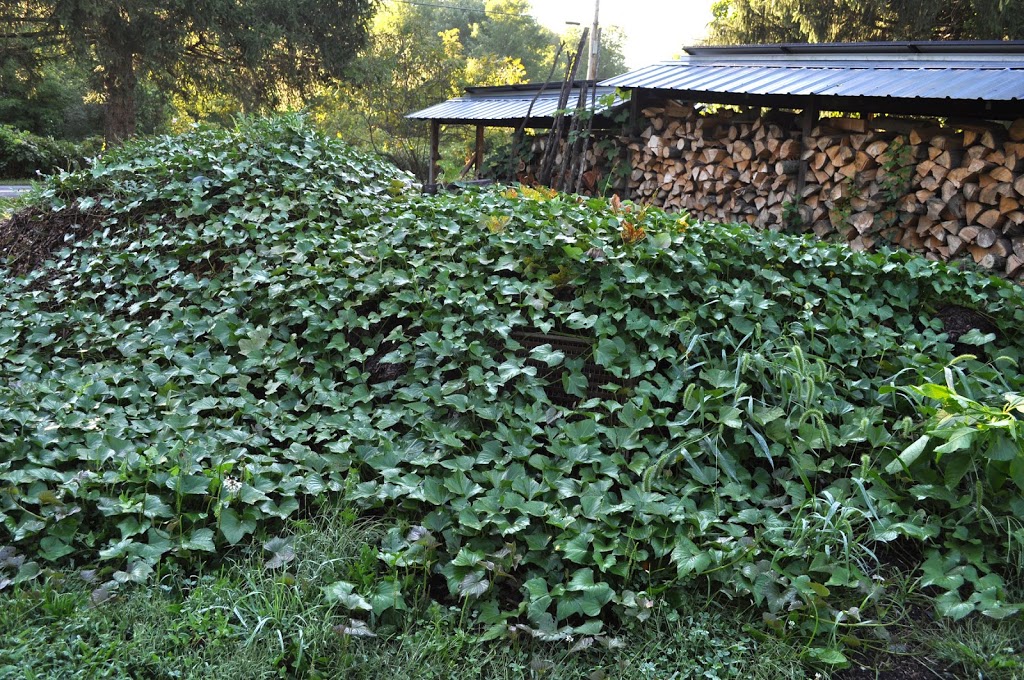
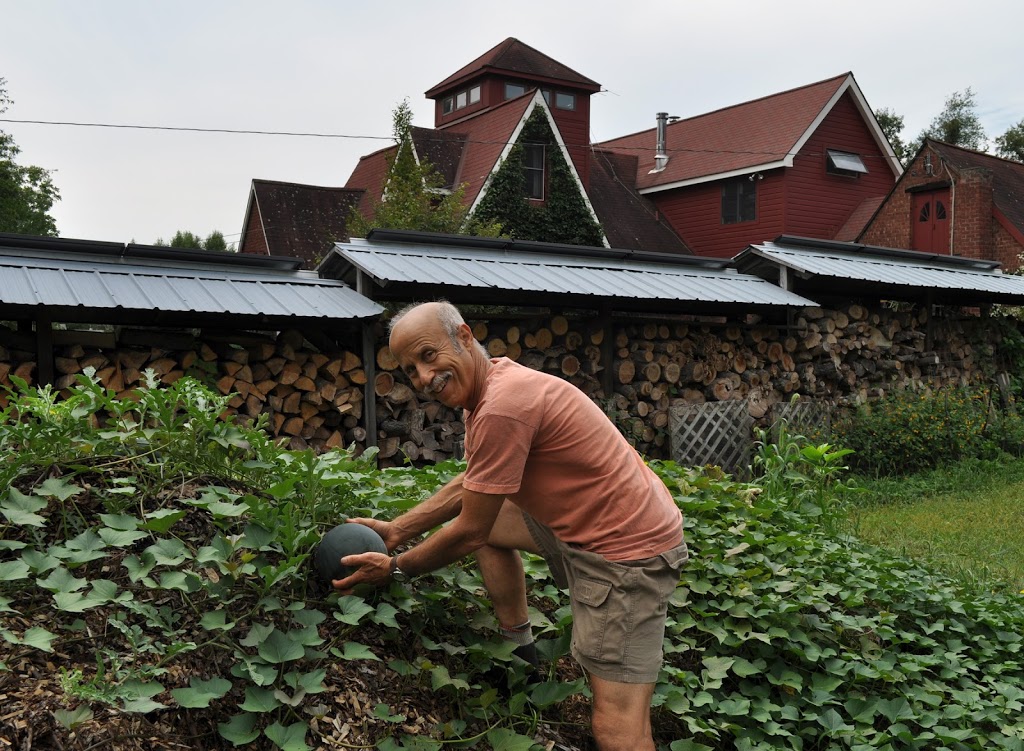
The sweet potato harvest is in, as it should be before cold threatens. Soil temperatures below 50° F. cause chilling injury to the roots and internal decay. As I’ve written previously, I planted the vines atop piles of wood chips and leaves that arborists and landscapers dump here and that I spread as mulch later in autumn. All summer, the sweet potatoe vines multiplied and stretched out as far as 20 feet from my original plants. 
Unfortunately, it looks like the plants put more energy into making vines than fat roots. From 4 plants and a lot of vine growth I harvested a mere half-bushel of sweet potatoes. A couple of the potatoes were football-sized, others were below average, and too many were like swollen, orange strings. 
Stringy roots result from too rich a soil, but I didn’t even plant in soil! Probably the hot summer and sometime moist weather sped decomposition of the chips and leaves to release nutrients.
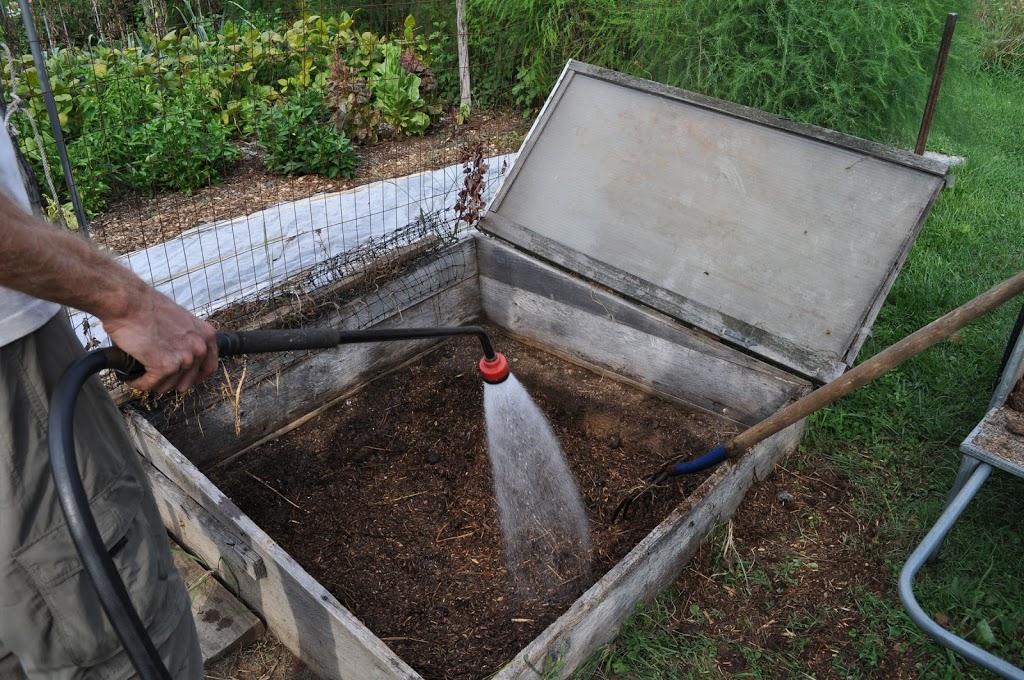
But we’re here to talk about curing. Like chestnuts, sweet potatoes need to be cured for good storage and good flavor. In this case, what’s needed are a week and a half of temperatures 80 to 85° F. and high humidity, not easy to find this time of year. My greenhouse benches are cleared and temperatures there  get quite warm on sunny days, so that’s were I’ve spread out the sweet potatoes. Longer curing times are needed at cooler temperatures, such as at room temperature. Covering potatoes with cloth or putting them in perforated plastic bags, or keeping them in the greenhouse, maintains high humidity.
Once cured, sweet potatoes are ready for eating. My paltry crop will be eaten soon, but for longer storage, medium humidity and temperature around 60° F. are ideal. Refrigeration is a no-no. The roots get chilled, just as they would in the ground (or my mulch pile), and show it. 
——————————————–
Black walnuts trees abound and the nuts are raining down and free for the taking. The sooner the fleshy husk is taken off, the less stained and better-flavored the nuts. No end of innovative ways have been devised for separating the husk from the shell, everything from spreading the harvested nuts on the driveway and running over them with your car to stomping on each nut to cutting the husks off to letting the weight of a small sledge loosen them and then twisting them off with gloved hand. We opt mostly for the latter, followed by hosing and drying them in the sun for a couple of days.
Of course, hulled black walnuts are not yet ready to crack and eat; they need to be cured, for a couple of months. Curing black walnuts is simple, involving nothing more than storage in any cool or cold, dry location impervious to squirrels. There are plenty of black walnuts for human and squirrels alike, but a cache of hulled, clean nuts is too tempting to those rats with tails. 

KEEP OFF THE SCALE

Shortening days and cooling temperatures have certain potted plants crying out to be brought indoors. Soon, soon. Subtropical plants, such as bay laurel, rosemary, and fig, tolerate — even enjoy — temperatures below freezing, so cold isn’t the threat, for the next few weeks at least. But the later the evergreen plants come indoors, the more chance that I will have fired up the woodstove. The resulting drier air will shock plants if they’ve recently come in from cool, moist outdoor conditions; leaves will yellow and drop.

As for my poinsettia, staghorn fern, orchids, and other tropical plants, temperatures that dip below freezing could do them in.

But nobody’s coming indoors yet. First I have to make sure that no creatures are hitchhiking in with the plants. No, not creatures that would threaten me, but creatures that would threaten the plants themselves, and those would be mostly scale insects. Outdoors, ladybird beetles, parasitic wasps, some fungi, and other natural predators and diseases keep scale populations more or less in check. Indoors, plants are on their own.

Scale insects are so named for the waxy covering that protects the adults. They need that protection because once they start sucking plant juices through their straw-like stylets, they settle down in one place for good. Infested plants become weakened and the insects secrete a sticky honeydew that drips on the plant and surrounding furniture and carpet. A dark-colored fungus feeds on this honeydew, blackening leaves and surroundings. Blackening of the leaves, although superficial (the fungus isn’t attacking the plant), further weakens the plant by shading it from light.

Scale trivia: Male scale insects die after a couple of days without ever feeding. Some scale species consist only of females. Some scale insects are herded by ants who move them about and protect them from predators; in return ants “milk” the insects for their sweet honeydew. And not all scale insects are bad. Red cochineal dye comes from a scale insect, as does lacquer.
—————————————–

For the past few weeks, once a week, I’ve taken out my arsenal against scale insects. Insecticidal soap is relatively nontoxic and is a kind of soap especially formulated to kill soft-bodied insects. Two teaspoons of mild detergent in a gallon of water is also effective.

Repeated applications are needed because the soap is ineffective against scale insects protected by their covering. It’s the little ones, the “crawlers,” as they are called, that I’m gunning for. After birth, they scoot out from beneath their mother’s protective cover to find their own sucking spots, and that’s when they’re most vulnerable to soap. My goal is to keep at it to kill each hatching until there’s no more fecund mothers still giving birth. If the soap merely knocks crawlers off the plant, a subsequent spray will also kill or knock off any that climb back aloft.

My last couple of sprays will be oil, which smothers protected mothers and crawlers. (I know this sounds brutal, but experience yourself a houseplant heavily infested with scale and the associated sticky, blackened carpet and furniture before passing judgement.) Oil can damage plants also, especially evergreens, so the oil to use is “horticultural” oil, also known as “summer” oil, which is highly refined to remove harmful ingredients. Like soaps, these oils are relatively nontoxic to nontarget organisms.
—————————————–

Usually, scale insects hardly make their presence known until just after midwinter. I do notice a couple of scaly bumps on citrus and staghorn fern; these I deal with mano a mano, with a flick of my fingernail.

Strawberry guava, though, already has plenty of tufts of white cottony cushion scale on it. The guava also is loaded with ripening fruits so needs all the energy it can get, especially with shortening days. This tropical fruit tastes nothing like strawberry but has a sweet, perfume-y flavor with a nice tang. The reddish flesh and abundant, edible seeds probably give rise to the “strawberry” part of the name.

It Ain’t Over — The Fall Garden Begins

If I wasn’t a gardener, I’d look upon the late summer and fall weather as a glorious succession of warm sunny days and crisp nights with intermittent periods of mostly gentle rains. As a gardener, the crisp nights make me a little nervous.
Temperatures so far have only dipped into the low 40s; any night, though, that low could plummet below freezing. Below freezing temperatures would ring the death-knell for okra, peppers, tomatoes, and the any other summer vegetables still braving cooling temperatures. 
Actually, there’s not much oomph left in the okra and tomatoes. Okra doesn’t bear pods except when temperatures are downright hot. And disease, mostly early blight (not the dreaded late blight of a few years ago) has reduced tomatoes to nothing more than bare stems capped by a few green leaves and fruits. So loss of tomatoes or okra would hardly be noticed except to indicate it was finally time to clear those beds and ready them for next spring.
Peppers are another story. The leaves are still green and spry, and cool weather hurries the fruits along on their way to full red ripeness. 
—————————————–
With cooler and cooler weather descending on the garden, the race is on with cool-weather vegetables — cauliflower, broccoli, cabbage, turnips, and winter radishes. These vegetables tolerate temperatures well below freezing. But will they do what they have to do, whether it’s making flower buds, heads, or roots, before their growth slows almost to a standstill? Further south, they could wait out winter and finish growing as weather warmed. This far north, they eventually succumb to cold, perhaps headless, flower bud-less, or fat root-less.
I seeded cauliflower, broccoli, and cabbage in early June and transplanted them a month later. Turnips and winter radish seeds went directly into the ground in early August. According to my records, they should all be on time. But roots are only just beginning to swell in the ground beneath the turnips and radishes, and there’s no sign yet of flower buds on broccoli and cauliflower or developing heads on cabbage. Which makes me nervous.
Kale, of course, is yielding abundantly. It enjoys both warm and cool weather. All it needs to do is keep growing leaves, which it does.
—————————————–
No need to leave everything to Mother Nature; I’m going to change the weather. On a very small scale, within my cold frame. For years, I’ve used my cold frame — essentially a 5 foot by 5 foot wooden box with a hinged, clear top sloping southward — to extend the season for fresh salad fixings. This year it has become a hotbed, which is a cold frame with warmed soil.
Soil can be warmed in a number of ways. Most modern is with an electric soil heating cable made for this purpose and woven back and forth beneath the ground. Most old-fashioned — and the method I’m using — is with manure, utilizing the heat of its fermentation.
Successfully growing plants in a manure-heated hotbed demands a mix of art and science. Too much heat, too fast is to be avoided as is, of course, too little heat. To start, I and my able assistant David dug almost 2 feet of soil out of the cold frame. I had on hand horse manure mixed with wood shavings and a little straw; the mix was fairly fresh and moist. As David forked the manure mix into the bed, I watered it and occasionally got right into the frame and stomped it down — not too hard, which would drive out all the air, but enough to pack everything together for a critical mass to start heating.
Once the bed was filled, the mix was topped with a 4 inch layer of ripe compost. Those few inches are needed to keep young, tender roots above the hot layer which, as it eventually cools, can increasingly accommodate roots. A few days later I scratched out furrows into which I sprinkled lettuce, spinach, and arugula seeds. Spinach usually survives winter here in a cold frame. Lettuce and arugula do not, so will provide a good measure, along with speed of growth, of the efficacy of the heating. 
One week after planting, temperatures about a foot down into the bed are around 80°F.
I’m lucky in not having to leave things to Mother Nature even if the hotbed’s performance proves less than stellar. A few steps away is my greenhouse, now sprouting a panoply of cool weather greens, as well as ripening cucumbers and figs.

Melon-ic Efforts

I like to keep my vegetable garden trim and neat and intensively planted. Melons have a different perspective on life. They like to sprawl every which way, tumbling across garden beds and latching their tendrils onto whatever they might come across to pull themselves up. Can ever the twain — homegrown melons, here — meet? Yes, and especially this year.
First, let’s look at the melons I planted in the garden. Seedlings a few weeks old went into the center of columns of concrete reinforcement wire 18 inches in diameter by 2 feet high. The idea was that the wire cage would contain the vines by letting them grow around and around the cylinder in an upwardly spiral fashion. Ripe muskmelons, the varieties Hannah’s Choice and Jenny Lind, could drop to the ground, the 2-foot maximum drop causing no harm.
My melons evidently weren’t in on my plan. Hot weather in early summer spurred fast and furious growth, with new shoots outstripping my efforts at coaxing the vines around and up  the cylinders. Most of the vines escaped their confines and sprawled over the bed, then onto the paths. I did manage to turn the vines inward before they overran adjacent beds.
Not to complain, though. There was a good crop of melons harvested, and vines have now been cleared away and beds prepared for next spring, with everything trim and neat again.
——————————————
Melon-ic efforts did not end in the garden. My compost bins are, like my garden, relatively neat and trim. This is not to say that some sprawling vines couldn’t be accommodated on top of those piles. The compost isn’t needed until the end of summer or fall, anyway, and melons enjoy rich, moist soils. What could be richer and moister than pure compost?
So I pulled back the corners of the coverings on a few of the compost piles and planted Hannah’s Choice and Jenny Lind seedlings there also. These melon plants grew even more vigorously than those in the garden and sprawled over the tops of the piles and down the sides.
The compost pile planting was a total success. It also yielded the earliest melons, probably due to extra heat from the innards of the pile and the dark cover on the pile, and from the richness of compost.
——————————————
Even then my melon-ic efforts were not at an end.
Every autumn I get a truckload of leaves from a landscaper, and through winter get truckloads of wood chips from arborists. The leaves and chips mostly sit in place until the following autumn when they get spread as mulch beneath trees and berry bushes and in pathways in the vegetable garden.
Lately, I’ve been thinking of making some use of that pile of organic material even as it sits waiting to be spread. Last spring a year ago I planted sweet potatoes — another sprawling vegetable — in the pile and harvested some humongous, orange tubers. This past spring melons, including Blacktail watermelon, were introduced to the pile along with my new planting of sweet potatoes.
Until raw organic materials start to decompose, they are relatively poor in nutrients, especially nitrogen. So instead of going directly into the pile, melon and sweet potato transplants went into holes scooped out of the pile into which I had added a few handfuls of compost. The compost would get the plants off to a good start. The melons, which are more demanding about their soil than are sweet potatoes, initially sulked and had to be encouraged with periodic watering and some additional fertilizer early in the season.

  The slow start was for the better. Melon plants, except for the watermelons, don’t keep bearing for a long time, and these leaf/wood chip melons brought up the end of the season with a late crop. Right now, the leaf and woodchip pile is completely overrun with melon and sweet potato vines. A few watermelon fruits are still ripening atop the pile and within lurks, I expect, a good crop of sweet potatoes.
——————————————

To experience firsthand the possibilities in home-grown fruits, come to my workshop BACKYARD FRUITS: A TASTING AND A WORKSHOP, which will be held here art my farmden. Learn how to grow delicious fruits organically and then taste some that are in season, such as pears, grapes, pawpaws, persimmons, and kiwifruits. The workshop is Oct. 6th, 2-5 pm. Contact me for registration information.

Beans, Beans, . . .

 
Lima beans are one of those things, like artichokes, okra, and dark beer, that people either love or hate. I love them. The problem is that this far north, summer temperatures usually hover below those in which lima bean plants thrive, at least those best-tasting varieties of lima having large seeds and dry, sweetish flesh something like chestnuts.
 
A few years ago, I grew the variety Jackson Wonder, which was billed as a “prolific, cold-hardy heirloom with bright nutty flavor.” It was cold-hardy and prolific, and it is an heirloom dating back to 1888, but the flavor was blah.
 
A long, long time ago, I grew what might be the best-tasting of all lima beans, a pole variety named Dr. Martin. Dr. Martin’s demand for warm summers resulted in a harvest that was too paltry to justify space for those long vines again.
 
The earth has warmed in the quarter century since I grew Dr. Martin. The growing season is longer and summer temperatures are hotter. So this spring I thought it was time again to try growing some big, fat, flavorful lima beans. King of the Garden was the variety at hand, a variety perhaps as good as Dr. Martin. I started the seed in spring in pots indoors and planted out the seedlings, 2 per bamboo pole with 3 poles tied at their tops to form a teepee, a the end of May, by which time hot weather had worked its way into both air and soil.
 
King of the Garden plants grew, and grew, and grew. And flowered, and grew, and grew. And occasionally, I noticed a little, very little, pod beginning to develop. But no flowers or mini-pods grew to become large pods filled with big, fat, flavorful lima beans.
 
Lima beans are a finicky lot. Not only do they shiver in cool weather; they also underperform in weather that’s too hot. Like the hot weather we had, at times, this summer. More recent, cooler nights should improve pod set. That is, unless something else is the roadblock to pod production. That “something else” could be stinkbugs. Stinkbugs and stinkbug problems are moving north from their more traditional southern haunts. There were plenty this summer. The buggers enjoy limas.
—————————————-
 
Moving over to another bean, green beans, my third and last planting of which is now being feasted upon by Mexican bean beetles. (They also feed on the limas, but not enough to cause significant damage.) Mexican bean beetles are not something new that’s become more problematic with warmer summers and winters; they’ve been showing up in my garden for decades although few other gardeners with whom I speak seem to have problems with them.
 
Despite the beetles, I harvest plenty of green beans; my main beef with the beetles is that they keep me from being able to grow pole green beans. Pole beans, unlike bush beans, which get sequentially planted and then pulled out after a few weeks of harvest, are a long season crop planted in late spring to grow and bear until frost. That long season of growth offers a 24/7 dinner to bean beetles. Growing only bush beans restricts my choice of varieties and makes growing and harvesting the beans, for fresh eating and for freezing, more frantic.
 
This year, I tried to check bean beetle infestations with weekly sprays of neem, a relatively nontoxic pesticide derived from the Indian neem tree. It was ineffective. Another possibility is to elicit the help of a stinkbug! No, not any old stinkbug but one known as the spined soldier beetle, a predator a many plant pests. These bugs can be purchased as such or pheromone attractants can be purchased to attract them to the garden. I tried the traps many years ago to no good effect. Perhaps it’s time to import the bugs themselves.
—————————————–
 
One bean that seems to be pretty much ignored by bean beetles and stinkbugs, and any other pest, is soybean, which I harvest green as edamame. The edamame harvest this season has, as usual, been excellent. I grow the variety Shirofumi, both for its flavor and good yields.
 
Edamame usually flower and ripen pods in response to daylength, and Shirofumi edamame harvest ends in early August. Then, I usually pull the plants to make space for late plantings of cabbages, radishes, lettuce, and other cool weather vegetables. This year, the space was not needed so I decided to leave the plants in place.
 
Soybeans, along with green beans, lima beans, and other beans, are legumes, which are plants that, with the help of symbiotic bacteria in their roots, can use nitrogen from the air as food. Much of that nitrogen becomes the protein in the soybean seeds; the rest is in the leaves, stems, and roots. Leaving my soybean plants in place is helping to enrich the soil with nitrogen, from old roots that slough off. The rest of the plants, once pulled, go into the compost pile to provide nitrogen there and, as the finished compost is spread, subsequently in the garden. My lima bean plants, even if they remain podless, provide those same benefits. The same goes for my green bean plants, from which I’ll get a little extra nitrogen from all the Mexcan bean beetles on their leaves.
——————————————
 
Do you want to grow fruit but think you don’t have room? I’ll be giving a workshop “Fruit for Small Gardens,” covering the fruits and growing techniques needed to reap delectable rewards from spaces as small as a balcony to as “large” as a small suburban yard. The venue is Stone Barns inn Pocantico Hills, NY on September 22nd from 1-3 pm. For more information, see http://www.stonebarnscenter.org/products/backyard-fruit-for-small-gardens.html

Payday Here, Beginning with Pears and Persimmons

Sept 6, 2012 #35
A GARDENER’S NOTEBOOK
by Lee Reich
 
It’s payday here on the farmden. The first Magness and Beurrée d’Amanlis pears dropped to the ground, signaling that it’s time to harvest those varieties. Immediately, before the chickens peck at the fallen fruit, which will then get hollowed out by this year’s abundant yellow jackets. The crop is pretty substantial considering last spring’s wide swings in the weather.
My Seckel pear, ready to harvest
 
Actually, the real payday — eating the pears — needs to wait a couple of weeks. European pears, such as Magness and Beurrée d’Amanlis, need to be picked underripe to finish ripening off the tree, or else their insides are mush. These two varieties are early ripening, and early ripening pears ripen best if chilled for a couple of weeks before being brought to room temperature for ripening. 
 
The pears must achieve a certain degree of maturity before they can ripen to perfection off the tree. The easiest way to tell when that magic moment has arrived is when the fruit stalk separates readily from the tree as the fruit is gently lifted and rotated. That’s after a few fallen fruits call attention to the tree. Not all fruits reach that lift-twist-separate stage simultaneously so I’ll go over the trees again 2 or 3 more times. (A refractometer, which measures sugars, also can indicate when to harvest, although the fruit must be cut so then can’t ripen for eating; most pears can be picked if sample fruits show refractometer readings greater than 10°Bx.)
Magness, one of the best of the European pears
 
Color on my Asian pears, the varieties Chojura and Yoinashi, is becoming more vibrant, which is their way of telling me that they’re near ripening. Unlike European pears, Asian pears don’t taste their best unless plucked from the tree dead ripe. When ready, they’re at that lift-twist-separate stage. They’ll need especially careful picking because as a result of last spring’s frost, less than a dozen of the golden gems hang from the branches, making each fruit all the more prized.
—————————————–
 
The tree fruits highlight what a strange growing season it has been. Besides the dramatic early warming last spring and the dramatic freezes that followed, the growing season got started early and has been unusually hot. The upshot is that everything, fruitwise, is advanced ahead of its usual schedule. Magness pears typically ripen for me around the middle of September, with Chojura beginning soon after. This year, all these fruits are ripening about 2 weeks early.
 
A hot season and early ripening could effect fruit quality, especially of pears. Some varieties taste best following warmer summers, others during cooler summers. Temperatures during ripening also have an effect on quality. It’s known that hot temperatures in the two months preceding harvest bring out the best flavors in Bartlett and Bosc pears, and that Anjou pears like it cool. The effect of temperature on the more obscure pear varieties, which are what I grow, is not well elucidated. Time, beginning in 2 weeks, when tasting begins, will tell.
—————————————–
 
This morning I was scything some tall grass and weeds beneath my persimmon trees in anticipation of their ripening. Mowing exposed a ripe, orange persimmon couched softly among stems and leaves on the ground. And then another one, and then another. I looked up and confirmed that Mohler persimmons are ripening.
Szukis persimmon
 
Mohler is one of a number of varieties of American persimmon that are cold hardy and will ripen their fruits this far north. My persimmons have survived winter lows below minus 20 degrees F.; Asian persimmons, which you find in the markets, are not nearly that cold hardy. The flavors differ also. American persimmons are drier, with richer flavor, the best varieties having taste and texture something like a dried apricot that’s been soaked in water, dipped in honey, and given a dash of spice.
 
 
Mohler is not available from nurseries. I made my tree by grafting a stem of Mohler, which I got from someone named Mohler in Pennsylvania, onto an American persimmon seedling. I was able to hook up with Mohler through North American Fruit Explorers (www.nafex.org), a fun organization of fruit nuts who write about their fruit adventures, home and afield, and exchange plants.
Mohler, as well as my Szukis, Dooley, and Yates, American persimmons (the others are available from specialty nurseries) are very reliable and easy to grow. Mine have never succumbed to late spring frosts and the mature trees require no spraying, pruning, or any other care. They’re among the fruits highlighted in my books Uncommon Fruits for Every Garden (Timber Press, 2004) and Grow Fruit Naturally (Taunton Press, 2012).
—————————————–


Do you want to grow fruit but think you don’t have room? I’ll be giving a workshop “Fruit for Small Gardens,” covering the fruits and growing techniques needed to reap delectable rewards from spaces as small as a balcony to as “large” as a small suburban yard. The venue is Stone Barns in Pocantico Hills, NY on September 22nd from 1-3 pm. For more information, see http://www.stonebarnscenter.org/products/backyard-fruit-for-small-gardens.html
—————————————–

To experience firsthand the possibilities in home-grown fruits, come to my workshop BACKYARD FRUITS: A TASTING AND A WORKSHOP, which will be held here at my farmden. Learn how to grow delicious fruits organically and then taste some that are in season, such as pears, grapes, pawpaws, persimmons, and kiwifruits. The workshop is Oct. 6th, 2-5 pm. Contact me for more information and registration.

Demise of Miss Kim, Sweet corn

Aug 30, 2012 #34
A GARDENER’S NOTEBOOK
by Lee Reich
I killed Miss Kim. Sure, she was pretty enough, with lilac purple flowers late each spring. In fact, she is  . . .  I mean “was” . . . a lilac, although she was Syringa patula, a different species from the common lilac (S. vulgaris). 
The very reason that I had planted Miss Kim was because she was different. She would blossom later than the common lilac, extending the season when lilac blossoms and their fragrance could be enjoyed. Later in summer, her leaves were never to be marred by the powdery, white coating — powdery mildew disease — that mars the leaves of common lilacs. And her expected stature, no more than 6 feet high, would be fitting for the bed of perennial flowers that she would call home. 
The relationship did not work out. Her later blossoms did not extend the fragrance of lilac blossoms, at least not the heavenly aroma of the common lilac. Miss Kim’s flowers were fragrant but not pleasantly so. Her growth was my oversight: I should have predicted that the rich soil here in the Wallkill River floodplain would coax Miss Kim to new and greater proportions, proportions that overpowered other plants in the flowerbed. 
So Miss Kim had to go. After an initial effort with shovels, I, along with helpers David and Jonathan, coaxed her root ball out of the ground by adding a tractor and chain to the tool mix. Unfortunately, this is not the ideal time of year to dig up a large shrub for replanting. Miss Kim is now in some kind of lilac heaven.
—————————————–  
Perennial bed, minus Miss Kim
The spot vacated by Miss Kim is thankfully open now to light and air. A bit too open, in fact, so a replacement shrub is waiting in the wings. My probable choice this time around: summersweet clethra (Clethra alnifolia), a native shrub that is adorned with fragrant, usually white bottlebrushes of blossoms in late July. 
Clethra usually grows to about 6 feet tall (uh-oh) but some varieties are more compact. I’ll be on the lookout for the variety Hummingbird (to 4 feet tall, heavy flowering, shiny leaves), Pink Spice (dwarf height unspecified, pink blossoms, dark, shiny leaves), or September Beauty (dwarf height unspecified, blossoms 2 weeks later than others). 
Clethra grows in sun or shade, in either case needing a moist, acidic soil. My site is in full sun; I’ll bank on plenty of mulch for keeping the soil moist. 
There’s time until fall to ponder which clethra to plant, or even whether to plant something else. Fall is particularly good for planting because the soil is just right for digging, warm and moist, not sodden, and because roots will grow in their new home but shoots won’t grow until after they’ve experienced sufficient cool weather between fall and spring. I like to plant on October 14th.
—————————————–
Not that Walmart is the go to place for good sweet corn but Walmart is, after all, the largest retailer of organic foods. Now there’s one more reason to grow your own sweet corn (in addition, of course, to at least some others of your own vegetables and fruits). Soon to be found on Walmart’s produce shelves: GMO sweet corn,”GMO” as in “genetically modified” sweet corn. 
Most corn grown in this country is, unfortunately, GMO corn. That corn is field corn, destined for animal feed, ethanol, and processed foods. Allergens, pesticide-resistant pests, adverse health effects to animals fed such crops, genetic contamination of wild plants and non-GMO crop plants, questionable economic advantages, increase pesticide use, and a host of unknowns are among the reasons that GMO crops should be banned. (For more, see GMO Myths and Truths at www.earthopensource.org.)
Golden Bantam corn, grown here on the farmden

Most aggregious is the fact that GMO foods and feeds are not required to be labeled as such. 
I find comfort in knowing that the sweet corn I’ve been harvesting for the past few weeks, and for a few more to come, is non-GMO (the variety Golden Bantam, the standard of excellence in sweet corn 100 years ago) and has not even been sprayed with pesticides. I plant in “hills” (clumps of 3 plants), 2 rows of hills spaced 2 feet apart in the row down each bed. With good soil and water as needed, a 20 foot long bed yields 90 plus ears of scrumptious, healthful sweet corn.
—————————————–
I will be giving a workshop “Grow Fruit Naturally” at Hawthorne Valley Farm in Ghent, NY on September 9th. For more information: http://hawthornevalleyfarm.org/event/grow-fruit-naturally-workshop.
—————————————–
Do you want to grow fruit but think you don’t have room? I’ll be giving a workshop “Fruit for Small Gardens,” covering the fruits and growing techniques needed to reap delectable rewards from spaces as small as a balcony to as “large” as a small suburban yard. The venue is Stone Barns inn Pocantico Hills, NY on September 22nd from 1-3 pm. For more information, see http://www.stonebarnscenter.org/products/backyard-fruit-for-small-gardens.html

Tomatoes! (And a Workshop)

Tomatoes! Tomatoes! Tomatoes! I’m awash in fresh tomatoes. Sparkling red jars of canned tomatoes are lined up on the kitchen counter. Thin discs of dried tomatoes fill other jars. And out in the garden, tomato leaves are dropping from disease. All things tomato are center stage in the garden.
Kellog’s Breakfast, strange name but beautiful and delicious

It’s been fun comparing flavors of fresh slices of tomatoes. Brandywine and Belgian Giant, for instance, are both scrumptious, with Belgian Giant being a little more tomato-y. Cherokee Purple is also delicious, this one with a rich, slightly smokey flavor. In addition to my usual favorites, one new variety (for me), Kellog’s Breakfast, will become a regular in my garden. This heirloom has an odd name and a flesh that is at the same time meaty and juicy. The skin of these large fruits have a beautiful orange color with occasional deep red blushes.

Not all heirloom tomatoes are delicious. The main thing the heirloom Stupice (pronounced stoo-PEECH-ka) has going for it is earliness.  The fruits are small and ripen in clusters. We’ve been eating these fruits for weeks. Of course, since the later, better-tasting varieties have been ripening, we’ve been ignoring Stupice, for fresh-eating, at least. It’s better than any other supermarket tomato but not as good as Belgian Giant, Cherokee Purple, Rose de Berne, Kellog’s Breakfast, Sungold, and the other topnotch varieties I grow.
—————————————–

One heirloom tomato garnering special attention this year is Blue Beech, a variety that reached Fedco (www.fedcoseeds.com) from someone in Vermont who got it from her neighbor’s niece’s uncle(??) who brought it to Vermont from Italy during World War II. I tasted sauce made from Blue Beech at the farm of that original “someone in Vermont” and right then and there decided to grow it for its unique flavor and orangish color.

I’ve grown Blue Beech for a few years now and this year finally decided to jar it up separately from my other varieties. (All my other tomatoes get thrown into one big pot for collective canning.) My Blue Beech sauce does not have that orangish color, but does have a distinctive, very rich flavor.
—————————————–

Blue Beech is elongated, so looks like a canning tomato. Besides being good for canning, this tomato also has excellent fresh flavor, something that’s true for a number of canning tomatoes. Other varieties that have excellent flavor either fresh or cooked are Amish Paste and Anna Russian.
A number of canning tomatoes are good only that way — canned. Most notable is San Marzano because it tastes so good after being cooked, and taste so awful fresh.

And then there are tomatoes with poor flavor “no matter how you slice them” — fresh or canned. Roma is a often used as a generic name for any canning tomato but is also the name for a specific and, unfortunately, widely grown variety of canning tomato. The variety with this name is bland cooked or fresh.
——————————————

Yes, all things tomato does include some tomato diseases, just as it does every year. Gardeners and farmers seem hypersensitive to tomato diseases ever since the late blight outbreak here in the Northeast a few years ago. It made everyone start looking more closely at their plants, a good thing, with even organic growers ready to spray at the first symptom of any disease problem, not a good thing. 

I’m not planning to spray my tomatoes for late blight or any other problem. Late blight, although dutifully reported present at various locales by the Cooperative Extension Service, needs cool temperatures, humid or rainy conditions, and wind to loft it from one site to the next in order to develop and spread. We had those conditions a few years ago, in addition to multiple sources of infection from tomatoes distributed from transplants sold at “big box” stores. We don’t have that weather or the sources of infection this year (at least not as of this writing).

Late blight notwithstanding, my tomatoes, trained to single stems, are pretty much defoliated for their first foot or two. The culprits are early blight, characterized by tan blotches with concentric, darker rings, and septoria leaf spot, characterized by small, round spots with tan centers. Both diseases overwinter on infected tomato debris and wild host plants such as jimson weed.

My approach to keep early blight and septoria, which rear their ugly heads here every year, in check are to clean up all tomato debris at the end of the season, to plant tomatoes each year where they have not grown for the previous 2 years, and to mulch to keep spores from splattering up to the plants. And one more thing: not to worry. Every year, my tomatoes lose some leaves to these two diseases, and every year I harvest plenty of pesticide-free, juicy tomatoes bursting with flavor.
—————————————–
I will be giving a workshop “Grow Fruit Naturally” at Hawthorne Valley Farm in Ghent, NY on September 9th. For more information: http://hawthornevalleyfarm.org/event/grow-fruit-naturally-workshop.
—————————————–
Planted "forest"

Deferred Gratification

UPCOMING WORKSHOPS WITH LEE:
Hawthorne Valley Farm, Ghent, NY, 9/9, http://hawthornevalleyfarm.org/event/grow-fruit-naturally-workshopGrow Fruit Naturally
Stone Barns, Pocantico Hills, NY, 9/22,  http://www.stonebarnscenter.org/products/backyard-fruit-for-small-gardens.htmlFruits for Small Gardens

————————————————————————————-

One of the things I like least about gardening is its deferred gratification. I planted a Beurée d’Amanlis pear tree a couple of years ago and don’t expect to sink my teeth into one of its fruits until next year. I planted Indian Summer rudbeckia seeds a couple of weeks ago so that I can enjoy swaths of orange-tinged, yellow blossoms this time next year. Yesterday I transplanted endive seedlings, from seeds sown back in early July, into a garden bed to provide succulent, green leaves for salads, soups, and stews beginning this October.

My mini forest, 15 years old: sugar maple, river birch, buartnut

Not that deferred gratification is all that bad. After all, except for when I began my first garden many decades ago (Madison, Wisconsin on August 1st, and I did reap some beans and tomatoes), all the while that I’m planning for the future I am reaping other rewards of past efforts. This week for instance, I’ve harvested onions, seeds of which I sprinkled into furrows in a seed flat in a cool greenhouse back in February. I’m also enjoying tomatoes of all stripes, the result of seeds planted in early April. And I see a reasonable crop of Magness, the best-tasting of all my pears, getting ready with their final stages of ripening for harvest in a few weeks.


Now that I think of it, though, I do enjoy sowing seeds, planting trees, and other gardening activities that are ostensibly for some future reward. Not to mention the pleasure of watching and coaxing along plants as they develop, everything from a radish seedling, sown last week, to a maple seedling, planted 15 years ago and now about 20 feet high.

I’m reminded of a name I saw on a sign hanging over the entrance to a primitive cabin in the woods of Maine: Quitchyerbitchin. It was not a native American name.
—————————————–

There’s a flurry of deferred gratification in process: planting vegetables for the autumn garden. It’s like a whole new garden, one that begins around mid-September and continues, even here in hardiness Zone 5, into December. 

In between each of the above-mentioned endive seedlings went lettuce plants. Like the endive, the lettuce was sown in a seed flat about a month ago so, like the endive, required no garden space until it became available. That space was donated by my first planting of Golden Bantam sweet corn, sown out in the garden the first week of May and now either eaten or steamed, sliced from cobs, cooled, and packed away in the freezer. The lettuce will be harvested and out of the way by the time the heads of endive  start to spread and fill the bed solid with greenery.

How about another bed, this one just cleared of onions? Into that bed I just planted a row of turnips and a row of Black Spanish winter radishes. You might snicker at my heaping praise upon the lowly turnip, but if you’ve ever had them sown in late summer, grown quickly, and picked during the cool days of autumn, you’re in for a real treat, roasted, stewed, or sliced raw. Hakurei is one of the best for flavor; I also like the old Purple Top White Globe.

Conditions that bring out the best in turnips also do so for winter radishes, the pumped up counterparts of small spring radishes that offer the same spicy flavor but also can be stored through winter. You have to be careful not to plant winter radishes too early or they grow frighteningly large. One summer I did just that with a long, white variety of daikon radish. Very long, it turns out, given enough time. The radishes grew to look like baseball bats, their upper portions rising up out of the soil as if there was not enough room underground to house them. The experience sort of killed my taste for winter radishes for a while.

Just this morning, another batch of seeds — Chinese cabbage and cilantro — went into seed flats. Like winter radishes, Chinese cabbage should not be sown too early in summer, in this case because long days and hot weather cause the plants to make flower stalks instead of fleshy leaves. Tatsoi and Fun Jen, the two varieties I planted, each need about 45 days from seed to maturity, but no reason to rush harvest during the cool, short days of autumn. The plants just sit there waiting to be eaten.
—————————————–

Besides suitable soil fertility, the main requirement of all these autumn vegetables is water. Fast, succulent growth brings out the best in them. With drip irrigation, I don’t have to worry about watering established plants. But until their roots can forage out into wetting front a few inches below the surface, new transplants and seeds need regular watering from a watering can or hose.

You or I might be tempted to also quench our own thirst with water from that hose. In general, don’t! Consumer Reports magazine recently reported that some hoses can leach lead  (used to stabilize polyvinyl chloride in hoses) into the water at 10 to 100 times the level allowable by the EPA for drinking water. The workaround is, if you’re buying a new hose, to buy one specifically labelled safe for drinking water, to let the water run before taking a drink, or — best idea — walk to your kitchen to slake your thirst.

Blackberries Galore!

UPCOMING WORKSHOP WITH LEE:
Philadelphia Orchard Project, 8/22, 
http://www.phillyorchards.org/volunteer/schedule
Fruit Growing Simplified

The following is adapted from my new book GROW FRUIT NATURALLY:

If your fingers aren’t stained after you’ve picked blackberries, you’re not eating them at their very best. And this is the year — my year, at least — for blackberries. Spring weather threw a curve ball that pretty much wiped out my developing apples, hardy kiwifruits, and pears, but blackberries are among a number of other fruits that waited patiently in spring, and whose branches are now bowed to the ground under a heavy load of fruit. An especially heavy load due to a mild winter? abundant rain (to say the least, from hurricane Irene and tropical storm Lee) late last summer? my green thumb? Who knows?

After succumbing to temptation and plucking a few of the first blackberries of the season underripe, I can wait for finger-staining ripeness. Coming upon a fully colored blackberry, I give it a gentle pull. A dead ripe berry should drop into your hand with only the slightest coaxing. Eat.
Chester blackberry ripening

In the wild, blackberries are found growing almost everywhere. Some of these wild plants creep along the ground, while others grow upright like small trees. These growth habits have been bred into cultivated blackberries, so you can choose from erect varieties, which are the most cold-hardy and heat tolerant, as well as semi-trailing and trailing varieties. Trailing varieties, with lanky, flexible canes, are sometimes called “dewberries.” Western trailing blackberries yield large, wine-colored to black fruits having distinctive flavors. Varieties also have even been selected or developed that lack those ominous thorns. 

Blackberries have perennial roots and biennial canes. With most varieties, a cane bears fruits in its second season, then dies. In any growing season, as older canes are fruiting, then dying, new ones are making their first season of growth. Any planting, then, has both one and two-year old canes, so offers an annual harvest. The plants spread by tip layering, that is, by hopscotching along as arching or trailing canes root at their tips and make whole new plants which go on to tip layer and make more plants, as so on. Unfettered, blackberries grow to become a tangled patch of canes.
—————————————————

Although wild blackberries often grow along the partially shaded edges of woods, the plants fruit best and are healthiest in full sunlight. As with most cultivated plants, well-drained soil rich in organic matter is the ideal.

Spacing, which may be as close as 3 ft. apart to more than 6 ft. apart, depends on the type of blackberry and the training system. Erect blackberries are self-supporting, but other types are easier to manage if trained by being tied up to a sturdy pole, on a trellis of wires strung between sturdy posts, or on a fence. 

Blackberrys’ biennial canes and their aggressive spread make a case for annual pruning. On all but the trailing or trellised semi-erect types, prune twice each year. The first pruning takes place during summer; the tip of each new cane needs to be nipped off just as it reaches a height of 3 ft. Pinching causes branching and helps keep plants upright.

The second round of pruning, for all types of blackberries, takes place in late winter, just before growth begins. Any cane that bore fruit the previous season is cut down to the ground and the number of new canes is reduced to about 6 per clump. Finally, those lateral induced by summer nipping: They are shortened to about 18 in.

A convenient way to manage the long canes of trailing types is to let new canes trail on the ground, which they are anyway wont to do, lifting the second year canes, which will fruit, up to the wire of a trellis. If winter cold is a potential problem, those reclining canes can be left on the ground where they are easily protected for winter with a blanket of straw or leaves. Late the following winter, the old canes that fruited are cut away, the younger canes are lifted up onto the trellis, for fruiting, and new canes that season are allowed to trail on the ground. And so on year after year – all much more fun if canes are thornless.
 —————————————

The nice thing about blackberries is that they have few debilitating pest or disease problems. Start with healthy plants from a nursery; neighbors’ plants could harbor latent diseases, especially with age (the plants’, not the neighbors’). Prune regularly so branches can bathe in light and air, and remove any canes harboring insects or diseases. And pick berries when fully ripe.
————————————-

In the cold pocket, where I live and garden, I’m somewhat restricted in the spectrum of blackberry varieties I can grow. I also have an aversion to blackberries’ intimidating thorns, which arm even the leaves, all with reverse barbs to really grab you. Years ago, I traded in the delectable, but thorny, Darrow plants for my present Chester blackberries, which are the most cold-hardy of the thornless varieties. I also grow Doyle thornless, which makes long, trailing canes that I can sometimes lay on the ground to be covered by mulch or snow for winter protection.
The thornlessness of thornless blackberries is, in my opinion, beauty in of itself. It’s not just that these plants are non-intimidating; the smooth, greenish stems and lush green leaves really are quite ornamental, and made more so as a background for spring’s large white blossoms.

See my book GROW FRUIT NATURALLY for more detail on varieties and cultivation of blackberries, which can be grown just about everywhere with appropriate choice of varieties.