[jap beetles, rains and weeds, paper and chips]


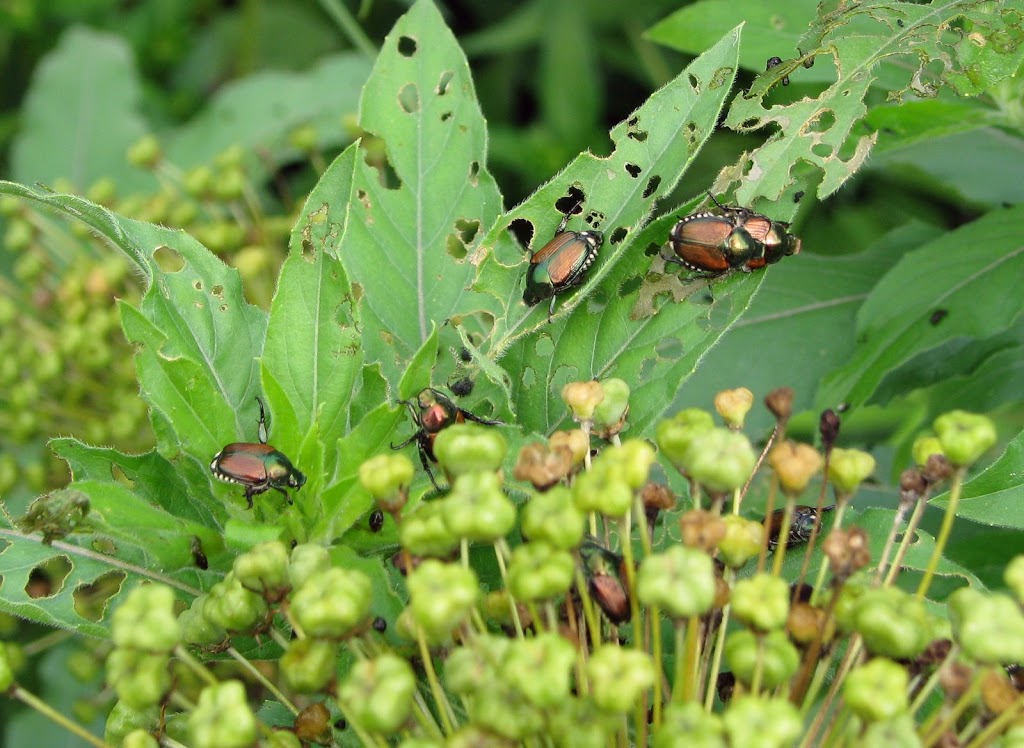
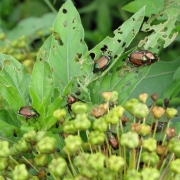
Friends have made sightings and I’m braced for an onslaught. I even saw a couple of Japanese beetles myself a few days ago but now they seem to have gone underground. (Figuratively, that is. They won’t be laying eggs in the soil and living underground as grubs for at least a month.) I’m sure I’ll be seeing the metallic green beetles again soon.

I’m at a loss for what to do. Spraying pesticides is out of the question. I have too many plants, too many of which are edible. Poisons on edibles sort of takes the enjoyment out of eating them. I guess if I had one or two prized plants struggling along under attack from Japanese beetles, I might resort to sprays. Then again, I could just wrap them in some fine mesh material such as Remay.

I’m not planning to put out the beetle traps I positioned around my yard for the past few years. Up until a few years ago, beetles were never a problem and when they became just a little problem, the traps captured what few beetles ventured here. But last year, the traps’ bags were bulging with masses of fidgeting beetles every day during beetle season. The traps probably attracted more beetles than would have made their way here in the absence of the alluring scent of the traps.

I am taking some action on some of the beetle’s favorite plants: grapes, hardy kiwifruit, and filberts. That action is a spray of kaolin clay, sold as the commercial insect repellent called Surround. Research suggests some effectiveness, hopefully enough for me to make it to the end of beetle season without doing anything else except tolerating some lacy leaves.

************************************************

Each year’s garden has its themes, and this year – I hate to admit it – the theme is weeds. (I hate to admit it because I wrote a book entitled Weedless Gardening.)

Rain is the reason for all this weed growth. It’s like a rain forest here. Turn your back on the garden for a few minutes, or stand in place for a while, and the garden or you get are likely to be swallowed in vegetation.

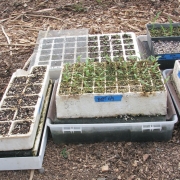
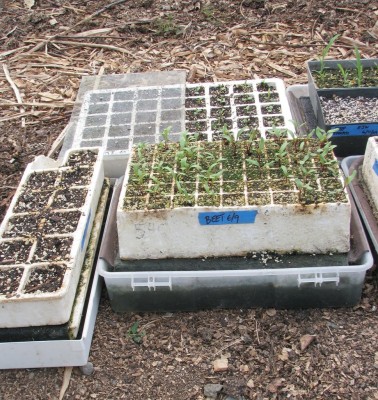
In seasons past, especially dry seasons, drip irrigation would pinpoint water to quench the thirst of all my vegetable without coaxing weed growth where vegetables were not, such as paths. Mulch would seal moisture into the ground for my other plants, which I would coddle with supplemental water only their first season.

I’m not complaining, though, because all my vegetables and flowers and shrubs are also growing well. I finally have returned me garden to sufficient weedlessness. It just took more weeding and mulching to get it to that stage.

**************************************************

One savior in this war with weeds has been a building product variously known as red rosin paper or standard dry sheathing, perhaps other names also. It’s a thick, absorbent paper that comes in long rolls and is often used as underlayment for floors.

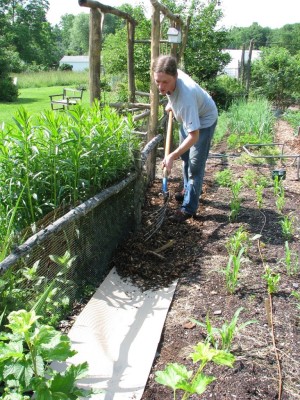
Not here, though. I’m using the paper as an underlayment for mulch. I’ve used newspaper the same way except this year I had 30 foot long paths to cover. Those paths have had year after year of wood chip mulch but the covering was getting thin and, with all the rain, too many weeds were beginning to appear.

So all I did was roll out the paper, then top it with just enough wood chips to hide the paper. Water can get through the chips and the paper but the combination smothers weeds for lack of light. Paper is an organic material so will eventually decompose. As long as the soil is not disturbed, which awakens seeds buried within, few weeds should appear especially as I replenish the chips every year or two. And if things get bad again, I’ll just re-paper the paths.

[berries, strawberries, aps]

For me, berries are the essence of summer. So summer has officially begun: Just before the end of June I began eating blueberries and blackcurrants, and now there are plenty.

Blueberries are familiar, blackcurrants are not, but deserve to be better known. With a strong, distinctive flavor and not a whole lot of sweetness, blackcurrants are a fruit that only some of us enjoy fresh. Apply a little heat and some sweetener, perhaps a pastry shell (or not), or just squeeze the berries to make juice, sweetened or mixed with other juices, and you have a fruit that just about everyone enjoys. I’m much more adept at growing fruits than cooking fruits, but I’ll bet blackcurrants would be heavenly paired in various ways with dark chocolate.

Blackcurrants are very easy to grow. They fruit well even in shade and pretty much the only care they need is relatively straightforward annual pruning. Deer are not particularly fond of the bushes and birds are not fond of the fruits.

Lest anyone thinks I’m talking about those dried fruits sold as “dried currants,” those are totally different creatures. They are dried “Black Corinthe” grapes whose name has been bastardized to “black currant.”

Ever since I started growing berries, blackcurrants have been among my favorites. These berries are generally unknown in this country because they can host a disease of white pines, a valuable timber crop, so were banned until recently, when disease-resistant varieties where developed. Consort is one such variety, which I liked fine, but a few years ago I got my hands on some Russian varieties, which are disease resistant and have much finer flavor. Eating fruits of the varieties Kirovchanka, Belaruskaja, and Minaj Shmyrev moved blackcurrant up the scale to my favorite fruits, along with blueberries.

**************************************

“What about strawberries?” you might ask. They’ve been ripe for weeks now. They’re berries also.

I like strawberries but they are not among my favorite fruits. I don’t like crawling on the ground to harvest fruits, and, although strawberries are technically perennial plants, a bed starts to decline after 5 years or so due to encroachment of weeds and diseases. Even before that 5-year mark, a bed needs annual renovation if it’s going to remain healthy and productive.

Take a look at my strawberry bed today and you’d think that I didn’t like the fruits at all. I renovated the bed, something that looks brutal and is needed every year soon after the harvest is over. Step one is to go through the bed and thin out the plants so that each has almost a square foot of space all to itself, with preference given to younger plants. Two rows of plants run the length of each 3-foot-wide bed. While thinning plants is also an opportune time for thorough weeding and pulling off runners.

Next, I used grass shears to shear all leaves from all the plants, then gathered up all the cut leaves to cart off to the compost pile. This step lessens disease buildup.

And finally, the bed got blanketed with an inch-thick icing of compost or, alternatively, some organic mulch such as straw, pine needles, or wood shavings along with a bit of fertilizer. This mulch feeds the soil, enriches it with humus, conserves soil moisture (not needed this year! – yet), and keeps roots cool.

There are other ways to manage a strawberry bed but the system described, called the “hill system,” works well in intensive, closely managed gardens. No matter what growing system is used, though, any strawberry bed needs weeding, thinning, periodic rejuvenation, and eventual replanting.

**************************************

We can’t forget about vegetables in our (very) local harvest backyard harvesting. Looking ahead to autumn, I sowed seeds of endive and radicchio along with more broccoli and cabbage, recently sown seedlings of which got flattened during a recent deluge. I also sowed my biweekly pinch of lettuce seeds to keep us in big salads right through summer.

Once up, all these seedlings can grow in self-watering APS seed flats (from Gardener’s Supply Company) for about a month before being planted out in the garden. Then there will be space available from which peas and early beans and corn have been harvested and cleared away. Later, harvested onions will free up more space.

Looking ahead to two springs hence, small spears are now appearing in the flat in which I sowed asparagus seed a couple of weeks ago. They’re so cute; they look like miniature asparagii.

[bean beetles, seed sowing for fall]

A reader wrote asking if I had any suggestions for thwarting Mexican bean beetle, a voracious pest of beans that resembles a ladybug except for being larger and yellow, rather than red, with black spots? The reader “tried ignoring them” (doesn’t work well) and then resorted to a spray made from pipe tobacco “tea” with a few drops of dish detergent added. She wrote that it “may have helped a little, but the bean plants eventually succumbed. It did smell good though.”

First off, nix on tobacco tea sprays. Tobacco tea sprays, like their commercially available pesticide counterpart, sold under the name Black Leaf 40, are highly toxic.

I deal with bean beetles by growing successive crops of bush beans. The beetles don’t cause much damage until after a couple of weeks of harvesting beans, at which point I just move on to harvesting from another bed that I had planted a few weeks after the first bed. I usually do three plantings a season, each sown as far from each other as possible and about a month apart. I thoroughly clean up infested beds once I start harvesting from a younger bed, packing the old plants into the compost pile and then piling on a layer of some other material, such as straw or manure, to get the bean leaves, stems, and old pods composting as fast as possible.

Because of the beetles, I no longer grow pole beans, which would stay in place to bear — and feed bean beetles — all season long. I don’t grow the usual pole beans, that is. I grow Scarlet Runner beans, which are a different species that is unappealing to the little buggers, and which bear beautiful, scarlet blossoms. The edible pods are fat, hairy, and ugly — but delicious.

****************************************************

I’m now in a flurry of seed planting. And no, it’s not because I forgot to plant everything beginning about two months ago.

Some of the seeds I’m now planting are for the fall vegetable garden. That would be Scotch kale, Fiesta broccoli, early Jersey Wakefield cabbage, beets, and Swiss chard. Other fall vegetables also need to be sown, but not yet.

I’m also sowing asparagus seeds for asparagus harvest the year after next and then for decades to come. Most people plant asparagus roots but the plants are very easy from seed, requiring mostly patience for the seed to sprout and then for first harvest. Growing from seed rather than from purchased roots adds a year until first harvest. If you decide this time of year to plant more asparagus, you anyway have to wait until next spring to get roots for planting, then another year until the first harvest, so it all comes out the same.

Last night’s soaking of asparagus seed in a small cup of water will speed their germination and today I’ll sow the seeds in a flat of potting soil, where the seedlings will grow through summer. Next spring, it’s out into the garden with them.

Some of the seeds I’m sowing this week are for perennial flowers for next year and beyond. Sown now, perennial flowers probably won’t flower this year but they’ll be poised and ready to flower beginning next year. Perennials are available in much greater variety in seed than plants, especially if the seed search includes mail order companies. And for the mere cost of the packet of seeds, I can grow more plants of any perennial than I could possibly find a place to plant.

I already count 56 seedlings, sprouting and ready to “prick out” into individual cells, in the flat of butterfly weed seeds I planted on June 1st.

**************************************

[mockorange, watering can, poppies]

Up until last week, every time I looked at my mockorange, I wondered why I would have planted such a bush so prominently right next to the greenhouse door. The bush looked like nothing more than a blob of greenery, a not especially graceful blob of greenery.

This week I did an about-face on my mockorange; I’m enthralled with it as it sits there draped in large, lily-white, semi-double flowers. And if those flowers weren’t enough just to look at, they fill the air with a most delicious, fresh scent that is vaguely reminiscent of orange blossoms.

Mine is not just any old mockorange. It’s a named variety, perhaps Flora Plena. Blossoms on run-of-the-mill mock oranges open earlier and are smaller and have single rows of petals.

It’s sad, but I know I won’t be looking fondly upon my mockorange again in another week or so. Until next year.

———————————————

You’d think it was a simple enough question from my brother: “I want to get a good watering can. What would you recommend that’s reasonable?”

Let me begin by stating that I own, not one but two (one for each hand), of what I consider to be the Cadillac (Prius?) of watering cans: The Haw’s Classic Long Reach Galvanized watering can. Each has a nice balance, holds a reasonable amount of water, and has a rose – the thing that breaks the stream of water into many, gentler streams – from which water falls like a gentle rain, but not too slowly.

Yet I wouldn’t recommend this watering can to my brother. I paid

about $60 twenty or so years ago, but now they cost more than twice that! You can get a similar plastic watering can for about $20. I had one. It only lasted a couple of seasons. So what would I recommend? First and foremost: No plastic. Plastic watering cans don’t last.

No sooner had I started asking whether the can was for houseplants or outdoor plants than my brother rolled his eyes and suggested that perhaps he should have started with a simpler question, like what kind of pencil I’d recommend for keeping garden notes. Ha, ha. But if a watering can is for watering just houseplants, you don’t want it to have a rose. For general watering, indoors and out, a watering can should have a removable rose. (My Haw’s does.)

Okay, I’ll make it simple. For general, outdoor use, I suggest a can that holds about 2 gallons of water, is made of heavy metal (hot-dipped galvanized ones usually are), and, unless decoration is also to be one of its functions, is not in the cutesy shape of a snail, elephant, pig, or other animal.

A good hardware store might have what’s needed, as well as web retailers, for 20 or 30 dollars. Haws does makes “SlimCan Galvanized Watering Can” that sells for about $70. It that might work a tad better than the others.

—————————————

I may have gone overboard with poppies this year. But can any garden have too many poppies?

The overboarded poppies to which I refer may seem, at first glance, to be the usual Oriental poppies (Papaver orientalis). But no, these poppies are corn poppies (Papaver rhoeas). Both poppy species have petals that are as delicate as fairy shawls and usually vivid red, but the red of corn poppies is more pure. And rather than unfolding on the ends of sprawling, clunky stems like Oriental poppies, corn poppy flowers perch high on the ends of delicate, upright, 3-foot-high stalks. A most significant difference between the two species is that corn poppies are annuals, while Oriental poppies are perennials.

Like most poppies, corn poppies transplant poorly so are best sown where they are to grow. The seeds are almost as fine as dust so there’s a natural tendency to doubt that they could amount to anything, especially just sprinkled on bare ground. With such doubts in mind, in early April I sprinkled two packets of the fine seed over a bed soon that I knew would be dense with various fritillaria and allium species, as well as licorice mint (Agastache), snow-in-summer, soapwort (Saponaria), and espaliered Asian pears.

I should have had faith. After all, corn poppy is called corn poppy because it once dotted (i.e. was a weed in) Europe’s corn fields, “corn” meaning any “grain” in the Queen’s English. My corn poppies sprouted with vigor, as did some seeds from last year’s corn poppies, so that now parts of that bed are happy riots of scarlet blossoms.

I had also sprinkled on that bed seeds another annual poppy, California poppy, a low-growing plant with ferny leaves and buttery yellow flowers. There’s no sign of these poppies, which were evidently overrun by the corn poppies.

[broccoli, interplanting]

Looks like I’ve already failed with broccoli this spring. And this was the year that I was going to grow it really well so that, parting ways with broccoli-hating, ex-president Bush (the better Bush), I might actually enjoy eating this vegetable.
The plants are making buds already, too soon and too small, not surprising considering that the plants are only about 8 inches high. This runting out occurred in spite of my starting seeds on time, transplanting the seedlings into extra large containers, and moving the seedlings out into the garden at the end of April into ground made richer with extra nitrogen.
I know what the probable problem is: dry weather. I watered the plants religiously after transplanting, but soon tapered off. Neglect perhaps resulted from the broccoli’s being planted in a part of the garden furthest from my back door. Perhaps neglect was inevitable: Broccoli, after all, is not (yet) a vegetable I like to eat. Perhaps that’s why it ended up planted so far away.
I haven’t given up mastering the art of broccoli growing and possibly enjoying this vegetable. Broccoli, kale, cabbage and their kin all taste best in the cool weather of autumn, and the time to sow broccoli seeds for autumn harvest is very soon. I’m poised and ready for another try.
**************************************************
All is not lost in that bed with broccoli. Few vegetables get beds all to themselves, and that broccoli had to share space.
So it was broccoli up the center of the bed at 18 inch spacings flanked on either side by two rows of lettuce. The near lettuce rows were only about 6” out from the broccoli row, which was plenty of space because the lettuces were transplants and the broccolis could rise up in the offset 1 foot of space between lettuces. The next row out of lettuce transplants was only about 6 inches out from the inner row, but staggered again so these offset lettuces could fill some of the space between lettuces in the inner row.
Not to leave well enough alone, I decided to also squeeze some popcorn into that bed. In early May, I dropped 6 seeds of Pink Pearl popcorn every 2 feet into the shrinking open spaces between the lettuces on either side of the bed about a foot in from the bed’s edges. By the time Pink Pearl poked up through the ground, the sprouts were being shaded by lettuce leaves that were almost touching between adjacent plants. Tonight’s salad, as well as those for the last few and coming nights, cures the shading as I selectively harvest lettuce leaves to allow the corn sprouts to bask in light and soon rise up above everything else.
 
The plan was for lettuce to be harvested first, then the broccoli, then give over the bed to popcorn. Not bad for a 3 foot wide bed, even if the broccoli was a failure.
******************************************************

May 21, 2009


For a day every week or so, my yard smells like salad dressing. No, I’m not getting the lettuce dressed while it’s still out in the garden. Yes, that smell is vinegar. For the past few years, regular strength vinegar, straight up, has provided nontoxic (except to sprayed weeds), sustainable, “green” weed control on the edges of beds, in paths, and on my brick terrace.

I specify “regular strength” vinegar because our USDA has also been looking into vinegar as weedkiller. On the theory that if a little of something is good, a lot must be better, USDA research focuses on using more concentrated solutions of vinegar – even 20%. Those more concentrated solutions are more effective but you have to be very careful using that stuff. It burns. I’ll stick with salad dressing strength 6% solution.

A couple of benign additions increase the power of my “regular strength” vinegar. First comes vegetable oil – no, not salad dressing again, but to helps the vinegar stick to weeds’ leaves. I use 2 tablespoons of canola oil per gallon of vinegar. Then comes soap, specifically Ivory liquid detergent, 1 tablespoon per gallon, to better spread the vinegar and oil over the leaves.

This mix only kills greenery so needs to be applied regularly to starve roots. Hence my repeated applications.

*****************************************

It’s amazing how many seedlings you can grow in a small space using a Speedling or some other multi-cell plastic (or “plug”) tray. These trays are re-usable, with tapered cells each about an inch square. For example, a 1 foot by 8 inches area was home to my 54 zinnia seedlings. The tapered design allows for good root development and, if the trays are elevated on a screen, the roots stay in bounds by being air-pruned as they try to exit the bottom hole.

I had 54 zinnias, 54 Signet marigolds (ferny, lemon-scented foliage and small, yellow flowers), and a slew of other flowers that I had sowed a month and a half ago in the enthusiasm of spring. A few days ago, the time came to figure out just where to plant all those seedlings. Flowers generally look best when planted out in large masses rather in isolation or anemic strips, so with this many plants, it’s hard to go wrong.

Planting is quick with plug trays. The seedlings were at just the right stage for transplanting, so all I had to do was yank on each stem to pop out a whole plant, root and all. A quick poke of my trowel into the ground was all that was needed to make a home for each seedling. Firming the soil around each plant after dropping it into its waiting home completed the planting . . . except for watering. That watering was thankfully supplied by the inch-and-a-half of rain that followed my planting.

Small plants establish more quickly than large plants, and with less care, so I’m finished with these plants except to enjoy their flowers.

*********************************************

I must have a built-in temperature sensor in my head. Last night (May 18th) my eyes sprung wide open at 1:38 a.m., I walked over to my remote thermometer, and saw that the temperature had just reached that magic number of 32 degrees Fahrenheit. The sky was clear and the morning was, to say the least, early, so I guessed that the mercury would dip even lower.

Preparations had already been made for a light frost, but who knew just how cold temperatures might plummet? After all, last year at about this time, a sunny morning greeted me with leaves blackened by a severe freeze. So I got dressed and threw any coverings I could find over any plants that could be protected and needed to be. Key lime, pomegranates, lemon trees, and other potted, tender plants went into the garage. Nothing could be done about the blossoming hardy kiwifruit vines, the soon to blossom grapes, and the fruitlets already developing on apples, pears, and pawpaws.

I went back to sleep.

Morning saw the thermometer reading 28 degrees, hoary frost on the lawn, and a sunny day in the offing. Damage assessment would have to wait until the sun melted frost off everything. And the damage, assessed this morning at 9:30, was  . . . . zip, nil, nein, nada, rien, nothing. It’s amazing the way even tender plants, like those marigolds and zinnias I had planted (and had not protected because there were too many of them), toughen up after a few days outside. It looks like a good year for fruit – unless we get another, more serious, freeze.

**********************************************